Hi,
Ive read through a few of other people’s issues with editing photos for engraving and i have tried my best but cant seem to get it to work. Any help would be greatly appreciated!
2 Likes
What material are you engraving on and what are you unhappy with?
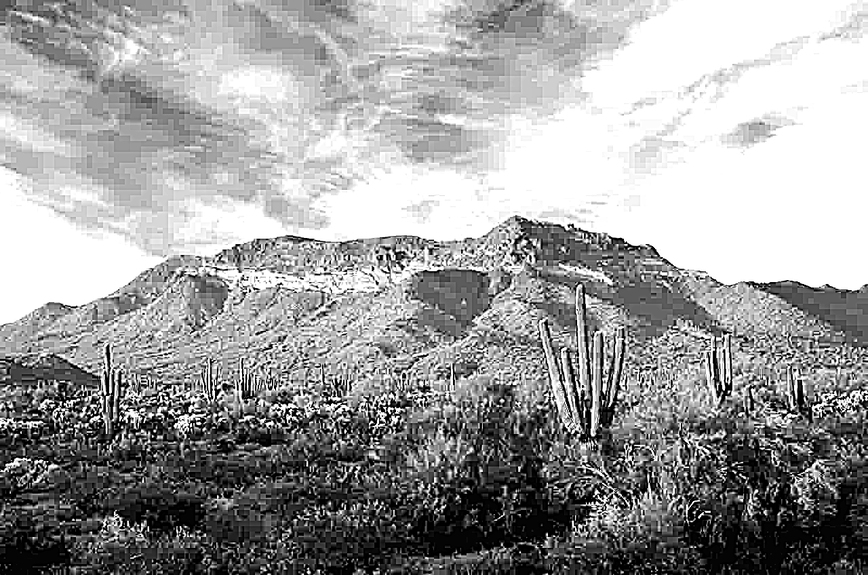
Im engraving on birch and either it engraves just a complete graphic box, or like pixelated unrecognizable blocks.
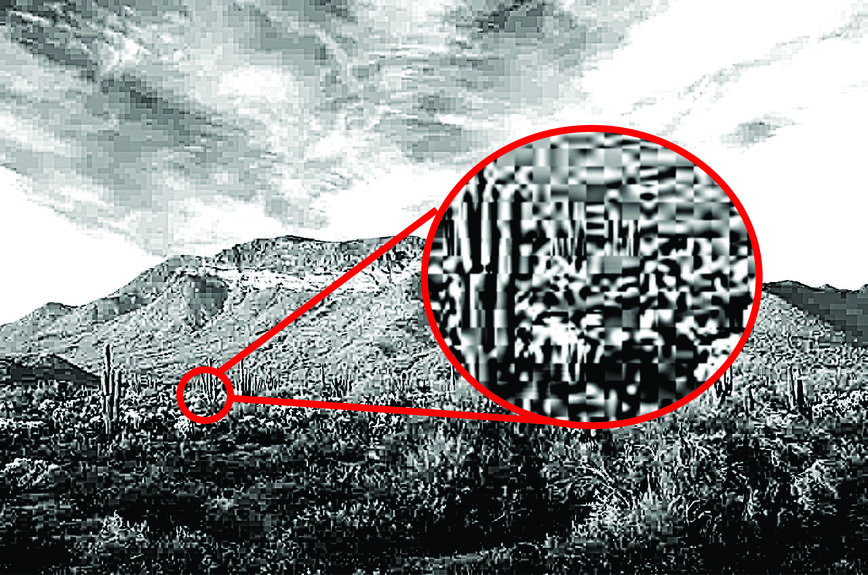
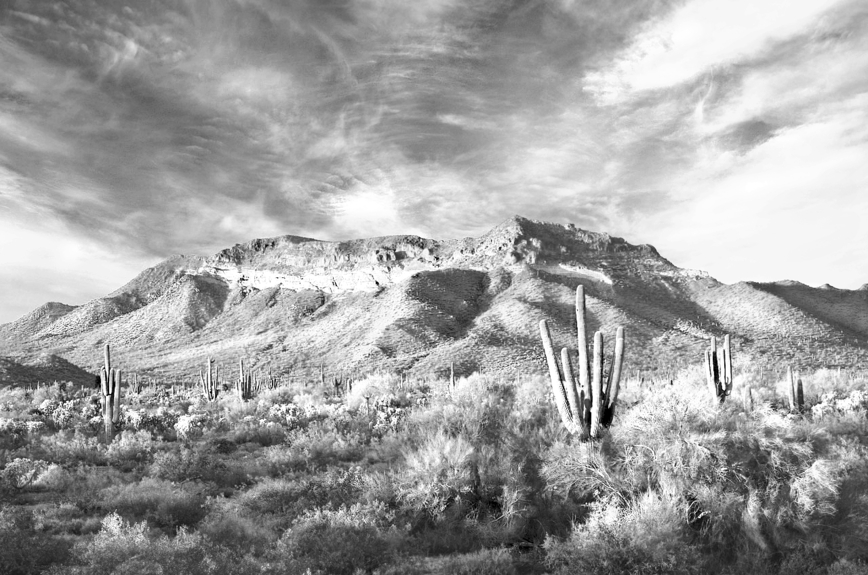
I think you’re original image is the issue. When you zoom in on it, it looks pretty pixelated as does the B&W version you’re engraving.
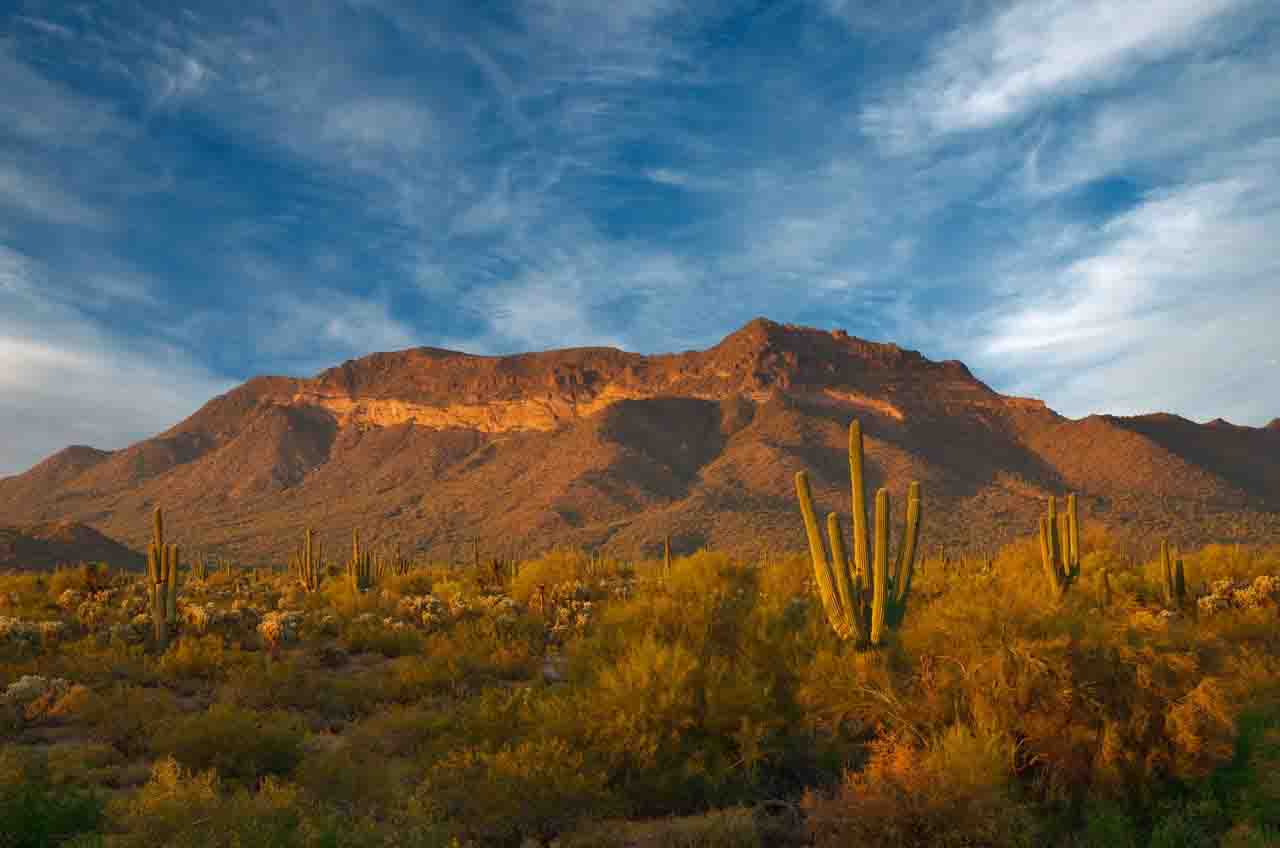
I did a reverse image search on Google and found a cleaner version here.
So that might be a better starting point.
1 Like
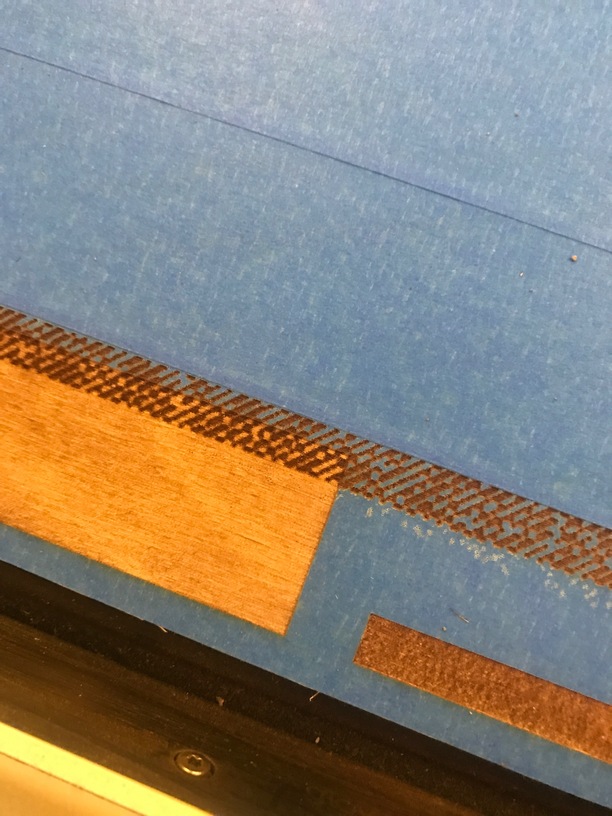
Also, you’ll get better results on engraving if you do it without masking. The masking will take all your fine details instead of the wood.
1 Like
Especially when your layers of masking overlap in your picture…that little bit of overlap will show up in the engraving.
1 Like
Here’s a link to our photo engraving tutorial. We can’t help with your specific design file, but I’ll move your thread to the Everything Else forum and the discussion can continue there.
Really nice pic and it’ll look great when you get it dialed in. I agree with the others though and this is what the GF sees in your image. It’s one of those situations of garbage (low resolution) in, garbage out.
@HerbsTea version will work much better I think. The original has a lot of very similar midtones and it’ll be a bit tougher to get a lot of detail out of it. I did a quick processing of the image just to show how the direction I’d go with it. (And @geek2nurse and @dmdiener are right about the tape, those little overlaps will be pretty obvious in the engraving. :-/ ) Good luck with it. Make sure and share your final product!
In looking at this here you might even go just a smidgen lighter overall. This might be one of those that takes a few test runs to dial in those midtones.
2 Likes
I find it best to crop those sections, like a 1x1” area, and do some test engraves as I edit.
Probably be a good use case for dodge and burn brush to perfect rather than global edits (start with global to get close overall l, and then dial in individual areas).
2 Likes
Yep, exactly what I do with pics like this. A little dodge and burn and selective contrast adjustments is exactly what I did. Great minds think alike 
1 Like
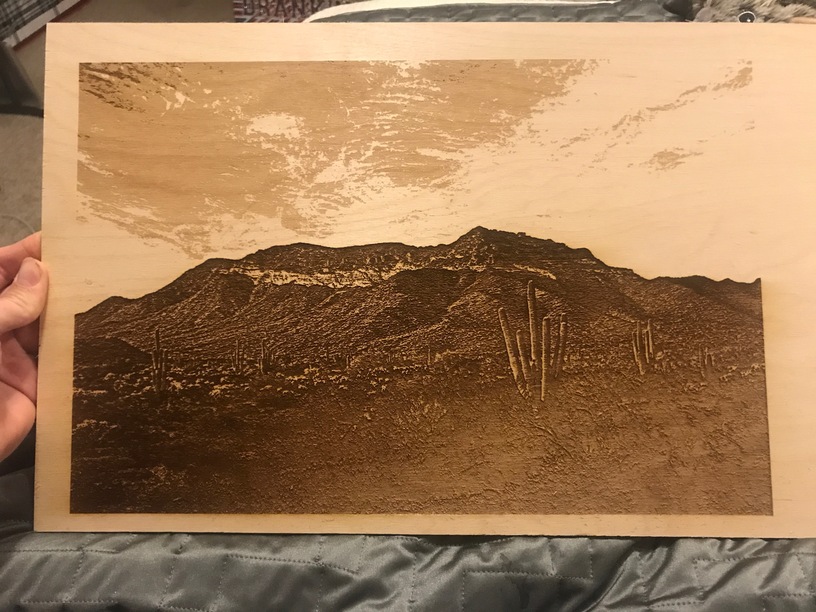
Thanks for all the help guys, I did another run through with a 2nd crack at the photo and i’m not mad at it. but will definitely give @kittski 's version a try. ![]()
1 Like
That’s pretty good! The detail of the mountains is really nice actually and will probably be better than the ones in mine. (I think I dodged a bit too much in that white strip maybe?) The only place you lost it a little is the close foreground and some of the clouds, but you’re pretty darn close.
@kittski and @jbmanning5 …now that’s I’ve read through this thread and keep seeing mention of dodging and burning…would you please tell me what those brushes do? I’ve seen them and maybe even tried them, but I’m not sure I can tell what they do.
Dodge = increases exposure
Burn = lowers exposure
The brush allows you to be selective, like a paint brush.
Not sure about other programs, but for Photoshop you can select the range you want to modify as well (shadows, midtones, highlights).
For example, you could select dodge brush and then shadows, and that would increase the exposure of the shadows in the areas you brushed over.
Or, you could pick burn brush and highlights, and it would lower the exposure of the highlights in the area that you brushed over.
Basically, it allows you to selectively edit portions of the image rather than making global adjustments. Global adjustments would affect the whole image, whereas the brush just paints in areas of edits.
4 Likes
Here’s a really quick example of a not very good picture of Rio that I had sitting on my desktop:
Base image:
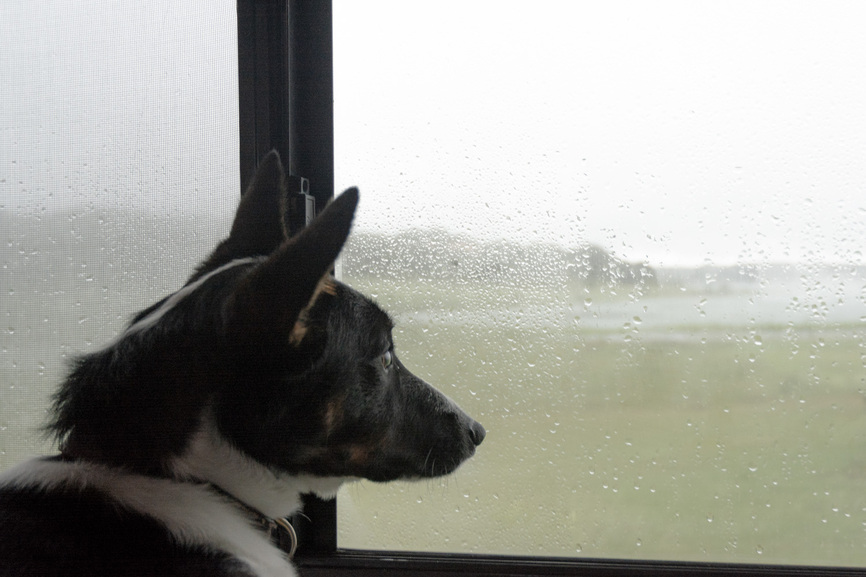
Image with burn brush (range: highlights) - a quick brush around the background behind Rio.
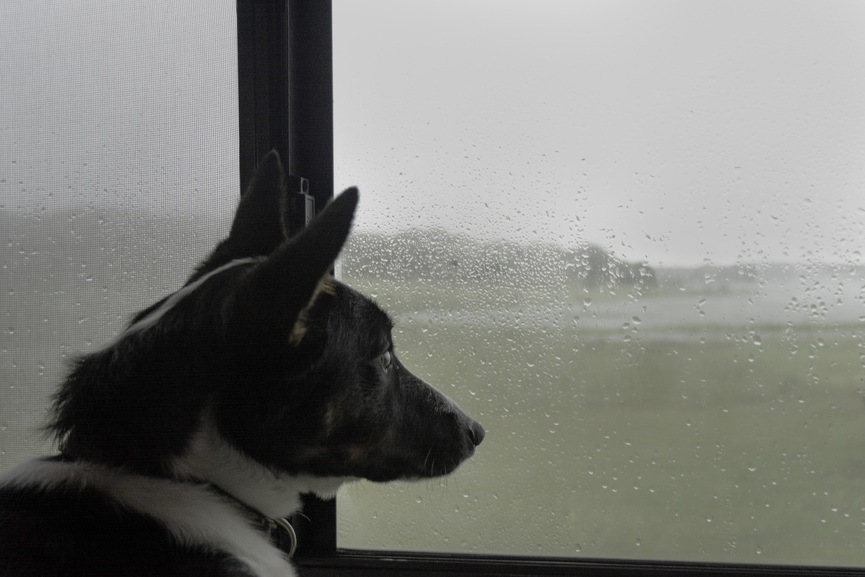
Same image as above (with the burn brush applied), selected Dodge brush and worked through a couple of different tonal ranges at different strengths on Rio/his fur.
2 Likes
Here’s a great look at it in use.
4 Likes
Excellent! Thank you so much.
Oh yes…now I can see what it did. Sometimes it’s so subtle it’s difficult to tell. Thank you again.
Thank you so much. I appreciate your input.