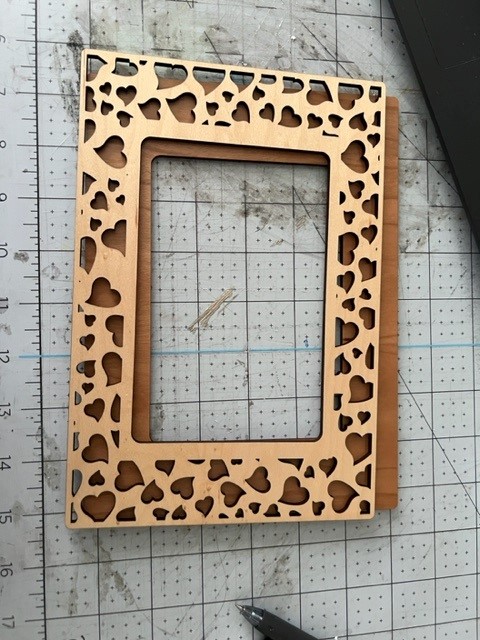
I have a file that was sized correctly in Silhouette. It was uploaded to GF all the sizes are correct I measured each piece. Yet the two main pieces are different sizes. I went and measure the pieces AGAIN and the sizes are both correct…
My machine is clean - it was deep cleaned recently and was cutting fine something else… The other pieces of the file are cut correct…
If it’s a simple file and you want to share, at least the parts in question, someone could take a look.
Also note, there is no such thing as a “deep clean” and more problems have been reported here starting with “I deep cleaned my machine then…” than probably many others. Follow the instructions, wipe down the optics and rails with a zeiss wipe, and you’re done.
What do you mean more problems began with a deeep clean? I cleaned all the mirrors / cameras and the exhaust fan. I took it all off and cleaned it all… anyway it was cleaned and here is the file …
File is fine so the best I can come up with is a loose belt that is skipping.
As to cleaning, some people go nuts cleaning the machine, dislodging cables, damaging connectors, or getting moisture unto those connections or onto sensitive electronics. They refer to that as a “deep clean”.
Does not sound like you did any more than a standard cleaning.
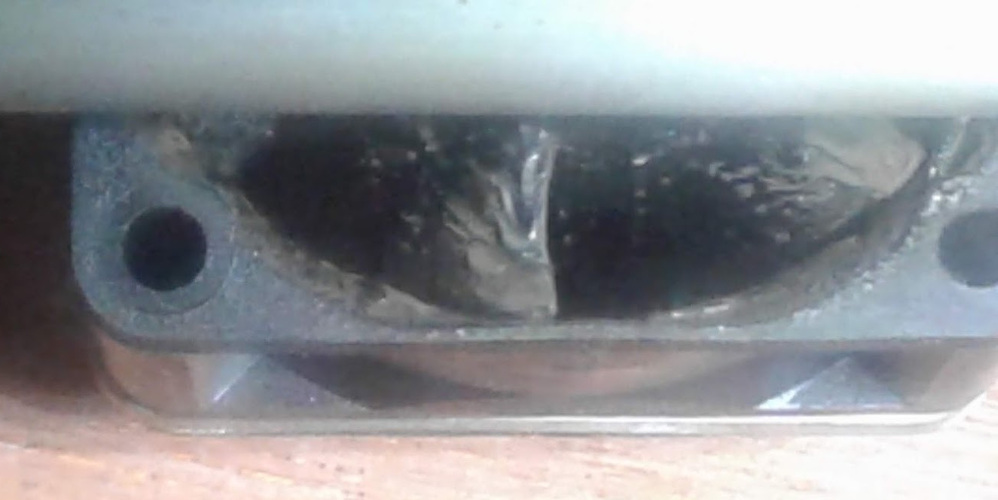
Actually I did loosen the belt to get to the assist fan to clean that. It is possible I did not tighten all the way so I will try to do it again when I get home…
BTW I am only doing as previously instructed with deep cleaning… this recommendation is in all the groups and actually on this support board…
That is often the issue as much as the cleaning. On my first machine, I was using magnets a lot and did not realize they were messing with that fan and so had excessive smoke and gunk everywhere, including that assist fan…
I managed to clean it several times, thinking it was jamming rather than the magnets were causing it, without ever removing the carriage from the gantry. Since I quit using the magnets, I have never had enough of a problem with the fan to ever have to clean it again (over several years).
Ok so lets clear one thing up… I did not say it was on the GF Support Site I said in this support board people have mentioned it here and I been on this board over three years… So never proclaimed it to be official. Now that is is not official I will be sure to clear it up when ever I see the term used. Thats the one thing with support forum’s / groups is that people do make up terms they get floated around and people use them. So can no move beyond that without more back and forth…
Also do you have a solution since the focus went on my words of cleaning versus a solution to the cutting situation…
Now I do remember seeing don’t use magnets so I have never… The assist fan was not that dirty but I did clean it and I guess I did not put it on properly. Is that the issue with this mis-cutting? Its a bit confusing b/c why didnt the other pieces not cut correctly?
Since your file looks good, why not try uploading it again and cutting it out of cardstock to see if the problem repeats. If the problem repeats then dive into the belt tension for a fix.
I retightened the screws and re-uploaded the file and it seems to cut good on the cardboard. That was a good suggestion for that thanks! It cut ok I will try with a raw piece of wood. Thanks…
Slips are not all the time, if it slips in the middle of a cut/ engrave it can be just a few or even a single pass. After that, every subsequent cut or engrave will be wrong by that amount till it slips again.
I see thanks for that… I do have another question sometimes it mis-cuts if I put a board or acrylic there that may already have an area cut out. If I go then cut again with the hole cover its ok… is that normal?
If you just go right for the cut you can see it go to the middle of your job and measure the height of the material. If there is nothing there it focuses to zero and messes up. If you use Set Focus and pick a point that is on the material It will do a lot better.
This will also do best if your machine is properly calibrated. When you do a Set Focus you will see the material look like it jumps as it is then properly aligned to the camera. At that time, and only then will moving the design to where you want it actually cut at that place.
If I have picked a place I know that the place will not be where I picked but off by how much the camera is off, so I frequently pick Set Focus two or even more times if I need to be super accurate.
I used heavy watercolor paper held with spray adhesive to a skeleton of PG and it did not matter or go all the way through the paper. It just has to cover the area and be at least close to white.
I see I will try that… I was concerned b/c the piece that I have does not cover the whole bed… I was also wondering if it had to do with the height of the materials too.