I’ve noticed that my photos are engraving much darker since the update. Has something happened to cause the engraving to change? My pictures were engraving perfectly. Now everyone looks SERIOUSLY tan. 
Which update are you speaking of? Is it possible the material is a different batch?
There have been no updates that affect machine settings/power.
Something has changed because my photo engraves were perfect and absolutely gorgeous - now they are a hot mess no matter what settings I use. I have the pro, and was using 1000/90/270. I’ve tried 1000/50/270 and 1000/30/270 and I’ve completely lost the detail that I once had. I’ve gone back and done pictures that I know engraved perfectly before and they look like junk too. I’ve changed wood and tried everything. Somethings definitely changed and I’m desperate to get it to go back
2 Likes
Same here something is up for sure
2 Likes
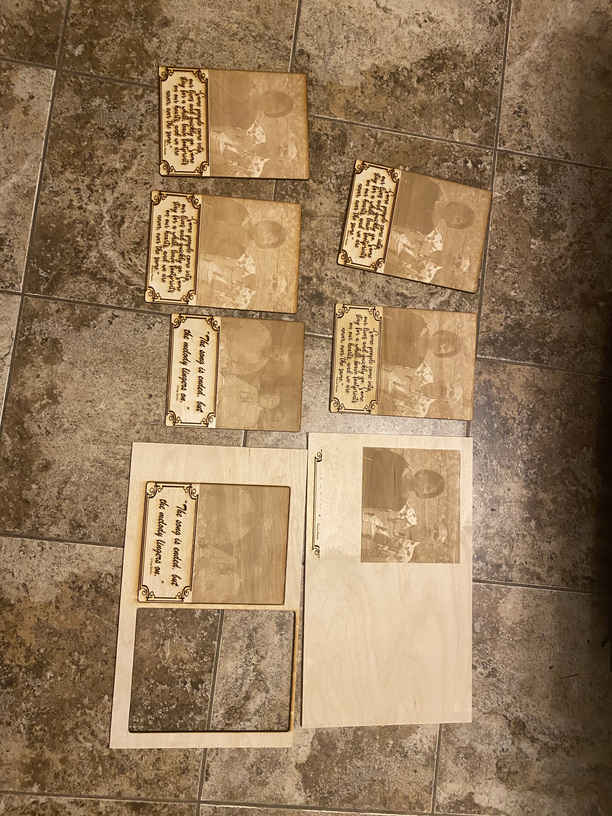
Do you by any chance have a “before” engrave to show for comparison purposes? (Same wood if possible would be helpful.)
The picture will help for checking for something that might be amiss with the machine, but it’s also possible that the pattern density slider was not the same for the same photo on different jobs.
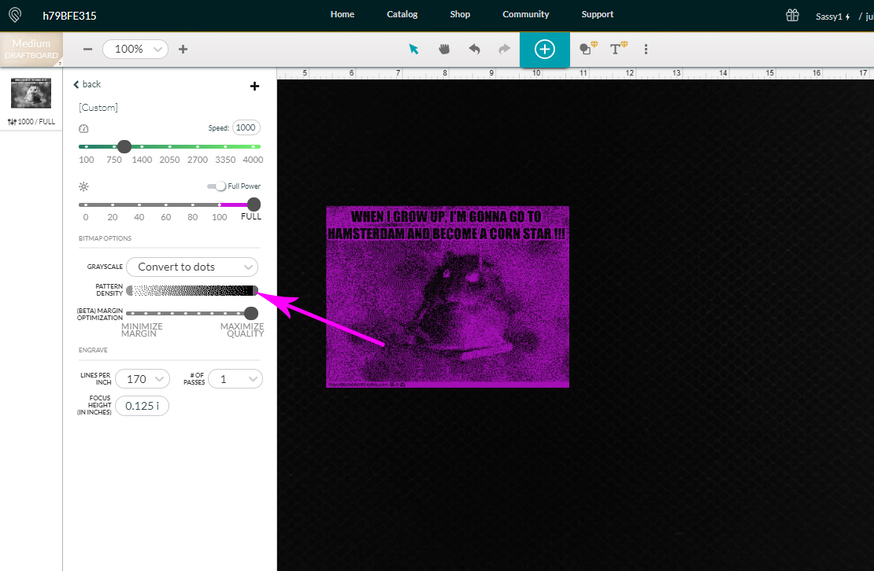
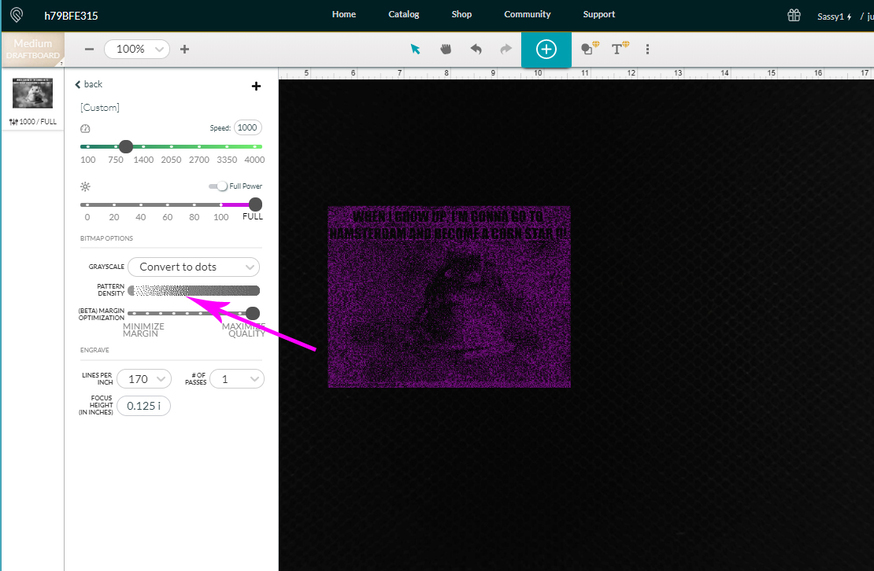
The pattern density slider is located here in the settings. If you have a dark picture, and want to lighten it up, you slide the right side of that graphic towards the center. (We have manual control over how things turn out if the default doesn’t work the way we want.)
2 Likes
I’m sorry to hear that your prints aren’t turning out as expected. Did the advice which @jules provided in her last post help? Something we could do to check if your unit is printing as expected would be to extract logs from a test print run on Proofgrade material using default settings.
Here are the steps for the test:
- Turn off your Glowforge.
- Check for small pieces of debris or dust.
- Check the lower door to make sure it closes all the way. It may require some force to open, but open it, wipe any dust off the edges, and close it all the way.
- Remove the tray and clean any dust or debris from the surface underneath. Pay careful attention to remove all debris from the four dimples where the tray rests.
- Check the lid to make sure it closes all the way. Small particles of material, such as dust or debris, can prevent it from closing completely.
- Check the surface your Glowforge is on to make sure it’s flat. Ensure it is not twisted slightly and that there is no debris propping up one side of the machine.
- Turn your Glowforge back on.
- We included an extra piece of Proofgrade Draftboard with your materials shipment for troubleshooting. Place the Proofgrade Draftboard in the center of the bed and print the Gift of Good Measure using the default settings.
- When the print finishes, leave the lid closed and wait until the fans stop and the picture updates.
- Take photos of the front and back of the completed print
After the print runs, please share the photos with us along with the time and date you ran the test. We’ll then take a look at the logs and follow up with next steps.
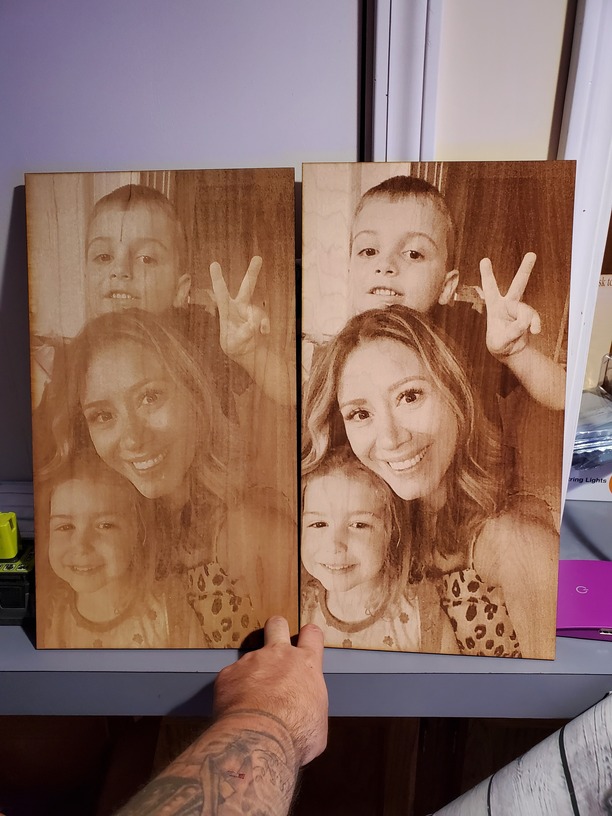
I am having the same exact problem. I did a comparison also with the same file lasered. Now it is very dark and blurry. I have seen about a dozen others saying they are having the same problem and it seems to be more on the pro.
1 Like
You’ll probably get a recommendation to start your own thread to get support specifically for you. Every OP is it’s own support ticket.
On first look, part of the issue there is the left one is obviously on a much lighter piece of wood. Are they the same type of wood? But yes, it’s obvious the right one did not get the same level of darkness. This isn’t so much “blurry” as it is not enough contrast. 1 part darker wood, 1 part didn’t get as dark a burn.
It’s been a little while since I’ve seen any replies on this thread so I’m going to close it. If you still need help with this please either start a new thread or email support@glowforge.com.