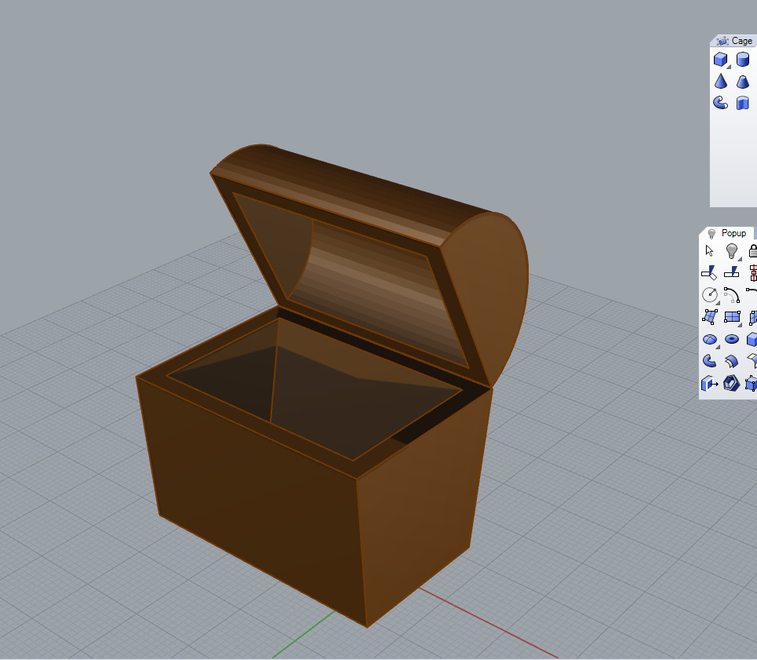
Wasn’t sure how this one was going to turn out, because it was built it from scratch, without using box tab generators, but it was okay in the end. (Not a straight up and down shaped box. Might not have worked.)
(BTW: results copied from Inkscape into Illustrator cause a Validation error when you try to open an SVG file saved from Illustrator later. Solution: You guessed it, rework the imported results in AI before saving the SVG.)
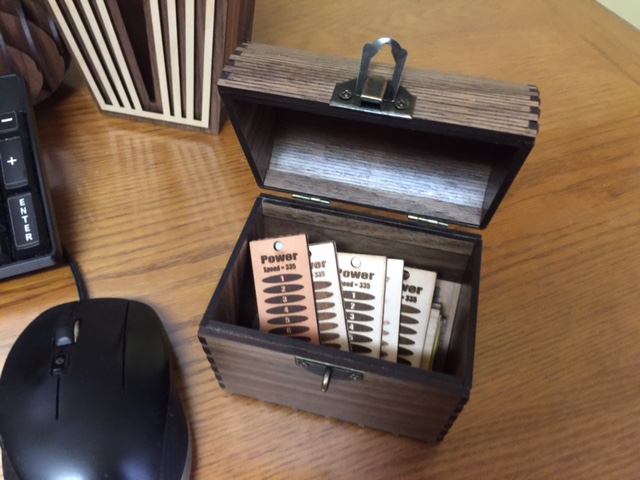
Note: This file was temporarily available to those who waited…as a party favor.
For several years (long before I thought I’d own a laser cutter) I have been wanting to find/make a treasure chest sized to serve as a business card holder for my desk. I’ll have to take a look at this design when my Glowforge arrives to see if I can adapt it for that need. Thanks for sharing!
I had to rebuild a partial hinge that I pulled out of the Inkscape Oval Box Generator program. I only had to rebuild it because it was preventing the AI SVG file from saving correctly in Illustrator. (Trying to open the saved SVG from outside of AI was giving a Verification error. So I just recreated those lines in AI, and the new one saved correctly.)
(In line with checking the obvious things, did you make double sure to use the vanilla svg format rather than “inkscape svg”, which never works right with anything else?)
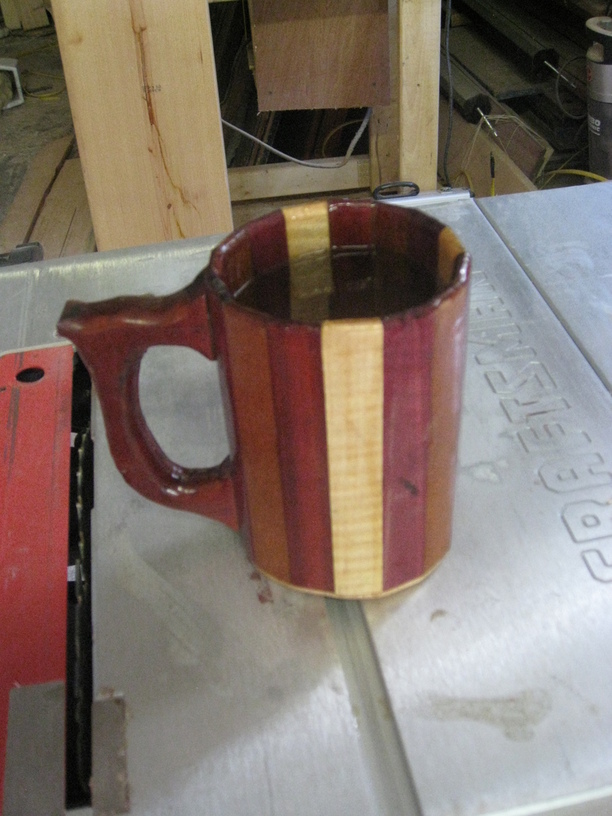
One of the things that I make on a very regular basis are wooden mugs. I make them “slat style” and I think that technique would work very well on this project as well (specifically the Lid).
Each “slat” is the same width and height (adjust to fit the application) and you need to cut each of them to be a trapezoid shape (when looking at the “end grain” of the piece). The angle of the cut depends on the number of slats that you are using. 180/(# of slats * 2 edges) <-- 180 because you are only making a half circle for the lid, # of slats times two to accommodate each edge of each piece.
Hope that is useful! If doing this completely on the GF, then it means that it would need the chamfer ability to cut the angle on each “slat”
That is very interesting, because I was considering using slats for the lid (it would look better with a less rounded top), but i knew it wouldn’t work as well without a chamfer on it, and i wasn’t sure the GF would be able to cut one.
It would be an awesomely cool ability to have, if they could pull it off! (It would certainly be on my wish list for down the road.)
I’ve thought about a cooperage design for a mug. I just figured it would be easier to set up a jig with plane to plane off the chamfer of the slats. But a Glowforge cut champfer would be sweet.
It’s made from 4 different types of wood, Curly Maple, Purpleheart, Bloodwood and Mahogany. Nothing is stained. I’ve used it for about 3 years now and I’m currently completing work on a new mug that has 15 different woods, one for each slat. I hope to have pictures of it completed sometime next week.
If you’re willing to build a jig to hold your pieces at an angle, chamfering should be no problem. With 2" of vertical space available, you can tip even a pretty big piece.
Regular flat cutting also produces a chamfer (in some materials) but it might not be enough for practical purposes. (And then there’s the variable-depth engraving, which could simulate a chamfer but would probably need a bunch of testing. If you got really good control of depth you could do the kerf-bending thing, which would make chest tops particularly sweet.)
I’ve worked out all the kinks in the system and I can make the wooden part of the mug in 3 evenings, and then the epoxy I use takes another 3 days to cure. So I can make a mug start to finish in a weeks worth of evenings. Typically I’ll make 2 or 3 mugs at the same time.
The one you see in the picture holds about 32 oz of liquid, about a nalgene’s worth.
For fun I made a mug that holds approximately 2 gallons of liquid, I call it my party mug
That’s a very nice mug. What do you use to waterproof it, how do you apply it and how long does it normally last? Also, what method do you use to mount the handle to the mug? I’ve been trying to find these answers out for a while yet can’t seem to find an answer. Does it handle coffee or other hot drinks? Thanks in advance for any help you could provide.
@wcwoodturning, I use Epoxy (http://www.homedepot.com/p/Rust-Oleum-Parks-1-qt-Gloss-Super-Glaze-Finish-and-Preservative-241352/202056337) inside the mugs and Lacquer for the outside. My first Mug was made 3-4 years ago and I’m still using that mug with no issues. Out of the 15 or more mugs that I’ve made since then, only one has come back with a minor leak, a small application of more epoxy fixed it. This Epoxy has held up to multiple uses of Hot beverages (Hot Chocolate, hot Mulled Cider, Hot Mulled Wine, and more) as well as iced beverages.
For Mounting the handle, I make sure both surfaces that will meet with the mug are flat and level with each other (much easier if you flatten the side of the wood before you cut the handle out of it). I then take a blade and intentionally mar the surfaces. I mark the areas on the mug where the handle will meet with it and mar those surfaces as well. I use Titebond III and apply it to the open ends on the mug handle and then apply a little bit of salt (prevents it from slipping). I then press it to the mug and I use two clamps to hold it in place.
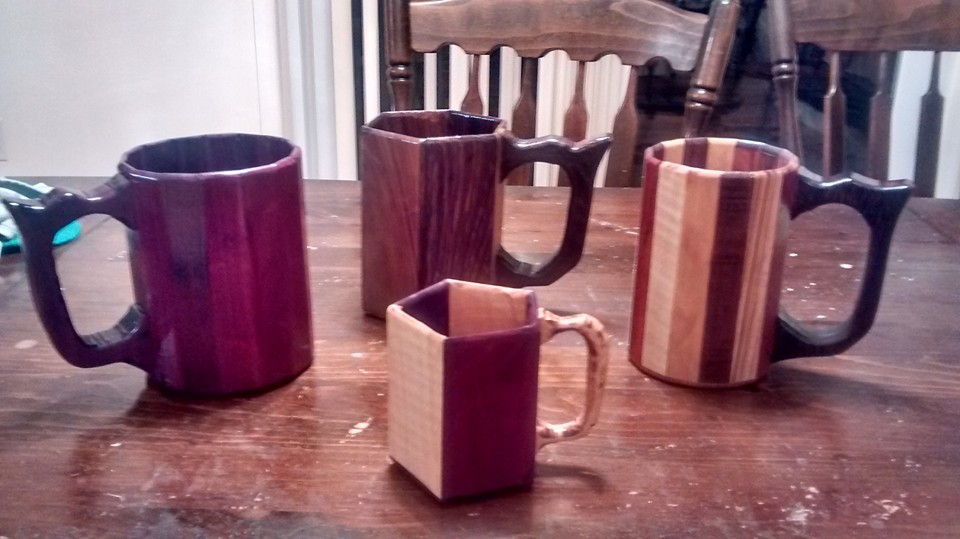
As promised, Here is a photo of the latest mugs that I completed this past weekend.
Left Mug is a 15 Sided Purpleheart Mug holds about 40 oz of liquid.
Back Mug is a 6 Sided Wenge and Walnut Mug holds about 40 oz of liquid.
Front Mug is a 5 Sided Purpleheart and Curly Maple holds about 12 oz of liquid.
Right Mug is a narrow 15 Sided Mug holds about 32 oz of liquid. It has 15 different types of wood. Dark Bicote, Leopardwood, Zebrawood, Brazilian Rosewood, Cherry, Curly Maple, Bloodwood, Walnut, Purpleheart, Hickory, Wenge, Yellowheart, Bicote, Soft Maple, and Mahogany.