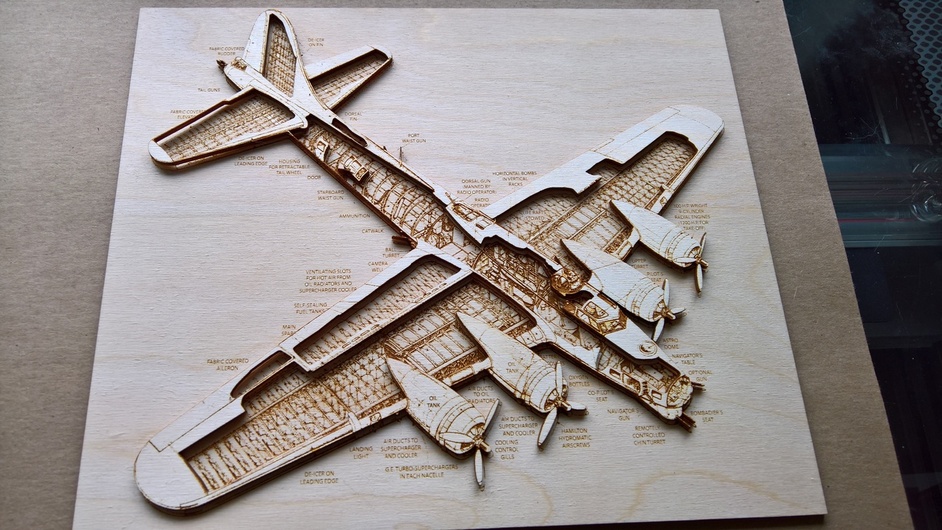
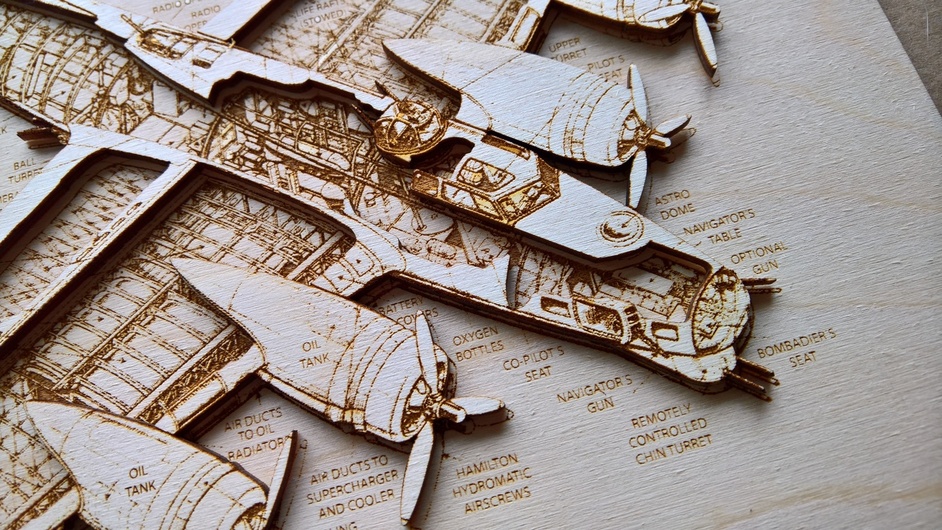
I’ve been playing around with some raster engraving. I still haven’t gotten a good test for the 3d engraving, but did work up a fun project for some detailed 2d engraving. It took some time, but the results were pretty good. I had seen some inspiring side views of ships and planes that had been cut out of wood and knew I wanted to try to make something similar. The other day I had a great conversation with a friend about various bombers from WW2 and decided to dig around for a nice image to start with. I found one online that I liked of a B-17 so I took some time to clean it up and enhance it with vectors for cutting a two layer image I could assemble afterwards. Rastering large areas like this takes a while but I was pretty happy with it.
there are a lot of small pieces of protective paper at the end, but the strong tape removal process worked well again for that. Here are some shots of the assembled one. I’m still debating if I want to try staining/painting/coloring the wood. If I do some more tests with this maybe I’ll try other variants
Such a cool idea, love it! I’ve been looking at A-10 schematics with a thought to make a nice edge lit acrylic sign, but the two-layer idea is even better, thanks for sharing.
Wow, I LOVE this! The cutaway plan underneath is brilliant, super genius! B-17s are really, really impressive (especially in real life), but my one true favorite is the P-61 Black Widow. I might need to steal this idea and inflict yet another P-61 gift upon my dad, who inspired my love of WW2 planes but I think still doesn’t understand why I don’t like a better looking one
I love how you’ve created depth and detail. It reminds me of books I loved as a kid that showed pictures of how a city’s infrastructure went down layer after layer into the earth.
I have been collecting schematics for many of the WWII aircraft and plan to laser them when the GF arrives. The first one I plan on doing will be the B-24 Liberator. I grew up just outside the Willow Run Plant in Ypsilanti, Michigan where a B-24 would roll off the production line every 58 minutes, test fire its guns by shooting into a large concrete bunker along the taxiway, then head off to the European front.
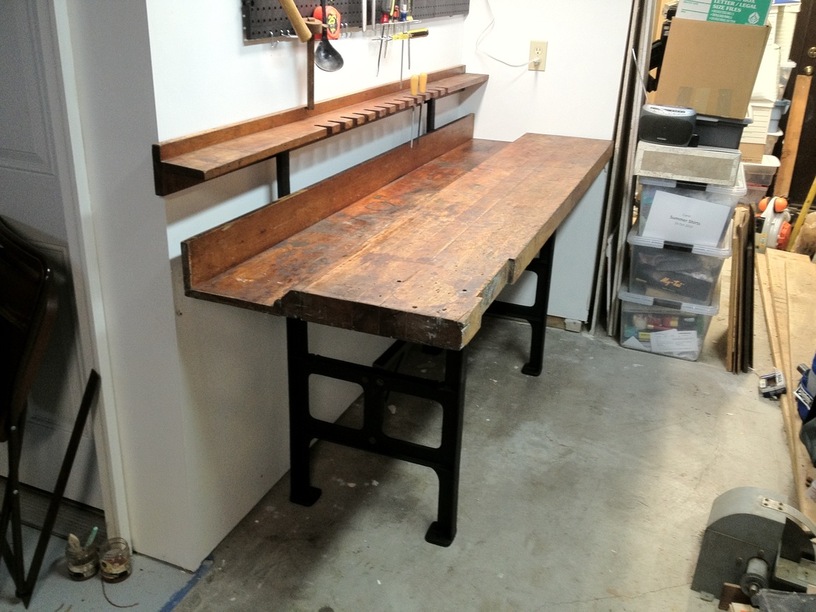
The schematic will have a place on the wall just above my pattern makers workbench, one of my most prized possessions, that came from the Bomber Plant. These workbenches were used to make molds for shaping the metal parts in the aircraft.