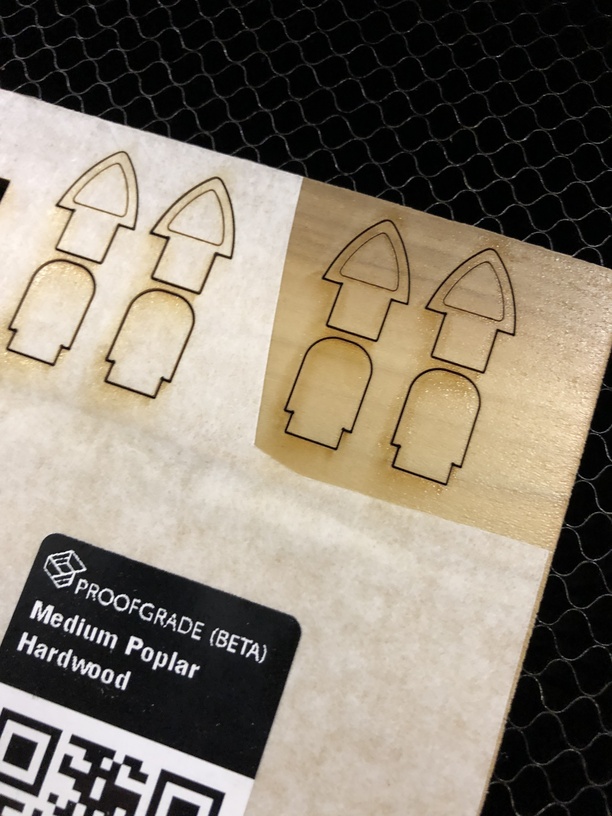
You might need to recalibrate the settings for proofgrade poplar. I ran a job last night and the score setting did not make it through the masking. I expected something closer to 25% to 50% of a cut.
1 Like
Which score settings did you use? Draft? HQ? Even at a 4 power, I would think it would go through at the low 125 speed (HQ settings).
On proofgrade material I normally don’t adjust. It was a a prototype just to dial in the settings. But It was HQ. I assume every proofgrade material is tested on all settings, it would be nice if they would provide photographic examples of each.
1 Like
Hi there! sorry to hear about the trouble engraving on Proofgrade poplar. I’m afraid we need a bit more information to narrow it down. Do you know approximately what time last night (including time zone) this happened so we can investigate for you?
June 23, 2019 10:47pm EST
I ran a print using one of our test machines on the default setting using the same material and was able to get an expected result. I was then able to compare logs from both the test machine and your unit and confirm that the settings matched. As a next step, I would recommend checking your optical surfaces. Here are some steps to follow:
Lens or Windows are Dirty or Damaged
Your Glowforge unit’s laser is powerful, yet it can be stopped by a tiny amount of dirt or damage to the lens or windows. If something gets between the laser light and your materials, they won’t cut through. Here’s how to check for damage and clean your lens and windows at the same time.
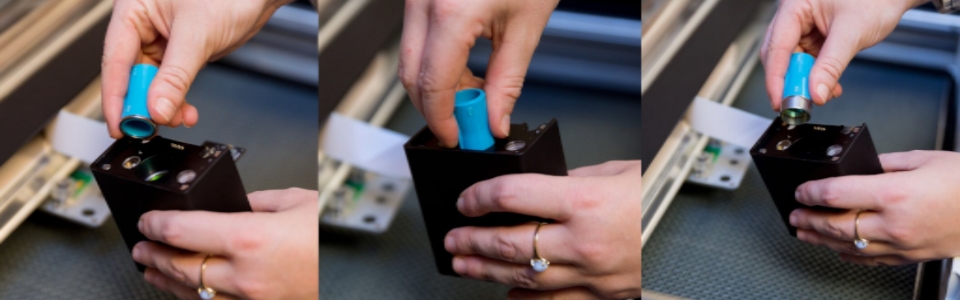
1. Remove Printer Head
Turn off your Glowforge. Grasp the printer head as shown, and pull gently up and back to disengage the magnets and remove it.
2. Remove lens and check for scratches or dirt.
- Gently insert the lens tool into bottom of the head with the “Remove” arrow pointing in. When you hear the magnet click, withdraw the tool and the lens.
-
Look at the lens on the tool. It should be resting on top of the tool like a bowl, with the top open and with the orange-colored optics on the bottom. If it’s upside down, it won’t work properly.
-
Gently slide the lens off the lens tool. Be careful to touch only the metal ring to avoid fingerprints on the lens.
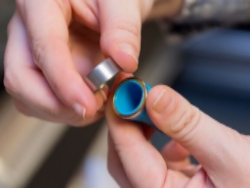
- Check the lens for fingerprints, dirt or scratches. If you see a scratch, you can order a new one at shop.glowforge.com.
- Wipe both sides with a Zeiss lens wipe.
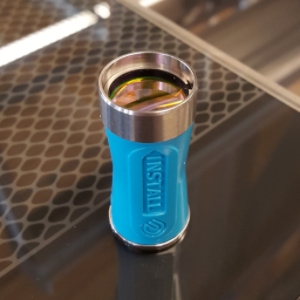
3. Put the Lens Back In
If the lens appears clean, you can put it back.
- Flip the lens tool until the “Install” arrow points up.
- Set the lens down on the lens tool. The open side goes away from the blue plastic, so it looks like a bowl on top of the tool.
- Slide the lens tool up into the printer head until the magnet clicks, then remove the tool.
4. Replace Printer Head
Review instructions for snapping in your printer head, then put the head back on.
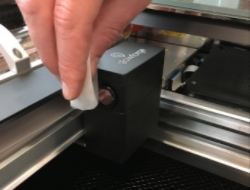
5. Inspect the Head Window and the Laser Window
- Check the windows for damage. You can find one window on the left side of the printer head, and another just over the left rail. Shining a bright flashlight at an angle onto the window may help you to see more clearly.
- If you see damage, write support.
- Otherwise, wipe the window clean with a Zeiss wipe.

Once you’ve inspected and cleaned, please try another print . If it doesn’t print well, please let us know and we’ll advise on next steps.
Thank you!
1 Like
It is probably do for a good maintenance cleaning. I just thought since it made the cuts just fine, that it was something with the score settings.
As reference here is a score from before cleaning.
HD Score
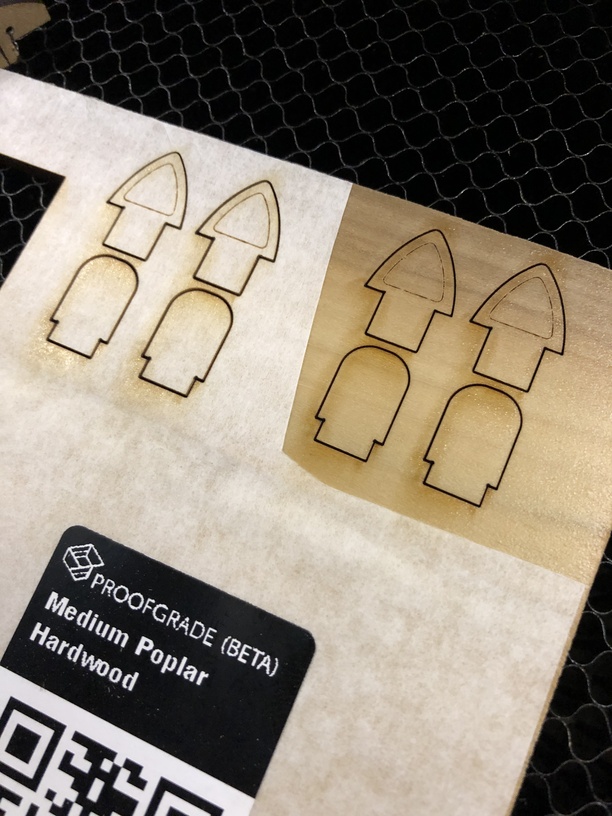
Draft Score
I will have to get back to you with another test after cleaning.
I think maybe with the HD score power settings being so low, it’s probably more susceptible to having any foreign matter on the optics eat up the power, as compared to higher power settings.
1 Like
Hi @bwente! It’s been a little while since we’ve heard back from you. Did the prints turn out well after cleaning? Please let us know if you’re running into any troubles.
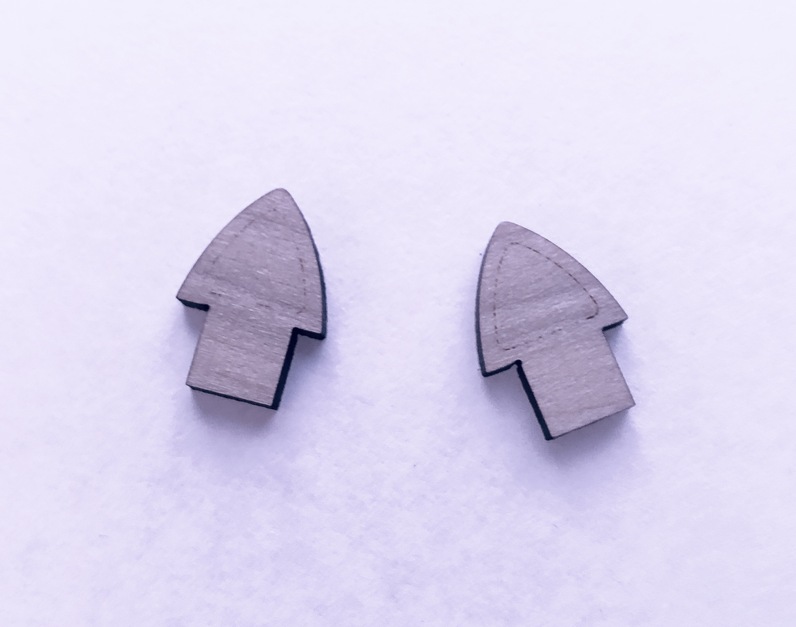
I finally had chance to laser without rain. Still the same result. Maybe I am just assuming the score to be deeper than glowforge does. The score is nice an dark on other materials. I just thought you might tweak the default or double check.
Thank you for the update as well as for the photos of your most recent test. I looked into this more deeply and I wasn’t able to replicate the results on our end, so I’ve reached out to my colleagues to explore this further. Are you up and printing with the default draft settings for medium poplar hardwood for now?
Draft settings is much better. Certainly could be deeper, but it made it through the masking.
I can’t see how the HD setting would be of any practical use for anyone.
Thank you very much for the detailed information you provided. I just wanted to follow-up and let you know that our team is investigating this topic based on your report. I’m going to close this topic for now, but if you run into any similar scenarios using Proofgrade settings, please reach out either here on the forum or via support@glowforge.com.