I have a Pro, “Glowgon,” and he is fantastic! Not a single issue that an occasional refresh doesn’t solve. I bought an unopened Basic though from another user about two weeks ago (Feb. 3rd) for my girlfriends house, “Laserion.” I ran the setup as soon as I got it home and all seemed fine, but due to exhaust constraints did not run a job until now. I’m in the basement and the temperature inside the machine is 66. I set the thermometer on top of the gantry and it reads 67.
I have what I believe to be a simple svg logo. I planned to do several different engrave settings for depth, and then cut it out. It loads into the GUI quick, and then when I press print it says it’s scanning, and the head starts to travel around, the time starts to show up in the upper right as 00:00, and then it blinks right back to the bed view. No messages.
I was just about to switch this to Problems and Support and thought, hmm they always seem to want to know if the Founders Ruler prints. I loaded it, and after pressing PRINT in the UI, the ready to Print screen comes right up. Grr, that means it the operator, not the hardware.
Edited **oh good gosh, I didn’t read your post carefully enough. I thought it was trouble with the file. Sorry about that :-/ Have you tried turning off the GF and rebooting? I’ve had the blank screen happen a few times and I think that’s what resolved it, but I could be wrong.
I removed the fill and regrouped everything by color and it loads fine for me now. I wasn’t suite sure what was suppose to be cut/engraved though. I don’t think it’d matter much here, but be careful of “dirty” fonts like these. They leave all kinds of little artifacts when they are converted to curves. I broke apart the fonts and I think I got al the little weird artifacts.
See if my re-grouped file works any better for you.
Thanks for working on it I think it’s the file though, not the machine. I don’t see a regrouped file, but I’ll try it on my own. I may have to add the other engraves as additional artwork. Or, just do it another way. This is a logo in progress. What I wanted was a lightly etch square, with broken score around it, like an old style architectural drawing, Then the Seven engraved about 50% and the 4 engraved deeper still.
Oh gotcha, I understand now. It was my fault for using the word grouped wrong. I was referring to making everything needing the same operation one color in the file. ( Score elements one color, cut elements one color and the seven and the fout each their own color.) FWIW, I tried it that way and it loaded and processed fine.
It’s a very cool logo and will be interesting to see it when it’s all done. Good luck with it!
I’ve attached @kittski’s upload in a zip file (I right clicked on the logo above and clicked save). Unfortunately that means it has been through Discourse’s shredder twice, but only once since kittski was able to use it in the GFUI.
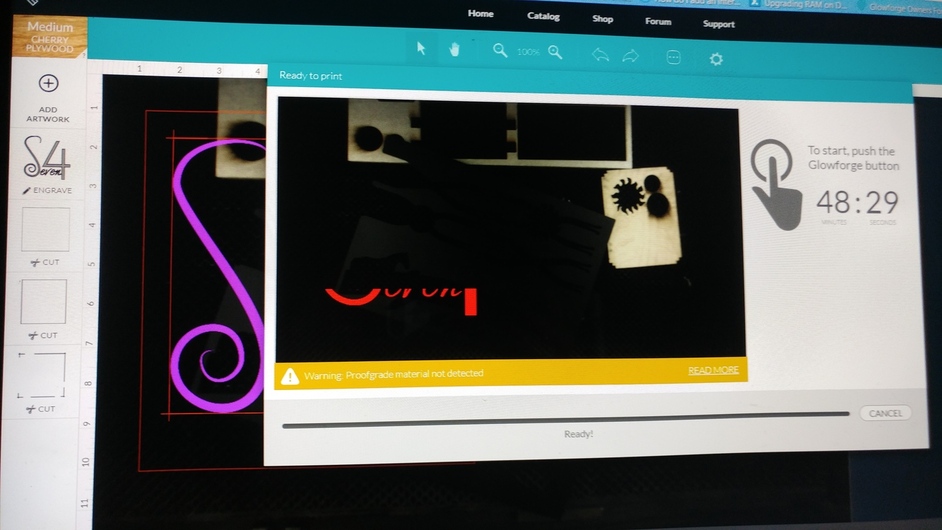
Thank you both. I’m thinking that 48 min is too long for something 2” wide. Time to fill with scores…
I just tried loading a new file from last night where I drilled down and found some floating islands in the outlined text, and it loaded fine. Maybe that was it. Too bad I don’t have time to run it. But, I will tonight… !
Agreed. When I did my test upload this morning, it was down to 18 min. I could almost live with that. Part of the logo is that it looks a little sketchy, so less LPI will be okay for most of it.
It’s 19.5"x11" (nominal) - practically speaking I get 19.495"x10.975" (ish).
I used a pair of lines - one horizontal and one vertical and moved them to the corners, moved each outside the boundaries and then moved one in until the No Artwork message went away and the gray border disappeared. Then I stepped it back 1 arrow click so the No Artwork showed again. Did the same for the other line but left it in place. Then went back, moved the first one back in place by hitting the arrow key 1 click. Then I scored the lines. Repeated for each corner.
Then without move the material I had in there I used blue tape lined up with the score marks to mark the corners on my crumb tray. That gives me a pretty darn close alignment with the maximum cutting area. (It can change a bit when moving the crumb tray but not a ton & good enough if you’re not trying for sub-millimeter precision.)
Engraves have a somewhat smaller area but that’s based on head speed so I haven’t bothered with detailed tests to identify the corners at various speeds.