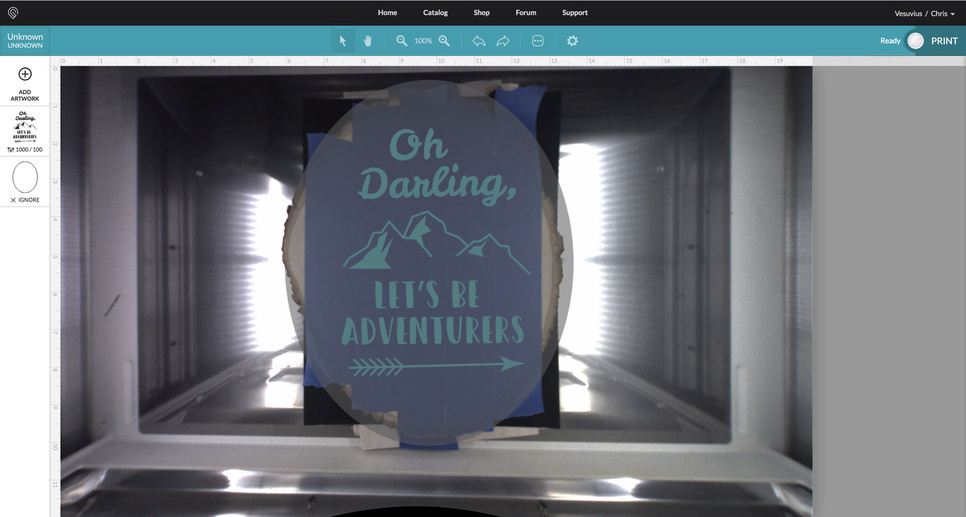
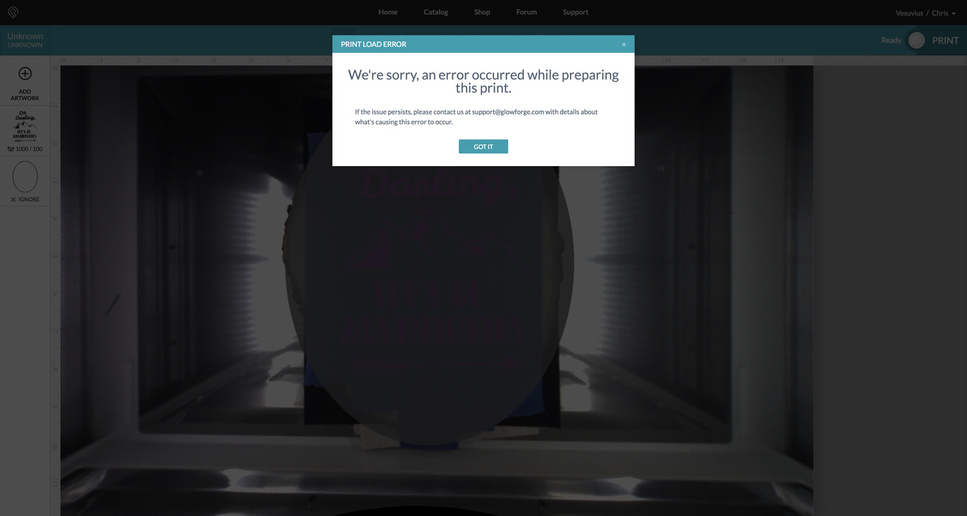
The head moves to the material, the little red laser beam does it’s thing, then the head moves back out of the way and the GFUI sits at “preparing your design” for a few minutes before giving me the error.
You might want to put down a sheet of dark construction paper or something over the bed, under the material. The shiny bottom of the bed reflects all kinds of light and might be causing problems.
Not sure, but I’m guessing the material height setting is not between .01" and .44 (or thereabouts–can’t remember the exact #). Try typing a number within that range.
Isn’t that the exact error you get when your engrave design is too big for the buffer? I know it has happened to me just like that. The crumb tray and focus height had nothing to do with it when I get the error. But have no idea what the settings are for your design.
I’ve not really tested to see if it causes the error message, but could it be that part of the image is in the no print area at the bottom? (I know it’s set to ignore and shouldn’t matter, but you never know.) To test if that could be it, I’d delete the circle or shrink the entire image to make sure nothing is out of bounds. If that processes OK, the issue is the being in the the no-cut zone.
Understand and agree. The GF doesn’t use a command code like GCode. The commands are at a much lower level. There might not be a difference in the size of the motion planning if you were to engrave a solid rectangle or a detailed lattice of the same dimensions. Not sure complexity matters. But there are others that understand how the motion planning works better than I with what seems to be a waveform type signal.
As @marmak3261 has posted, put something down on the bare metal. There is a post or warning the Support/Safety section of app.glowforge.com that comments about not letting the laser reflect from that surface.
Also, when you click on each of the components (of the job), do you get the teal or mauve coloring (with the grey hashed edges)? If not, then your print is in the “no-go zone”.
As you know, we’re working on improving our ability to handle large engraves. When we say your engrave is large - we really mean that it will take a long time to print. When your Glowforge prints an engrave, the head moves back and forth, line by line, like a inkjet printer. If the design is physically large or if you set your print to have a high LPI, the print will take longer, because the head needs to move further to finish the print. I don’t have exact numbers on size or print time for you, but I hope that helps a little.
If your design includes a large engrave, you have two choices. You can reduce the size of your print in the app by signing in, selecting your file, clicking on your image, and then dragging a corner towards the center of the image to make it smaller. Or you can divide your image into pieces and print them one at a time, as shown below.
Click on the “SPLIT IMAGE” tab and enter the number of rows and columns you want to split your image into
Choose PNG
Click the blue “SPLIT IMAGE” button. The software will split your image into the number of rows and columns you specify and automatically download a zipped file of the pieces.
Create a single file with all the pieces
Locate the file on your computer (where your downloads go) and unzip it
Mac: Double click on the file to open it
Windows: Double click on the file to open it, then click “Extract All”
Open a new file in Inkscape (used for this example, although other software will work too)
Choose File > Import and select all the images from the zip file
Line up the images up so they are seamless. In Inkscape, when you drag the images near each other, they will snap together. (If they don’t, go to View > Show/Hide > Snap Controls Bar and adjust the settings.)
Select File > Save As and save the file as an Inkscape SVG file
Upload and Print
Sign in to app.glowforge.com, click “Upload” and choose the file you saved. Each piece of artwork will import as a step in the app. Click on a step and choose “Ignore.” Ignore all the steps but one, and then press “Print.”
When that print finishes, leave your material in place
Set the step you printed to “Ignore” and print another step
Continue ignoring and printing until you’ve finished
It’s been a little while since I’ve seen any replies on this thread so I’m going to close it. If you still need help with this please either start a new thread or email support@glowforge.com.