Pro Passthrough Release

Glowforge Pro machines have Pro Passthrough slots in the front and back that enable printing on infinitely long materials to create truly enormous objects.

Update 11/27/2020: All Pros can get Pro Passthrough software!

All Pros are now able to use Pro Passthrough software. Read more about that in the Glowforge Community November Announcement here.

Before running your first Pro Passthrough print. make sure to read the Pro Passthrough tutorial. Please keep in mind that each section of the print will usually auto-align, but sometimes it doesn’t and you’ll need to align the next section of the print manually.

If you run into issues using Pro Passthrough with Proofgrade materials, please contact us directly at support@glowforge.com or make a new post in Problems and Support. I’m going to lock this topic so folks don’t accidentally post here for help. Moving forward, we’ll share updates on Pro Passthrough in Latest Improvements.

We really appreciate all the feedback you have given us on Pro Passthrough. We want to continue hearing your feedback, so we’d appreciate it if you filled out the survey that appears that appears after each Pro Passthrough print. We’ll use your feedback to help make Pro Passthrough even better.


Old announcement here:

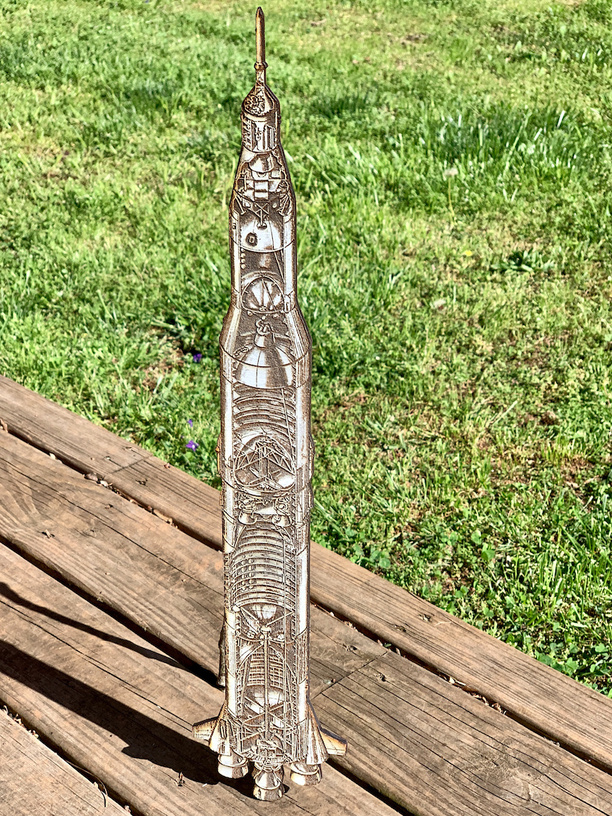
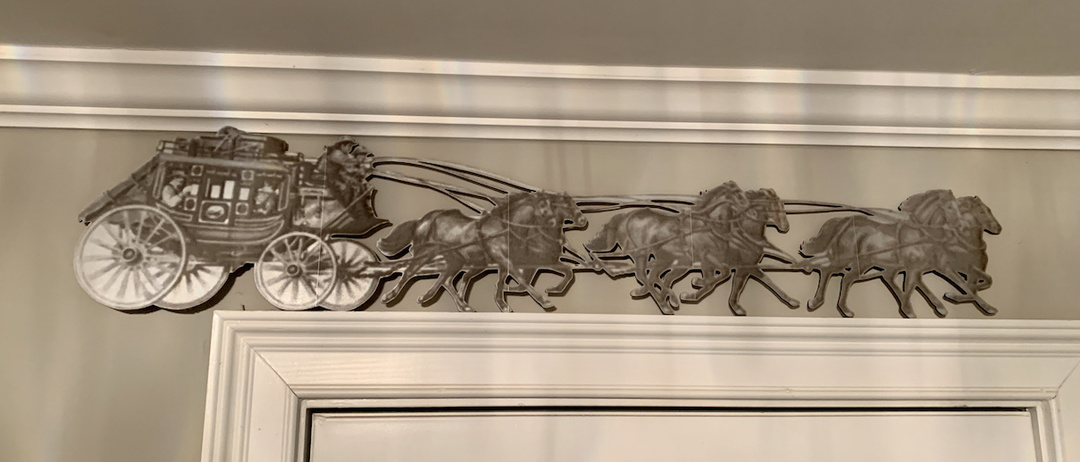
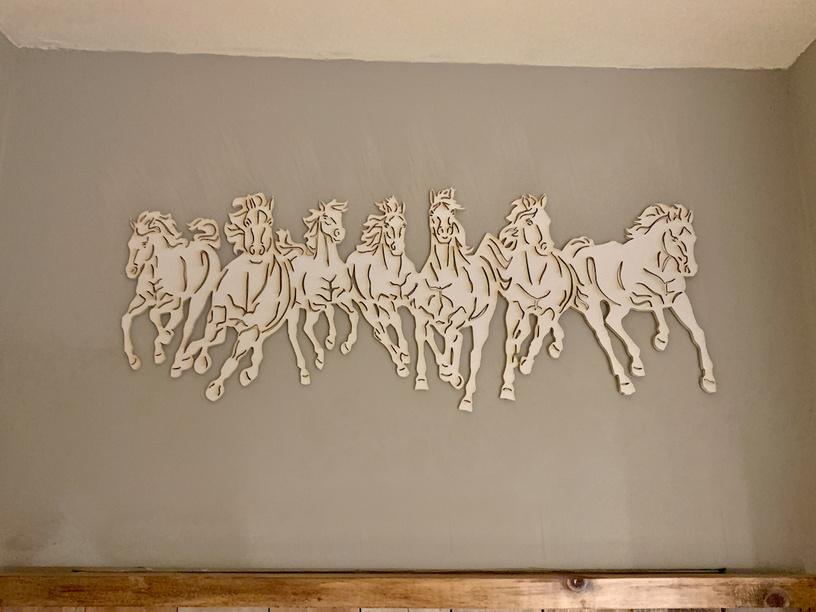
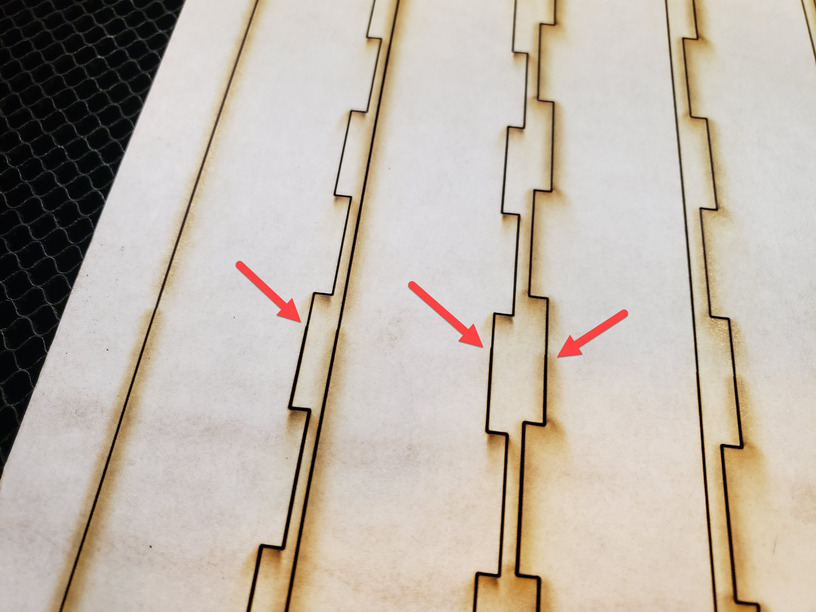
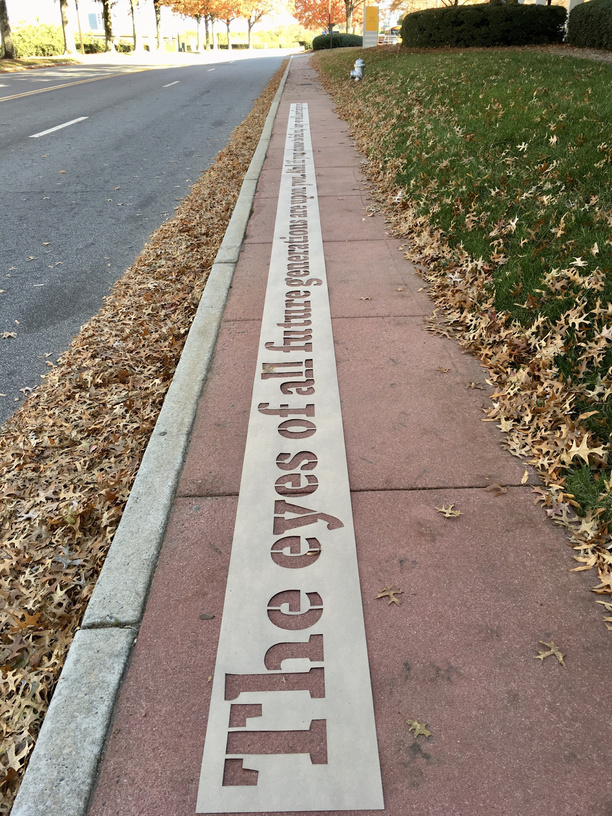
Pro customers have been using the Pro Passthrough slot for years to make amazing projects using techniques like this and this.

Now we have a beta version of the software that makes it much easier to prepare large prints for your Glowforge Pro. It automatically slices your design so you can create something enormous with a series of individual prints. Depending on your machine, it may even align each section of the print with the previous one, automatically.

Because we’re enabling new software and hardware capabilities on a variety of printers, we’ll be performing this beta rollout slowly. We’ve mostly tested with new machines from the factory, so we’ll adding older machines in waves as we develop additional compatibility tests and software. We’ve turned it on automatically for machines purchased after 6/25/2020.

If you’d like to test Pro Passthrough beta when it’s ready for your machine:

  1. Read this tutorial: https://glowforge.com/support/topic/first-three-prints/pro-passthrough
  2. Fill out this form: https://forms.gle/MY9ENkpeUTWiT56i6

We’ll let testers know by email when we’ve turned on the software for them.

Our plan is to launch Passthrough software to all Pro customers after we validate and improve on it with initial beta testers.

If you are a beta tester, we would love your feedback - Is it working? Is it useful? Is it confusing? Is it enjoyable? We encourage you to fill out the survey that will appear after using Pro Passthrough. You can also leave your comments right in this Pro Passthrough beta thread. Note that our customer success team won’t be able to answer questions about this feature yet, so you can also use this thread to ask questions or get support.

Here’s a brief FAQ.

How does it work?

First, turn on Pro Passthrough mode and insert a piece of oversized material so it sticks out from the back.

Then, place your oversized design on the bed. It can extend past the top.

Start your print. It will print everything in the printable area, then take some additional measurements.

Move your material when prompted, about 8 inches towards the front of the machine.

It will measure the material again and attempt to line up the next part of the print with the previous. If it doesn’t work, you can align it manually.

Continue with the second part of the print, and repeat until finished.

It’s pretty easy. Just ask this guy:

Is this coming to all Pro units (like 3x faster speed), or will you stop the rollout (like Snapmark)?

We plan to launch the automatic slicing ability to all Pro units. We expect newer units may experience better automatic alignment than older ones, but we will launch automatic alignment to as many units as we can. This beta, and your feedback, will help us understand how well it works so we can better plan our rollout.

When will I be chosen?

We have changed details of our manufacturing and calibration process over the years, and we’re bringing people in based on the details of how their machine was built at the factory. As we need people in different groups for testing, we’re adding them. Some folks are added immediately; others may wait until their machines are needed for testing - we don’t have any estimations of how long that may take.

Can I get this software on my non-Pro unit?

No, we’re making this a feature exclusively of our Pro model.

I really need it! Can I get it sooner by asking support?

No, unfortunately that will just tie up support and slow things down for everyone.

How big a print can you make?

Pretty big.

(Print courtesy @evansd2, 12”x600”)

79 Likes

Congratulations on getting to this point, @dan - we know how much effort it has taken on behalf of the entire team!

19 Likes

Thanks @eflyguy!

By the way, we’ve had 25 people doing early testing of this (resulting in that massive print in the announcement, for example) - so there are some folks here who can share how the service is working so far.

20 Likes

image

31 Likes

This is the first thing that has made me regret my decision to purchase the Basic model instead of a Pro. Just WOW.

11 Likes

The short version: Really well.

It’s a different workflow, and takes a bit of getting used to. Patience is key, there are stages where the camera is working and you need to give it a sec to think. Opening the glowforge as soon as it stops cutting is my weakness, I have to reel that tendency in when doing a passthrough project.

It’s not a miracle solution – it’s very good, but it does its best work when you’re being conscientious and consistent. I like to keep my material firmly seated against a known straight edge (side of the crumb tray usually) so that I don’t put it off angle. The software can compensate for the angle being off, but I find I get better results if I keep it as stable and straight as I can.

There are times where it matches up better than others, especially if your material isn’t perfectly flat. The camera is used to align the stages, so flexible materials (flimsy paper and cloth) are pretty much out, you’ll almost certainly warp the material a bit when moving it. A nice rigid material with a fairly bright color (so the dark cuts show up better) is key here. Luckily masking is a nice bright material, so if you go off PG you can mask your dark woods and get good performance.

So, yeah sometimes it’s so good you literally can’t tell where the break is, other times it’s off by half a kerf-ish. It’s very good, either way. If you’ve seen my recent sword projects, now you know my secret weapon in pulling those off.

Basically, if you have a pro, apply for the beta. You won’t regret it.

21 Likes

Can’t add much to what @evansd2 just said, other than needing designs and settings that have decent contrast on the material or masking. The cut lines can be enough - the stage coach had a very “busy” engrave but the cuts gave the camera the contrast needed for near-perfect alignment. I couldn’t find any mis-alignment on my cut-only efforts (some not shown here) but the fully-engraved ones do have minor flaws (remember, this is a beta - don’t expect perfection!)

You’ll come up with new ways to hold down materials while still allowing movement thru the slots, as long pieces will hang out each end of the machine and flex up above the bed of the tray. Some use supports, I’ve done that in some cases, and also some different hold-down pin designs for lighter, stiffer material. Now it’s out in the open, it will be interesting to see what people come up with.

27 Likes

I did early testing, and I’ve been incredibly impressed with it. It’s a whole lot easier to use than I had hoped for. No file splitting required! (Making a whole lot of tutorials completely obsolete.)

Now is the time folks! :wink:

16 Likes

You will really enjoy the release of this feature for your Pro machine. It is simple to use.

9 Likes

I still think it’s magic. It’s so cool to watch it get intricate designs spit on (or worse case skipping one scan line that in highly detailed engraves can be near impossible to see).

But I agree 100% that you want to try keeping things straight & flat. I use a straight edge against the left side of the tray and flat sided pins to guide the material as I slide it forward. The standard hold down pins are good to keep it flat as you slide it forward as well. Good contrast between the project engrave & the material is helpful too.

And unlike a lot of things sometimes re-attempting an automatic alignment can result in success especially if you shift the material a bit so the camera sees something else that it wasn’t able to see before to help its alignment.

6 Likes

I was able to test this and it worked flawlessly for me creating a game board box. Interface was simple, and the alignment for me was flawless. If you have a pro unit, sign up!!!

17 Likes

Oh Boy, this is big stuff right here. :slight_smile:

3 Likes

Yay!!! YES! Can’t wait to try!!!

3 Likes

Nice!

I’ve had mixed results using snapmarks with infuriating screw ups on step 5 of 6 and that kind. I will apply for the beta and I think it’s great and all. But please realise this is a feature that was sold with the Pro since the crowdfund campaign already some time ago. Sometimes it feels like I was sold a car and they have only just delivered the steering wheel.

Can’t wait to use the new software.

4 Likes

AS I only have a Basic, I don’t / won’t have the possibility to use this. I did get snapmarks way back when, and it is my understanding that the snapmarks are what helped create this feature. As I stated earlier, I wish I had paid for a Pro now.

2 Likes

It’s better than Snapmarks. (I’ve tested both.) :blush:

One thing gang…if you’re selected to beta test this…

GET YOURSELF SOME CARDBOARD!!!

Mattboard is better than corrugated. Learn the settings for it before you try to use the passthrough. I promise you will mess up your first few cuts as you learn to use it, and the large sheets of proofgrade are expensive. :slightly_smiling_face:

16 Likes

I can’t wait to sign up… but I am stuck at my day job for another 1.5 hours :frowning:

Hopefully I remember to submit my application when I get home.

2 Likes

Or chipboard (cereal box type cardboard). Blicks & Amazon will deliver in these at-home times :slightly_smiling_face:

3 Likes

I too struggled with snap marks in a similar manner.

I have been testing the pass through. When it works, it is magical. When it fails, it is frustrating as heck. I end up with a lot of re-trys, which one can try to their heart’s content. Eventually on some of these, I conclude that it has failed and will not get there automatically. One saving grace is that it does allow you to manually align when the auto alignment fails. Of course, manual alignment is not ideal, and can fail as well. So, for me, more than a few wasted parts, and a bit of wasted time.

Is it crazy to want it to work in the way it was described when I bought it.

When I read:

I get a sinking feeling that I have a machine where it will not work constantly. Auto alignment is not auto slicing and hope for the best. My hope is that we can get to a place through software or hardware changes where all pro machines can successfully use their pass-through slot with auto aligning software. That day is not today.

1 Like

Yes - we did communicate to everyone before confirming each pre-order for delivery that this feature was not a part of your product after all, and might never be. But we’ve been working on it ever since anyway.

That’s our best case, but we know we can provide auto-slicing to everyone.

4 Likes