First of all, thanks so much for all the feedback you’ve provided so far! The team has been reading every post.
Next, we have a few Pro Passthrough updates going to beta testers today. Refresh your browser to get these improvements:
The button on your Glowforge will now light up throughout a Pro Passthrough print to indicate that your Glowforge is busy and you shouldn’t lift the lid. The button will be lit solid while your Glowforge is printing and taking pictures for alignment. The button light will turn off when it’s time for you to shift your material, and then turn on again until it’s time for you to confirm the alignment. Once the next part of your print is ready, the button will blink as usual.
We released a fix for the issue causing “Print Expired” messages. (@marleeshealy@desireecollins22 If you continue to see this message, please let us know.)
Your Glowforge can now enter sleep mode while waiting for you to shift your material. If the lights inside your Glowforge dim, you can wake up your Glowforge by simply pressing the button or lifting the lid.
I just got word yesterday that my adjustable table arrived at Menard’s. it is going to be the INFEED support for the passthrough operations. So Tomorrow I should have things all assembled and rearranged and be able to get back to running. my previous support was just NOT stable enough.
My most recent update is that I did not see “Print Expired”!!! I cannot get it to align automatically. It seems to freeze on the inspecting stage for 10+ minutes. But I see this is improvement, at least for me. Thank you!
I tried my hands on another passthrough project yesterday. It went flawless. And I mean everything. Alignment was precise, calculating was fast and the machine cut like a hot knife through butter. Really great to not have to worry about anything.
For workflow I would suggest to be able to work front to back instead of back to front. Shouldn’t be too hard in software.
I’m having trouble with one segment of a passthrough print not cutting through the material while other segments in the same print cut through just fine.
I have printed on PG Thick Draftboard and on PG Medium Maple Hardwood. The file is only cuts, no engraves or scores, and is 35.5" long x 6.5" high. On the Thick Draftboard, all segments cut fine except for the last one, which only scored and left a few small pinholes. I cleaned the lens—it was surprisingly dirty, but not without reason—and mirrors, then tried again with the Medium Maple Hardwood. The first segment didn’t cut through, so I stopped and sent the “gift of good measure” to test on the same material. It printed beautifully, so I tried again with a new piece of Medium Maple. First segment cut okay, but not great, but then the second segment cut beautifully.
This file has been able to print (I successfully printed a full-size test before making edits), so I’m confident the file isn’t the issue.
I’m seeing a lot of overburn marks on the masking when the cuts don’t go through, and very little when they do, so I suspect that it has to do with the focus. I’m using the standard settings since it’s PG material, and pinning down the edges with the Honeycomb bed holdown pins on the first cut, but relying on the passthrough slots for subsequent segments.
Well I did a 4 piece room divider. The auto alignment work great on all but one area. One of the pieces had a area that only had a few lines to cut. Two were right near the edge, another also close to the edge being about an inch in. Leaving just one near the center. I tried a few times and it wouldn’t auto align. (And I had zero luck manually aligning)
I decided to add a “pendant” to an area near the center so I would have more lines and even some engraving to help line things up. First try and it was able to Auto align.
Not sure if it what made it work – or it was just luck.
I’m super excited for this to get out to the community. It sounds like this has been pretty successful. I too was hoping I could avoid that nightmare of breaking up large designs and let the software take the wheel. So I guess for now I’ll just party in the community group and cross my fingers that one day I get the beta upload so I can test this too. I have some orders on hold (for personal family/friends) that understand I’m waiting for the upgrade. This is like waiting for paint to dry though. I REALLY want to try this. Has anyone had any issues with a design being too overly complicated and it not working or has it been pretty clean. From the discussion above it seems to be working well
We all had some issues when the initial tests were running I think, but I was getting 100% success before it was opened for Beta testing, so you likely won’t have any insurmountable issues. (And I hope they are still expanding the Beta. Might be a week or two though, they are working on multiple things simultaneously these days.)
If you do get picked to beta test, remember to carefully read the instructions they give, pin the material down flat in the machine, and always start with the material and design up against the left side.
Can confirm, beta invites still going out as of 6/5. Only played with a few simple things so far but they’ve all been perfect, seamless transitions to the naked eye. The process isn’t exactly speedy but still faster than the manual methods.
That’s great to hear. i have 5 large pieces waiting to be printed on in my back room and I’m just so antsy to get started. Been doing some father’s day projects to keep busy but I really want to get into larger stuff. Thanks for replying
Do you have an ETA or rough release date for when the general public will get this feature? I applied for the pass though beta but never heard back, not even a confirmation email. I fear this will go though the same way snapmarks did for me (never saw them), I anxiously awaited the release then… nothing. I’ve had my GF for nearly 2 years now and to say I am frustrated with this process would be the understatement of the year. I bought the pro specifically because it has the passthrough slots.
So far I have been disappointed sitting on the sidelines yet again waiting for a feature…
I had the passthrough beta enabled on my machine, then I had my machine replaced under warranty, but the beta was never transferred to the new machine, and I desperately need it in order to finish a project I’m doing for someone, and I need it now! This should have been done automatically. I emailed support, I filled out the application again, and now I’m writing in this forum post. It shouldn’t take this long for support to actually respond. Most companies respond to inquiries within 24 hours, and it has been 3 days. Glowforge, if you can’t cater to your customers’ needs within 24 hours, then I really think you should hire more staff.
Not every machine is suitable for the beta, so it wouldn’t be automatically “transferred”. I believe they would need data from previous prints, the camera images, etc., so a brand new machine would likely not provide the data they need to determine if it is suitable. You would need to have been using it a fair amount for other prints. Support doesn’t handle the process, it is the dev. team - posting here is the fastest way to get their attention.
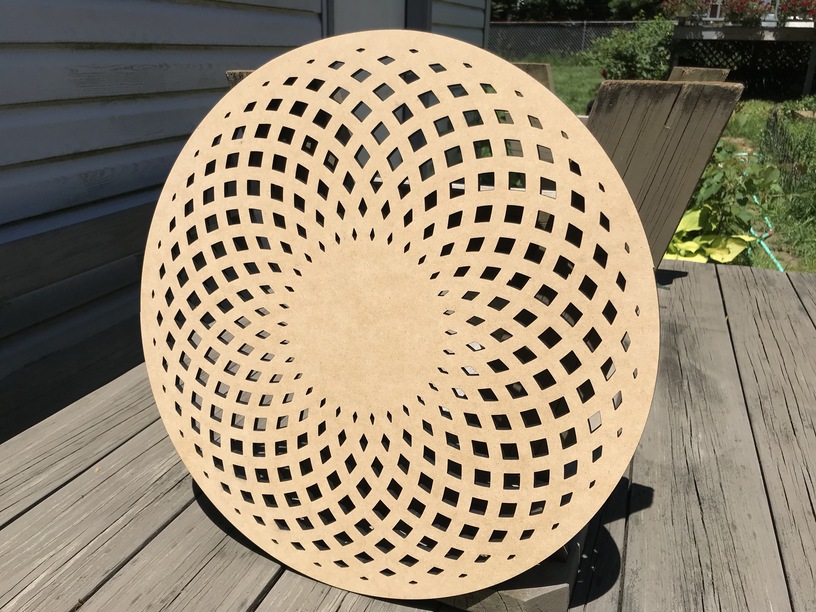
Finally had my first and second go at the passthrough beta. Picked out something with a little more detailed and a circle. Used 1/4" thick Draftboard(GF stock). I adjusted power to 121 instead of 132. Too many have not cut all the way at 132 power.
First go through did not match up even close, used manual and
![IMG_1004|375x500] showed okay online but came out not even close.
Ran a quick camera calibration.
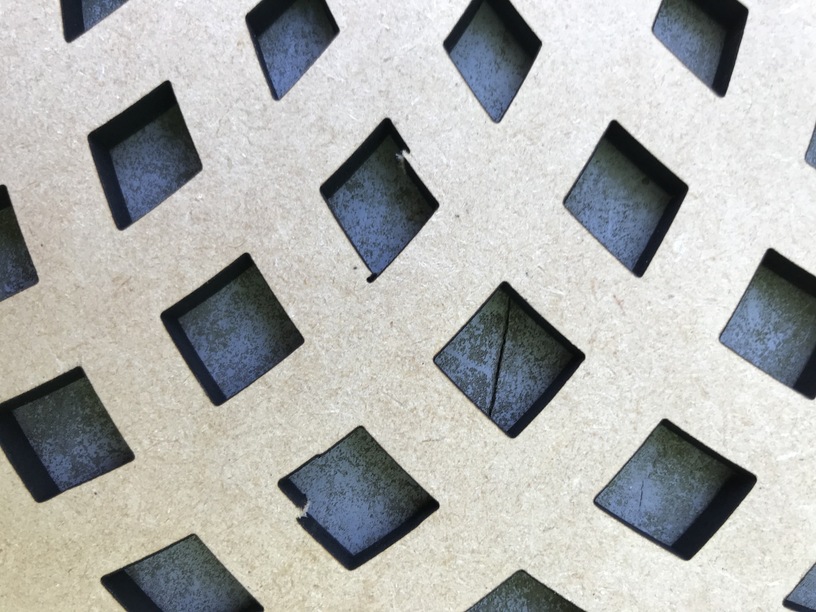
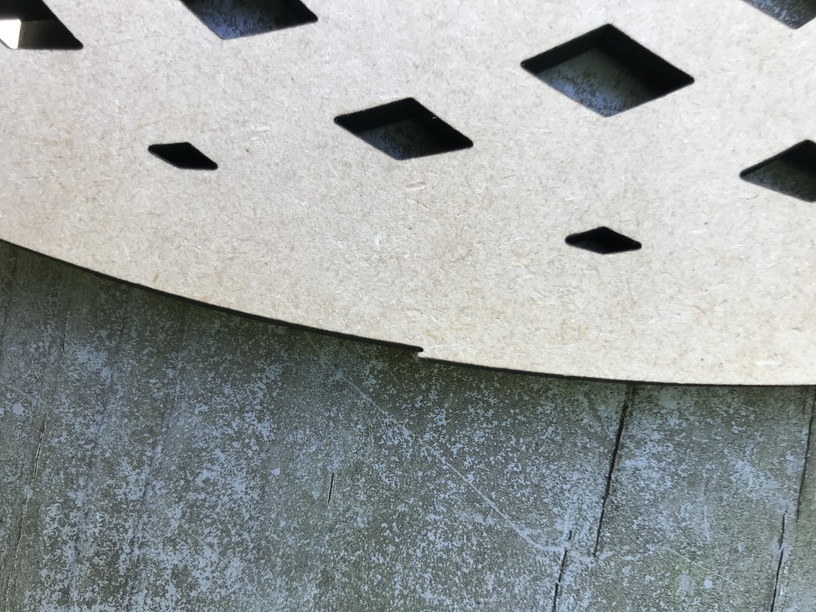
Second go through came out close to perfect. Slight minor imperfections which can be fixed with a minor 2 second filing. Not bothered by this as the piece is to be painted.
It is 18" in diameter.
Used my two adjustable rolling table saw stands for front and back support so easy peezy.
Almost forgot to mention I was using a piece of board that was 20" wide X 48" length.
Properly supported material to address keeping things flat is a must.
Also I throughly cleaned the lens, printer head, head Window, laser window and the wide angle camera lens.
Just an update on our pass through. So far 4 projects 60 inches plus and every time we have to manually align. We pause wait 20 minutes while it says taking pictures and then move on with our days. At this point the software looks promising, but No matter what file we use, or how patient we are the results are the same. Any advice is appreciated, at this point just going to manually align.
If you read back up this thread, there are a few lists of tips that Jules and others have posted that have helped. I have not had great results ( my machine seems to be not great with this feature) but these tips seemed to improve my batting average. Here is what comes to mind but I suspect there are a few other gems worth finding in the prior 200+ posts on this.
position the work towards the left
control the lighting (I block out external light when the photos are being taken or pondered)
make sure your materials are flat and well supported
clean the optics on the bottom side of the head (those are what are used to see your parts)
make sure your transition at least 3 inches away from the front door.
Also be sure your material is light colored. Either actually light colored material (Light colored woods, bright acrylics) or masked with light colored masking material.