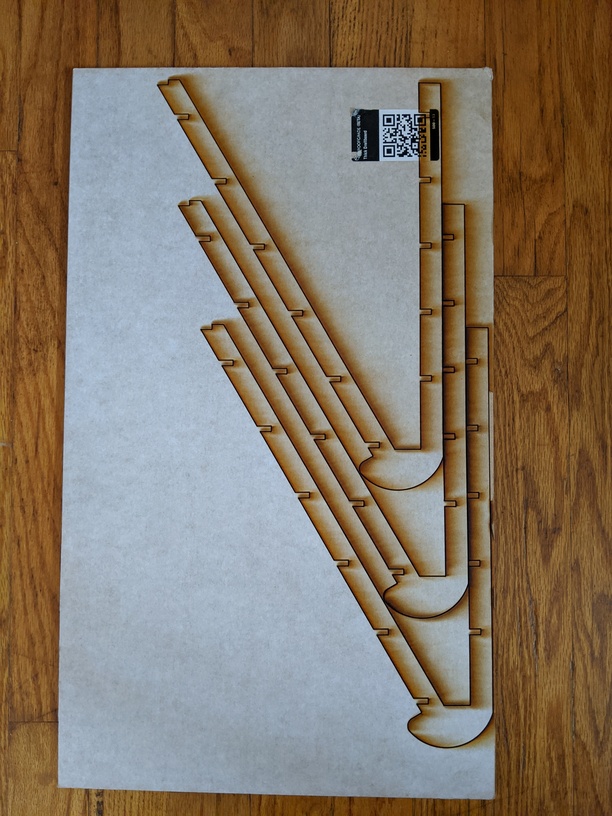
Has anyone experienced issues cutting Proofgrade materials with the recommended power settings? This is the first time I have used PG material and (ironically) the first time I’ve had a print fail to cut through the material.
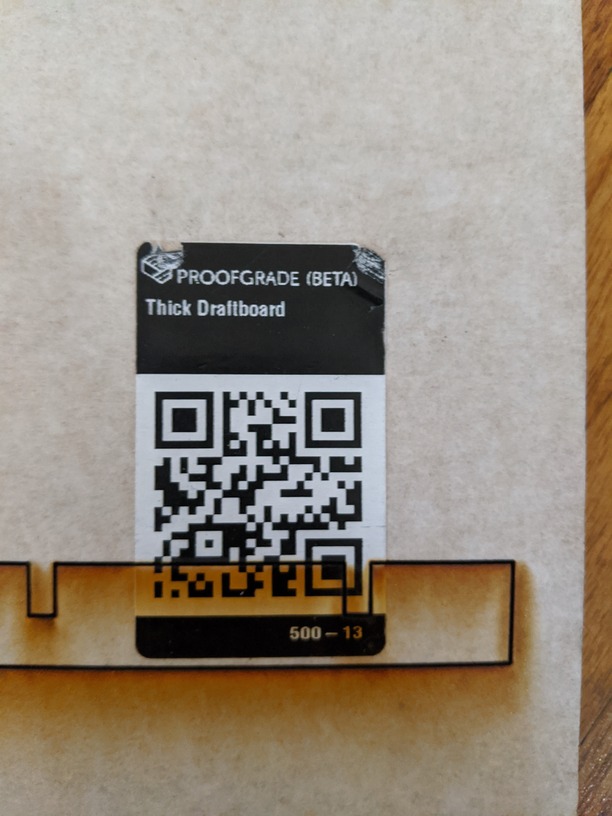
I noticed that the material was tagged as “Proofgrade Beta” Thick Draft Board. Using the Glowforge programmed settings the machine was set to Speed 132 / Full Power and ran a single pass. Perhaps the power settings were changed after the beta material was released?
Check the usual stuff – make sure all optics are clean (lid, left side, side of head, bottom of head, lens, and mirror); pin down the board to make sure there’s no warp, check its thickness to see if it’s maybe expanded a bit due to humidity (the “set focus” tool will test and figure out the correct height for you and save the measuring, if you’d rather go that route).
Assuming you’ve done all that, next step is to wait for Support to get here to decide on next steps.
I’m so sorry to hear that you’ve hit this snag. I’ve extracted the log files from your Glowforge and reviewed this particular print. I noticed that during this print, the crumb tray may not have been installed correctly, which can cause the material to not lie completely flat, and run into the behavior you are seeing.
To cut successfully, there are three important things to check. First, your material must lie flat. This requires a clean, properly installed crumb tray and flat materials. Second, there must be no obstructions, dirt, or damage preventing the laser light from reaching your material. Third, your design must be set up properly - for example, with lines that are fully on the material and that are set to cut. It’s hard to know which issue might be affecting your print, so please thoroughly inspect your unit and design according to the suggestions below.
Crumb Tray mispositioned or holding particles
If the Crumb tray is mispositioned or holding bits of material from packaging or printing, it could keep your material from lying flat. Even a millimeter difference in height could affect your laser’s ability to cut.
To remove the crumb tray, lift the lid, then swing down the front door. Lift the crumb tray slightly and slide it towards you to remove it. Be careful not to tilt the crumb tray up, or it will knock into the printer head and rails.
Remove all dust and debris from the bottom of your Glowforge.
There are four dimples for the feet of the crumb tray to sit in. Wipe them with a damp tissue or cloth.
There is a slot in front of the crumb tray, under the handle. Point it towards a garbage and shake the tray so that debris falls out. If debris is stuck in the honeycomb, gently push it out. Debris can force the honeycomb to be uneven, or prevent your material from resting flat against the honeycomb.
Replace the tray. Make sure that it’s facing the right direction and that the tray’s four feet drop into the small dimples. When the four feet drop into place, the tray will no longer slide freely.
Please attempt to replicate the print after following these instructions, and let us know how it goes!
Thanks for the advice! Since this is a shared machine I think it has suffered from the “tragedy of the commons” and has been neglected of a good cleaning. I’ll run through your suggestions and see if that improves the performance.
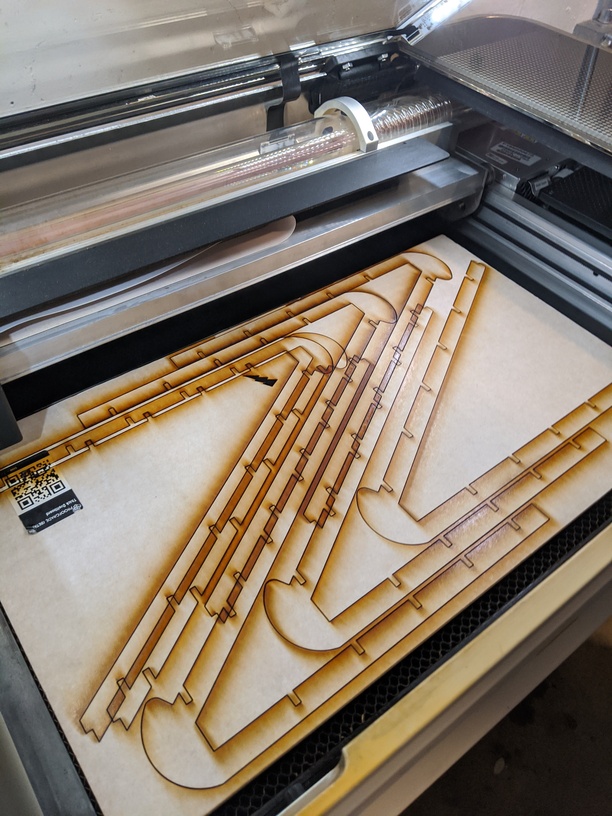
After removing the crumb tray and clearing the debris, it was obvious that the machine was in dire need of a deep clean. You can imagine what the lens/mirrors looked like…
Wow, yep, that that definitely needed a deep clean. Glad you are up and running again. Unfortunately if others aren’t going to clean the machine, I would take it on yourself to maintain it as otherwise you are likely not going to have a machine to use soon.
WOO HOO! Thank you so much for updating us, and for taking the time to thoroughly clean your Glowforge. I’m so glad to hear that you are back up and printing properly. I’ll close this thread now, but please don’t hesitate to reach out to us in the future at support@glowforge.com if you happen to run into any more trouble.