I saw someone else was having problems with PG settings and mine are similar. I’ve had my Glowforge Pro since last fall. I’ve never had the PG cut settings work where it cuts through the material in 1 pass, all is fine if I just make 2 passes. I was wondering that since I’m off-grid, maybe my electricity wasn’t up to par, of being over 4000 ft above sea level had some bearing or maybe I just have thicker material than what is listed on the label. I did originally have the Forge on grid-electricity, so I don’t think that was the problem.
You should not have to do two passes on proofgrade materials. I suggest you cut the Gift of Good Measure on proofgrade draftboard with proofgrade settings. If the cut is not perfect, photograph the result (front and back of the board) and post here so support can assess the result. Also, document the time and date of the attempt.
2 Likes
I’m so sorry to hear that your print didn’t cut through.
Could you please do the following?
- Turn off your Glowforge, then turn it back on
- We included an extra piece of Proofgrade Draftboard with your materials shipment for troubleshooting. Place Proofgrade Draftboard in the bed and load the Gift of Good Measure design.
- Set the score and engrave steps to ‘ignore.’ Print the Gift of Good measure using the default settings. Allow the print to finish.
- When the print finishes, leave the lid closed and wait until the fans stop and the picture of the bed updates.
- Check the completed print:
-
- If the Gift of Good Measure fails to cut, please let us know the date and time of the print
- If the Gift of Good Measure cuts successfully, please try another print of the design you saw the issue with, and let us know the results.
- If the issue still occurs, please let us know the date and time of the finished print.
Let us know how it goes!
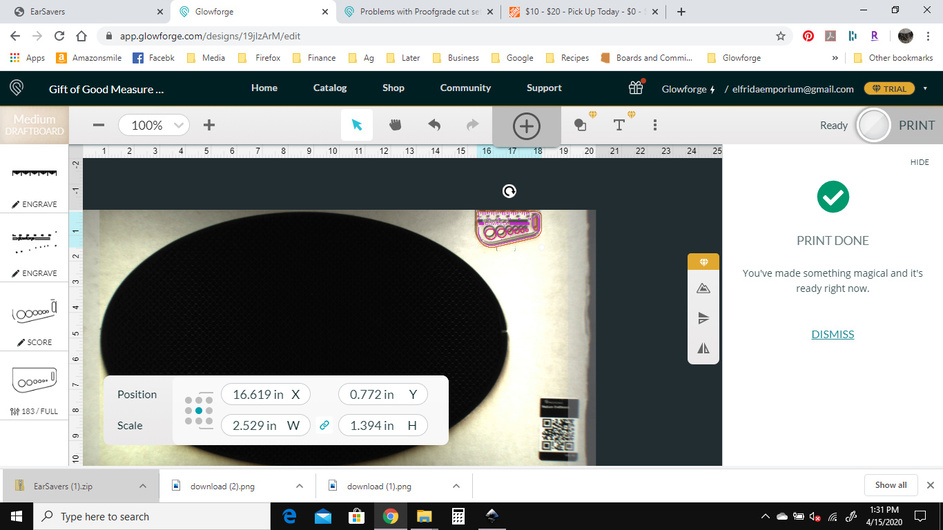
Used the PG settings on Gift of Good Measure. It did not cut through the PG draftboard. Time of cut 1:25 -1:28 pm, 4/15/20. Hoping this is self-explanatory.
Thank you for working through those steps. I’ve reviewed this particular print inside of your log files, and I noticed that your Crumb tray may not be positioned correctly.
If the Crumb tray is mispositioned or holding bits of material from packaging or printing, it could keep your material from lying flat. Even a millimeter difference in height could affect your laser’s ability to cut.
- To remove the crumb tray, lift the lid, then swing down the front door. Lift the crumb tray slightly and slide it towards you to remove it. Be careful not to tilt the crumb tray up, or it will knock into the printer head and rails.
- Remove all dust and debris from the bottom of your Glowforge.
- There are four dimples for the feet of the crumb tray to sit in. Wipe them with a damp tissue or cloth.
- There is a slot in front of the crumb tray, under the handle. Point it towards a garbage and shake the tray so that debris falls out. If debris is stuck in the honeycomb, gently push it out. Debris can force the honeycomb to be uneven, or prevent your material from resting flat against the honeycomb.
- Replace the tray. Make sure that it’s facing the right direction and that the tray’s four feet drop into the small dimples. When the four feet drop into place, the tray will no longer slide freely.
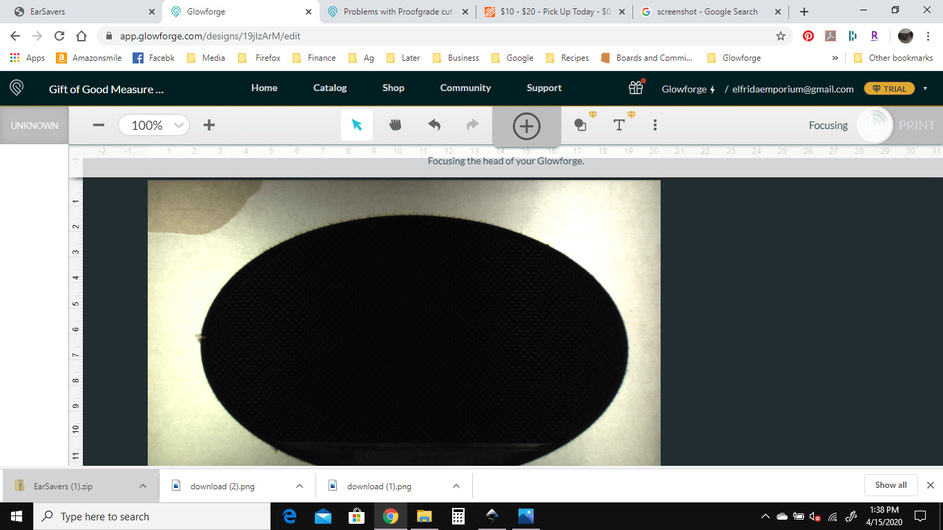
Once you have worked through these steps, please repeat the Gift of Good Measure print you previously completed, and utilize Set Focus in the print around the area of the material you are printing on.
Let us know how it goes! I’ll send over the next best steps after this print completes.
It’s been a little while since I’ve seen any replies on this thread so I’m going to close it. If you still need help with this please either start a new thread or email support@glowforge.com.