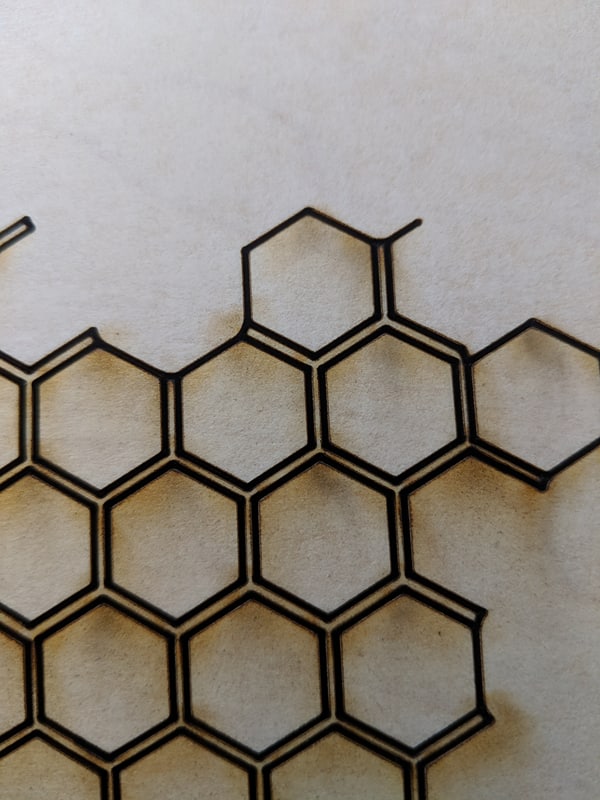
Using Medium Maple Plywood, and the default settings for cut, my file did not cut all the way through. It did penetrate at corners (it was a honeycomb I was cutting out).
Looking in the forum, there may be an array of causes. It is 55 degrees outside, and that room of my house is maybe 60? High humidity?
Troubleshooting the cause aside… I’m going to adjust my settings for a second go round. It already says full power. Do I decrease the speed? (that’s what intuitively makes the most sense) Increase the speed? Increase the passes?
If I decrease the speed, I don’t want to set my project on fire… what kind of adjustment is reasonable?
(I have a limited amount of proofgrade left, so my testing is limited)
You can decrease the speed or increase the passes. I’ve found that if it’s just barely not cutting through then decreasing the speed by 10 or 15 is all it takes. But, I find increasing to an additional pass is easier.
You should not have to adjust your settings. That’s the whole point of Proofgrade. However you should confirm your material is perfectly flat. Press on it and there should be no give anywhere. Use magnets if you’re unsure about it being flat.
I usually drop it 5 or 10 speed units. In this case I’d start with the 10 units. Don’t move it afterwards so you can check to see if it did cut out and if it didn’t you can re-run it and it will cut right over where it cut before (don’t worry that the screen image will look shifted).
I agree about not adjusting the settings for proofgrade. However, there are environmental factors that may be beyond GF control? (The humidity here is 94% today?.. I have no idea if that plays into things or not.)
It is absolutely flat and the level of cut/uncut throughout the piece is consistent.
I’ve learned that I shouldn’t touch the dang things until I see if it’s cut all the way through… I just can’t figure out how to tell before I touch it.
In case the results of the first pass were of interest… these were the incomplete cuts.
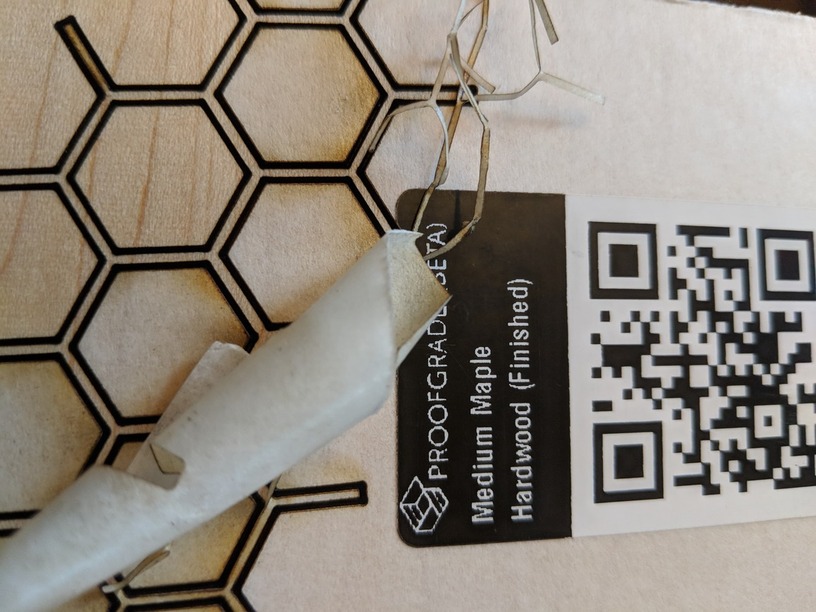
I’m recutting now and I can see that it is cutting through. This second piece, while proofgrade, was previously used and has a slight warp to it. It’s irrelevant to my project. But I saw the first center honeycomb piece drop just a little. Settings adjusted to 155 speed, down from the default of 168.
What’s even more irritating is I had a large number of objects to cut on PG Maple Plywood. The sheet was flat, but I put magnets on it just in case, and along the left hand side it didn;t cut all the way through, whereas the right side not only cut through, but left behind a bigger scorch area. So it’s almost as if the power changed while moving from shape to shape. Using PG settings, no manual adjustments at all.
That’s the ideal, but physical laws still have the last say. Proofgrade is subject to environmental factors like relative humidity and temperature that will cause swelling, shrinking, and/or warping. I’ve even seen my PG scraps swell a bit when the humidity changes. It’s not a matter of absolute values – I live in a high desert region so “high” humidity for me is 40%.
I generally dropped speed about 10 zooms for the Maple Ply, although not lately. The early batches of Maple ply had a slightly thicker veneer on it I think - it needs to be cut a little more slowly to get all the way through it every time. (And I still have some bits and pieces left from that.)
On the other hand, I’ve been getting by just fine with the standard default settings on some really tight cuts these last couple of days, so it might just be batch dependent.
Either a dental pick or one of those little picks @Jules loves works. Or even just the tip of a utility knife poked at a cut edge and try to lift. If it’s cut through it’ll come up easy. I try it in a few places to make sure it’s good all around. In fact, I tend to pull all the stuff out while the material is in the GF (I usually have it secured with really good neodymium magnets so the overall sheet doesn’t move). Then if only some pieces don’t cut through, when I run another cut pass it’s only double cutting some of it and not all because you do get wider kerfs when you run the second pass.
Which says there’s some warp in the material or the sheet is extending over the edges of the honeycomb bed. If it is securely flattened (which can be hard with a large & complex pattern because you can’t necessarily get the magnets in places that won’t be cut or engraved), nothing drops when cut.
Yes, the second try piece was a scrap of proofgrade that has been sitting on bookshelf hanging off. The first two smaller pieces of maple were completely flat.
Thanks for for the help, all! I’m sorry that your print didn’t come out beautifully.
To cut successfully, there are three important things to check. First, your material must lie flat. This requires a clean, properly installed crumb tray and flat materials. Second, there must be no obstructions, dirt, or damage preventing the laser light from reaching your material. Third, your design must be set up properly - for example, with lines that are fully on the material and that are set to cut. It’s hard to know which issue might be affecting your print, but based on the discussion in this thread, it’s possible that your unit’s lens or windows need to be cleaned. Could you please follow the cleaning instructions for things that need wiping, and also check carefully for scratches or damage on the lens and windows on each step?
Once you’ve inspected and cleaned, please try another print. We included an extra piece of Proofgrade Draftboard with your materials shipment for troubleshooting. Please print the Gift of Good Measure on Proofgrade Draftboard and let us know the result. If it doesn’t print well, please let us know the date and time of your print and send photos of the front and back of the print.
Well, all three of the first were fine. It was flat, there were no obstructions. And the same file printed just fine when I decreased the speed, so the lines were good.
I had cleaned the laser windows with a Zeiss wipe about 30 minutes before this print, but they were all dry. Since it was my first time cleaning them, I checked them carefully before using it again.
The lines were crisp and perfect in the first cut. They consistently went half way through the material over the entire cut. (I’ve since broken a piece off to look. I can give you a picture of the cross section.) Since the slight speed reduction printed just perfectly, I don’t think it it was the four trouble shooting steps above.
Slowing the speed down can overcome warped material, dirty laser windows/lens, and cuts set to score because it results in more net energy being delivered to the material.
Did you also remove the lens from inside the head and clean that?