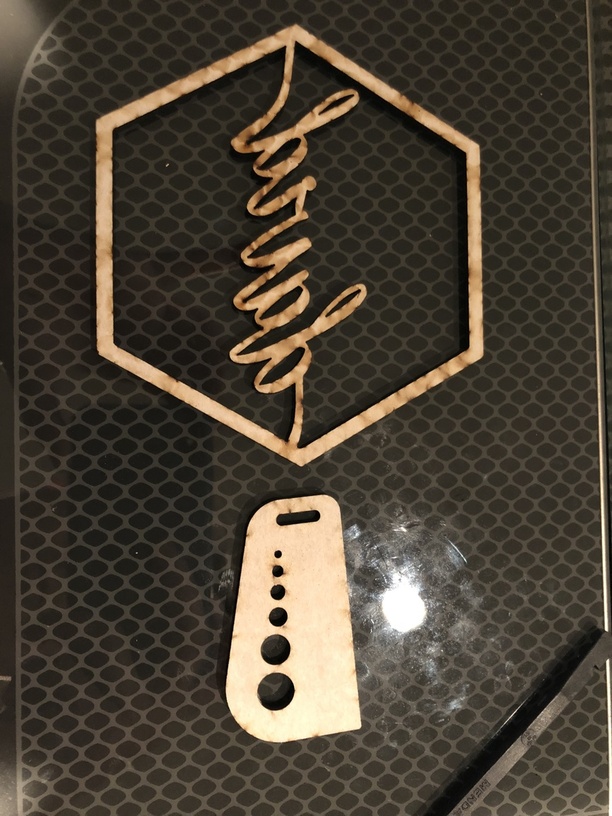
I’m cutting through proof grade medium draft boards and I’m seeing sticky residue on the backside after cutting. The residue seems burnt from the laser.
Before cutting, I did inspect the backside and everything looks normal. However after cutting the mask looked burnt and sticky already. Upon removing the mask, most of the tape comes off but there are many spots that do not get removed. It basically stains the backside and leaves a sticky residue that I cannot get off.
I was wondering if anybody has experienced the same thing, how to prevent it and how to remove the residue.
It’s flashback and caused by too much power or too slow speed. You can drop the power a few ticks or bump the speed. Not too much of either or it won’t cut all the way through though.
@brokendrum – Thanks for the suggestion. I ordered some Fast Orange to give a try. However, I already tried getting rid of some of the stickiness with Gorilla tape and Goo Gone. It just seems like some of that residue has burned into the draft board. One method of using sand paper helped to an extent but I feel I’m just etching away thickness, which is not desirable or feasible.
@jamesdhatch – Thanks for this suggestion as well. Do you think this is a flaw with proof grade materials? I was hoping yet expecting that glow forge + proof grade has been tested and scrutinized their settings. I’m a newbie so I’m still learning. I see how to apply manual settings but I’m not too sure how to auto detect proof grade settings and then downgrade intensity or increase speed.
I think they’re erring on the side of making sure something cuts so right now (especially in corners & where it makes a tight turn) it overburns - it’s not dropping the power in corners when it’s going slower around a point. They’re supposed to be working on that.
But you can access those settings by clicking on the operation and picking Manual Cut after first picking Proofgrade Cut - the PG settings will show and you can then adjust them for that operation for speed or power (and all the other settings too).
It took me a few tries to get the correct settings that allowed a clear cut with no flashbacks that affected the back of my designs.
Glowforge/Proofgrade default was 183 speed and Full Power and height 0.125 for the medium draft board.
The setting I ended up with was 220 speed and Full Power. I tried changing the power to Precision Power 100, but it wouldn’t cut all the way. I’m not too sure the difference between Precision Power 100 vs Full Power is especially since the documentation says the Precision power is supposed to be within 1-99.
Anyway, my findings is that the sole contributor in making my boards clean was the speed setting set to a higher speed than the proof grade default.
The power settings from 1-100 are the same for Basics and Pros. The Full setting is the max for each machine. Since the Basic is only 40W and the Pro is 45W, Full is different for each one. But since 1-100 is the same we can share settings between machine types as long as they’re in the 1-100 range.
If you’re sharing settings with Full power, you want to verify it’s the same type of man hine (Basic or Pro) so you can tell if it will work as expected on your machine.
Would you mind sending me a photo of the back of that print if you still have it?
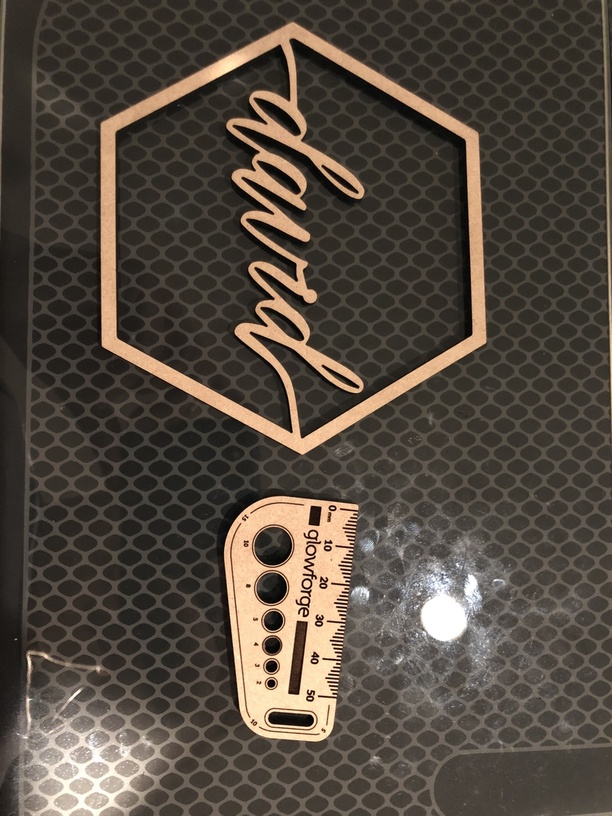
If not, we included an extra piece of Proofgrade Draftboard with your materials shipment for troubleshooting. Place the Proofgrade Draftboard in the center of the bed and print the Gift of Good Measure using the default settings. Then send me photos of the front and back of that print.
Also, have you noticed this issue on other Proofgrade materials? If so, would you mind printing the Gift of Good Measure with Proofgrade settings on the other Proofgrade materials that are affected and send us photos of the front and back of those prints as well.
Can you send an extra draft board? Unfortunately, I threw all the bad pieces away. I can re-cut it again and print the Gift of Good Measure if you can send a draft board over.
I have not seen this in other proof grade materials, but I have not tried with the same design on other materials.
Thanks for checking. The delivery was sent to another location and I had to track it down within the community. I have it now, but it’s late and I won’t be firing up the glow forge tonight. I will do some glow forge work in the next couple of days.
I wanted to check in and see if you’ve been able to do any printing. I hope everything worked out and you’re seeing better results! If not, just let us know.
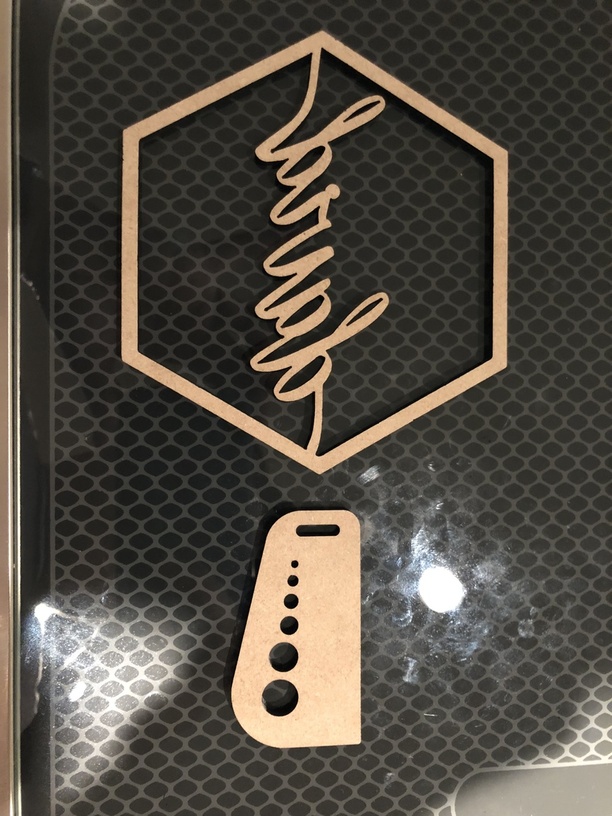
I did re-print and did not see any issues when printing the Gift of Good measure. I also printed the name plate after it to see what happens. No issues.
This one isn’t as bad as what I was seeing when I first started up the glow forge. However, I have many hours of the glow forge now and haven’t gone back to these designs in a while.
This was for my wedding and I wanted to make name plates for each guest. We re-printed ALL of the non-usable ones that had this problem. It just wasn’t a clean product to even show. TBH, it would have been embarrassing to actually have used. We have wasted roughly about 10 boards in a row before I figured out a work around, which was to manually change the settings to a higher speed.
Although the experience and what the glowforge is now producing is much better, I still feel uneasy about things. This issue I just one of few that I’m experiencing which this seems like the laser was too powerful or operating too slow. Other issues consists of the print not cutting all the way through, which indicates to me that the laser is not as powerful or too fast (yes, I checked if the board is flat).
Bummer I cannot reliably reproduce this issue anymore, but once in a while it does come back up.
I kind of forgot why I had asked to be honest hah. But, I downloaded the files and took a look.
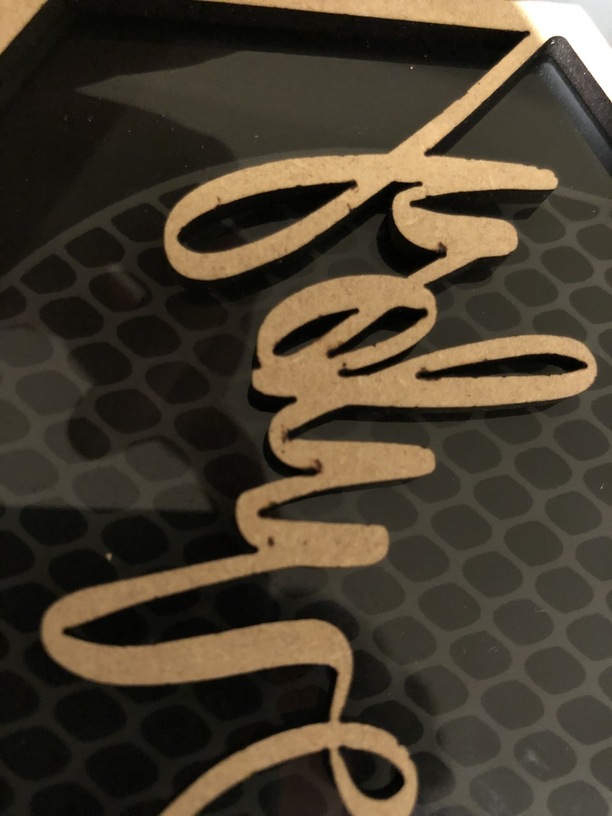
The reason I suspect you are getting such bad marks on the back are because the lines are all duplicated. Have you watched the cutting process? It should be making 2 passes with the way the file is set up.
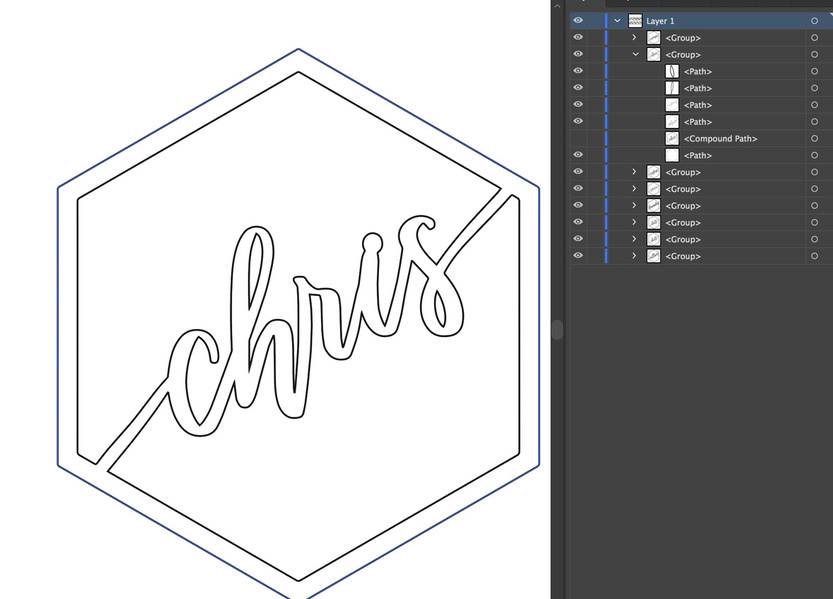
Here’s an example of one of the Chris nametags from the top left of Board 1.svg. I expanded the group that contains all of the Chris components for this name tag. See how I have the Compound Path object hidden but the other objects visible and everything still shows up?
You need to go through and delete all of the extra paths. The easiest way would be to go into each layer and either hide or lock (either will work) the compound path for each group, then select all and delete. The only thing left then should be your compound paths, which will only cut once and drastically reduce the flashback and charring you are seeing on the backside.
This is also the reason that you were able to increase the speed so high in your above post and have it cut through.
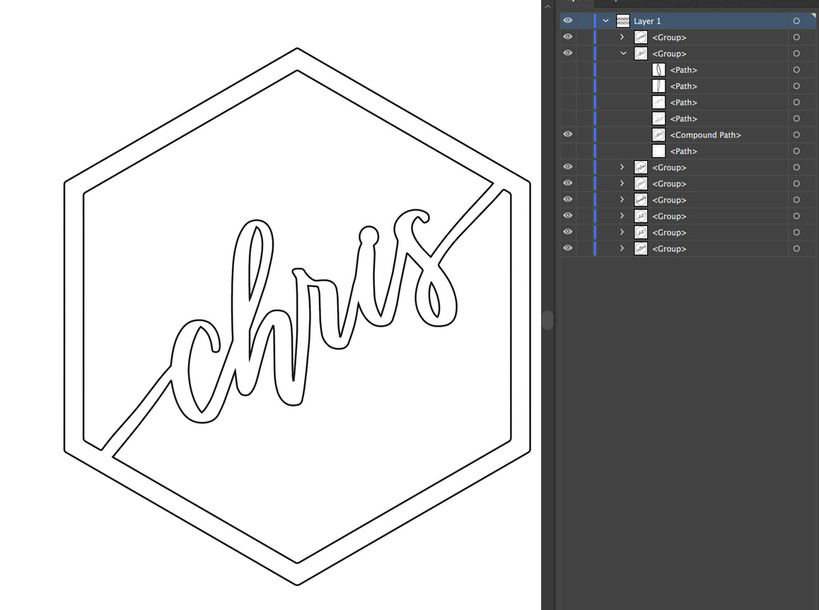
Here is one other screen shot showing the duplicate paths on top of each other. I dragged one of the anchor points out of the way to reveal the line beneath it.
One of the things you’ll need to do is open the image trace window and trace from there. Click the advanced options dropdown (I think that’s what it is called) and then Ignore White.
If you leave that box unchecked, it will create paths for the white areas like you have on the interior. Those pieces have a black stroke and a white fill.