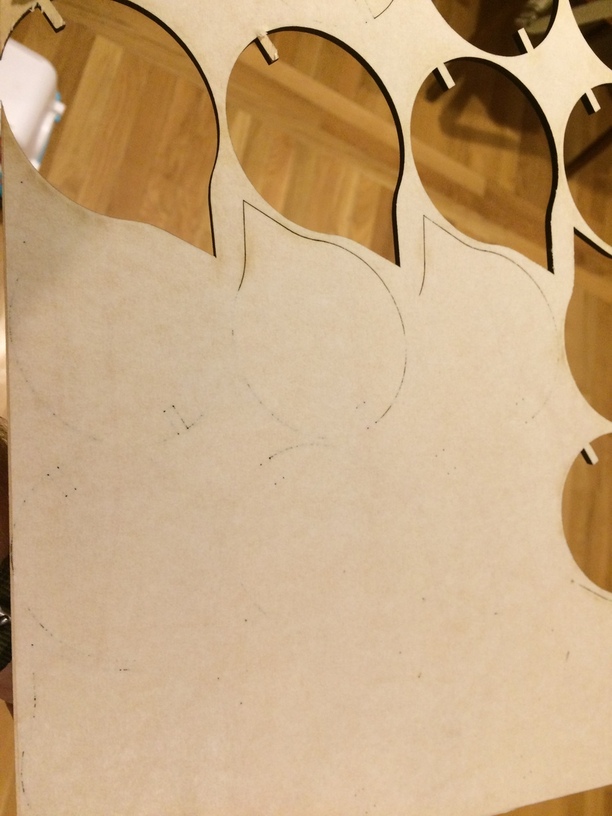
Proofgrade Maple Ply. Almost half of the sheet did not cut through. Settings are pretty much proofgrade, but I slowed it down a few points because the previous sheet had a bow in the middle and I thought that would help. This sheet was pretty flat.
Any ideas?
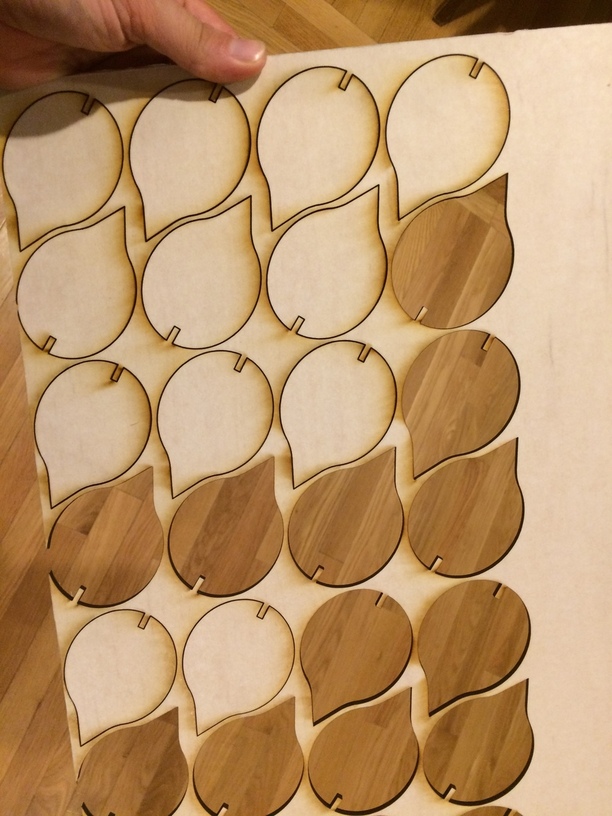
I’ve never taken the tray out since I got it and have made many cuts, and I haven’t been cutting anything small lately that would leave behind little bits behind. I cut a full sheet of parts out of medium draftboard right after this one with no problems.
It’s strange. Not clear in the pic, because the back tape was still on, but looking at the bottom side some areas look like the bottom veener is barley scored.
The slightest, and I mean the very slightest warp will cause this very problem. GF has been extremely conservative in their settings for PG materials. They seem to make the settings just powerful enough to get through the material while minimizing charing. I never use PG or other materials without magnets to hold the material dead flat.
Thanks for the tip, but I think PG should cut every time. I have seen this GF cut through Draftboard with an ugly bow in the middle and the parts just drop right out. It should do the same with PF ply. I guess I don’t understand why a material that bows up is an issue, then again I don’t know much about lasers.
For my money, they need to either change the settings or send a pile of magnets with each order.
I’m grumpy because I ran out of material for the project, so now I have to wait.
I’m with you, there should always be enough power to cut every with some warp.
I have gotten into the habit of making sure all is cut thru before moving my boards. I hold the board down with one hand and use a bit of tape to grab and lift the cut pieces. I’ve had to make several second passes to get full cuts which only works if you don’t move the material
Currently the multipoint focusing is not implemented so it’s not possible for the machine to determine if material is bowed. So that means the material has to be dead flat. Yes, if enough power is used even badly bowed material will cut but it would increase the width of the cut line and may badly char the edge of the material. Gets ugly fast. Getting the perfect cut even on homogeneous material requires just the right power, speed and focus.
So that said, I’ll let everyone else worry about what should and shouldn’t happen. I’m just trying to help you get a good cut. For starters, if you want a successful cut with the current implementation you need to have the material flat and that usually requires magnets. Also, for some reason the automatic settings for Medium Maple Proofgrade uses a focal point of 0.130". The material is closer to 0.145" thick. More than half the time it will not cut through for me. Don’t know why. Might be that my material has absorbed moisture from humidity, might be a wrong focus. I do know that if I raise the focal point to 0.145" for that material it cuts through 100% of the time with all other settings automatic. Just FYI.
Ah, so you are raising the focus to the actual height of the material. That makes sense. I couldn’t see how raising it above the surface would cut deeper but raising it to the surface can.
I am not sure guaranteed cutting of PG isn’t an impossible dream, perhaps like many other promised features. The material itself must have some variation and humidity might affect it as you say. Also the laser tubes must have some variation. Even if they calibrate that out then that calibration has some tolerance and it must vary over time as the tube wears out and is probably affected by temperature as well. Once all those variations add up the only way you can ensure a cut is to apply a lot of excess power I would think.
Yes, my previous discussions about raising the focal point 0.015" had nothing to do with what the correct value should be. If material is warped it might need to be raised higher. I was trying to explain that 0.015" was the difference between not cutting through at all and a perfect cut. So therefore any warp or variance in material thickness would be a big problem.
great info, Thanks. So looking at my results maybe the side that did not cut through was actually touching down on the honeycomb and the side that did cut was floating slightly. I was also wondering, since I was doing a lot of cutting that night, if it might have been a duty cycle issue. I haven’t seen much on this forum about the duty cycle of a basic and I’ve never seen an overheat warning as others have, so I wonder if the laser needs longer resting periods between cuts?
FWIW, when measuring material, I have noticed that rounding material height up instead of down makes a huge difference.
In one instance, when engraving on a round object, slightly lower areas did not mark at all.
In another instance a section of my material warped upwards as it was being cut. Later in the same operation a hole was cut at the end of this section, which was raised a good centimeter off the grid. The hole cut through, but was several MM wider than it should have been.
Wasn’t so much advice as explanation that slight focal point changes improve my ability to cut. Is it because my material is slightly warped?; humidity affected my material?; Crumb tray sitting too high?; or any of 20 other variables. Don’t know. I found a fix for my cut through issues.