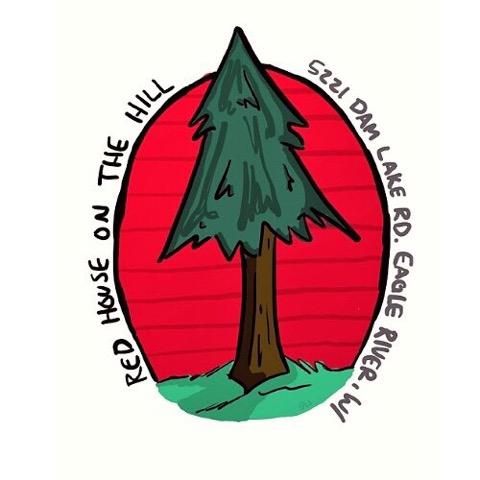
The beauty of a Glowforge is that it can make a person’s ideas come to life if you have the patience. My friend is a small woodworker, and had someone ask if he could make a large sign for their father’s house. They sent an image of a drawing their brother had made as the idea for the sign to him and he started brainstorming.
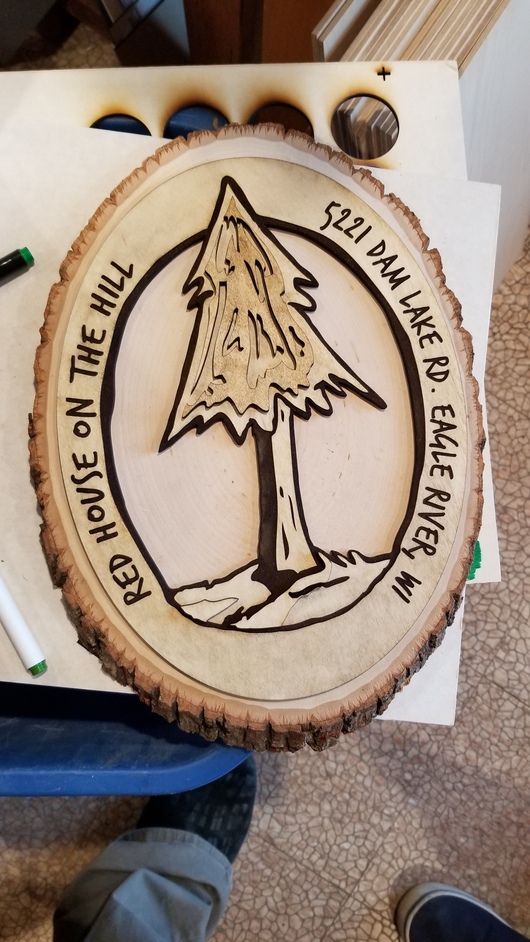
I started with the idea of engraving wood that he routered and then laying over top of red acrylic (prototype 1). He then took the idea a step further gleaning from someone’s youtube video of making the layered weiner dog using a glowforge and acrylic (sorry I forgot who). We decided that would be too expensive for the client who had a budget, plus too many layers for how he envisioned it. Then we decided to stick with a layering idea so I pulled out some draftboard and went to work. Since draftboard takes markers so well, I was able to “dye” the wood and layer it in a 5" sample. Both he and his client loved how that looked, so we had approval to go towards the final and larger product. Right before cutting the final product I had a brainstorm of an idea to really tie everything together, and to make the shape more organic since the original shape was hand drawn. I thought the great way would be to get an oval slab of rough cut natural edge wood to mate the laser cut layer pieces to. I think that brainstorm worked out great.
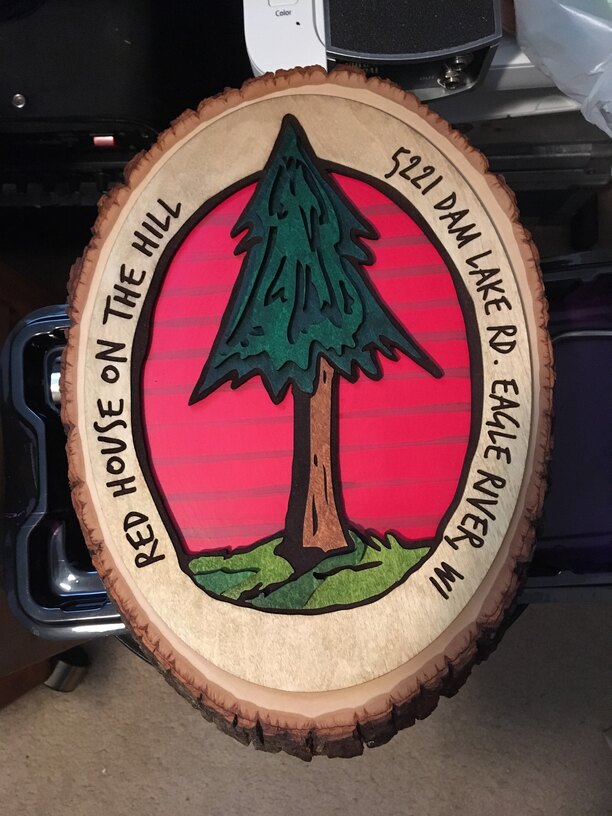
The final product came out to just under 12"x9.5", on an extremely dense and quality plywood from a custom cabinet shop. We used alcohol wipes to take the char from engraving to darken and age it rather than stain.
Original image
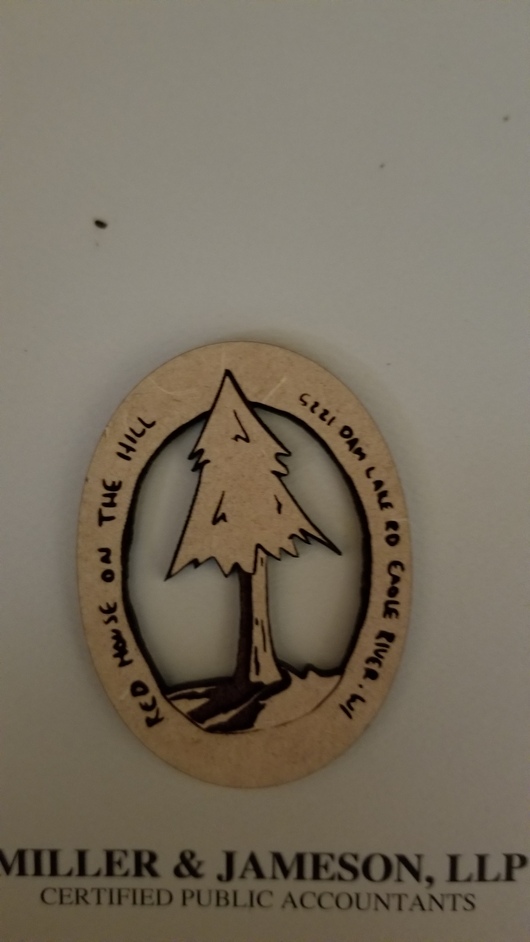
2" engraving idea and rough sample of final details.
Prototyping at it’s finest in stages, practice makes perfect. Showing the layering idea and coloring using draftboard. Went from the 2" to a 5".

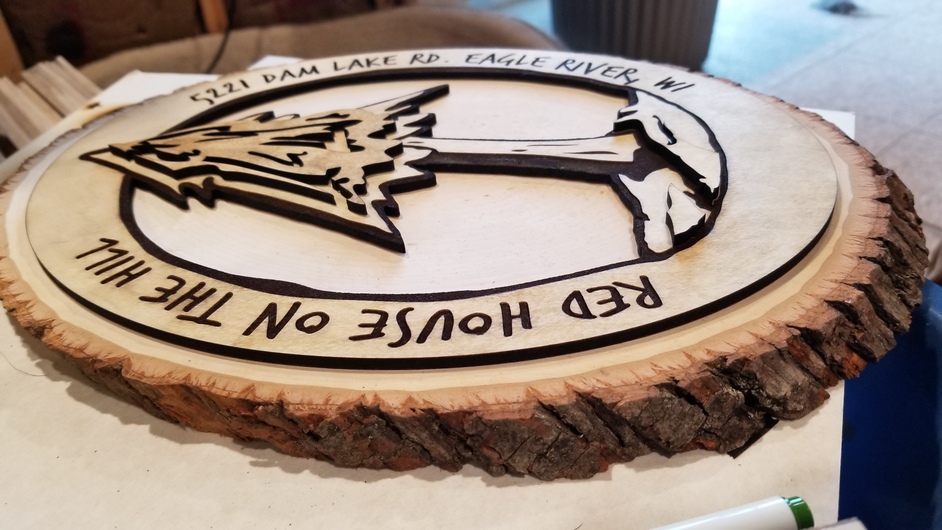
Almost final.
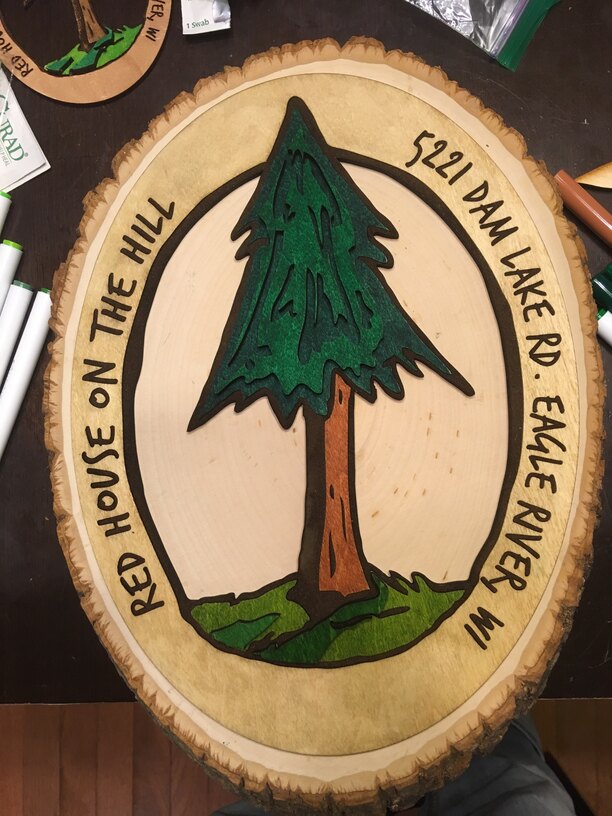
Final