Following up for anyone curious who searches puzzles.
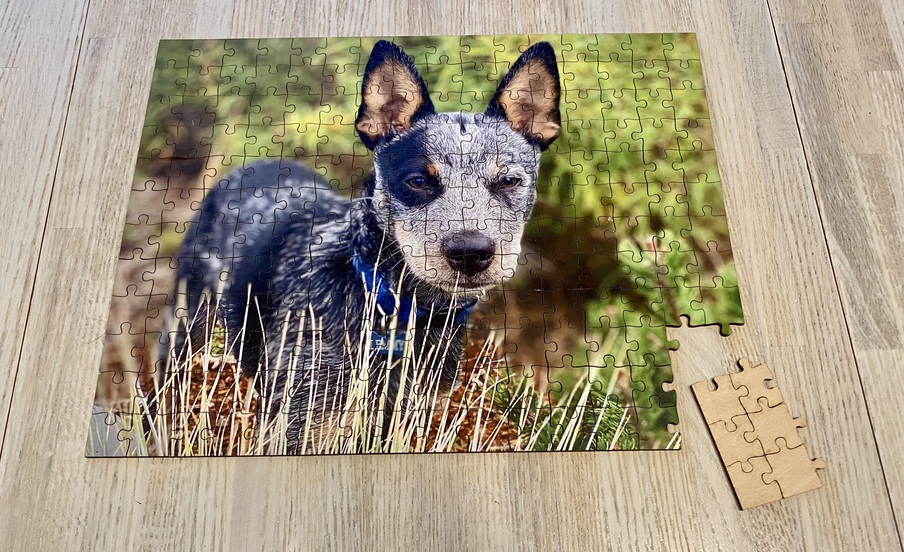
Last night was a lot more successful. Here’s the completed puzzle. showing no scorching and a video showing that the flame basically disappeared. Unclear whether the flame disappearing was a) cure time (about 2 hours vs. 20 minutes), b) sealing (2 coats minwax matte poly) or the c) masking (which I only did on the image side)
I was using 1/8" Russian Birch at 190/Full/.12" focus and had very little scorching on the verso. It’s definitely the case that you want to have a straight a piece of wood as possible as warp cuts get a little strange.
I screwed up and setup the image in a way that made it really hard to think about unmasking after the vertical cuts… next time I want to solve that. I’ll probably simply extend the horizontal cuts a quarter inch past the border and score a second border to make it easy to weed the mask after the first round of cuts w/ low risk of material shift.
Has anyone successfully done an oversized puzzle using either some type of registration trick and tile printing or with the pro slot? 11x14 is a nice gift size, but difficult to get more than around 200 pieces. Given the kerf, feels like you really don’t want to shrink much beyond that size.
Any tips on focus that might help minimize the kerf appreciated. I’m happy with the outcome, but I’d love any tips on how to tighten it up.
Salt on the shopping list. Looking forward to seeing how that works out.
Link to non-flame video. Same wood. Setting shift from 220 to 190 feed rate. Primary difference is the addition of mask and 2 coats of sealant.
More kindling and experience to share with some questions people might have some experience with.
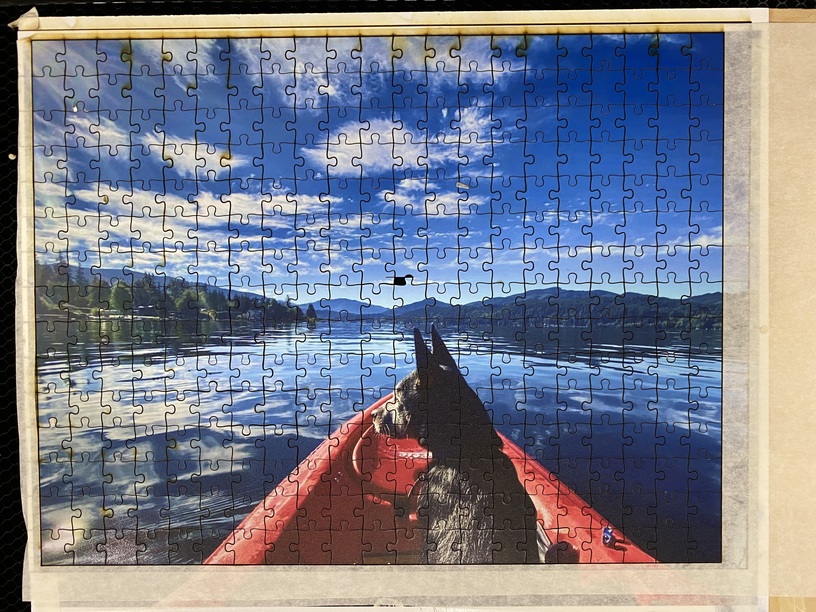
Okay, apart from a rogue stroke in the middle of the puzzle, this one was going to go well. I mounted and sealed it, curing it overnight. I masked it (squeegied) and broke up the hor/ver cuts with overcutting so that I could de- and re-mask.
Despite this using all of the same materials as the other print, a number of things came out differently
I got some image charring. The only thing I can think of is that I didn’t squeegie the second round of mask because the first was difficult to remove. Could that be the culprit?
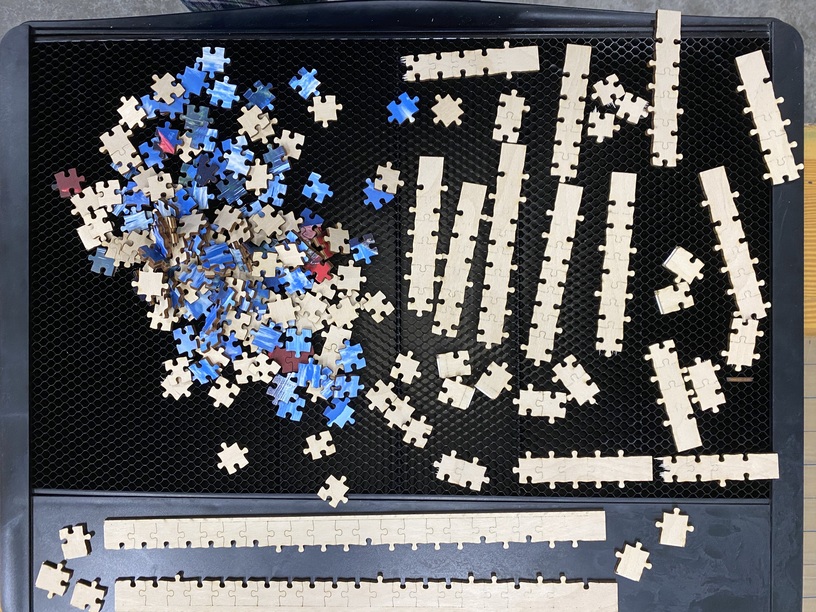
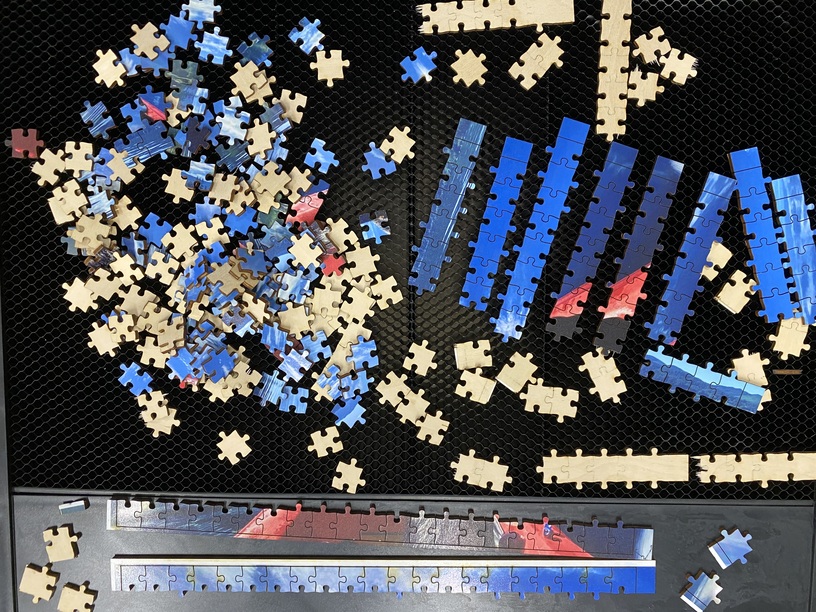
I didn’t get clean cuts all the way through (perhaps this is related to the charring to?). I was using 190/full/.12 just like previous puzzle. Sure, there was some minor warping, but I did have the stock pinned down and there was a LOT that didn’t get fully cut. 80% were perfect and the other 20% weren’t just one area (see photos)
I didn’t have the horizontal and vertical perfectly aligned b/c GF got confused. I had two “groups” in the artwork. Setup one to cut (horizontal) and ran the job. Opened the lid and de-masked the strips, remasked the piece. Closed the lid. It re-scanned and I setup the second “group” (vertical) with the same cut parameters (weirdly I cannot seem to figure out how to remove the group already cut - i could not remove it from the art, nor could I “zero” the cut parameters). Then I got a pair of errors and had to reboot - which meant that I had to re-place the artwork visually (not ideal).
Any thoughts on the scorching, how to ensure a good through cut (just subtract 10 on speed?) , how to do multi-pass without resets and how to minimize scorching appreciated!
Here’s the SVG for those curious about my inability to remove the first pass group, or interested in an 11x14"-ish puzzle setup for easy two part weeding (just be sure to cut horizontal first pass) . Pieces are probably the smallest I’d choose to deal with.
One thing I forgot - another variable that I just thought of is that I calibrated the device last night using the ~30min process with the patterns on chipboard verso. That did happen between the garden and kayak puzzles, so perhaps my improved calibration affected things? One thing of clear note was that the straight border edges didn’t all cut through, so I’m wondering if straightline speed is a little “higher” in the sense that there’s no overlap like there’s bound to be on cuts with curves or angles? Like I said, it was pinned down, so maybe the edges were tightest to the tray?
This is absolutely true - in fact one of the big improvements they released was to get rid of overburning in tight corners, but anytime the laser has to adjust belts it slows down ever so slightly, so you want to test for straight lines and curves and find your happy place between them.
Notice your scorching is on the edges. That even more points to your masking not being down as well there. No scorching in the middle because it is well adhered there.
I think you will really be pleased with how well your edges clean up with the salt trick. Somehow my salt container recently disappeared so I picked up some new coarse sea salt today.
I’m new but puzzles are part of my focus as gifts for family and threads like this are very helpful. I just have a thought on the wood backing for the puzzle. I debated backing material, spoke to a couple of personal friends about it and they asked why go the extra expense for wood. I did some looking around and pondering and finally found a good solid medium, mat board like they use for mat and lining of pictures.
I bought some via Amazon and found it to be rock solid and a lot cheaper without losing the quality of a firm backing.
Only way to know for sure is to give it a try. What I would watch for is it leaving debris/dust/powder on the pieces, especially on the faces. That’s why I prefer small’ish pool salt vs table salt (salt comes in a lot of sizes!) — it tends to not leave any trace when it’s done.
 . Pieces are probably the smallest I’d choose to deal with.
