Try draft graphic if you’re against changing settings (although personally I prefer to dial them in for exactly the result I want, and then save them as custom settings that I can call up easily the next time). And remove the masking when engraving, it serves no purpose except to obliterate fine details and leave gooey residue that’s a pain to clean out of the engraves.
This works as long as you’re not working with exact final size constraints. If you need the text to engrave exactly 1" tall you should size it in your editor, then export as a high DPI. 600 is high enough for most things, 1200 if you want overkill. The files get larger and processing takes longer as you increase DPI, but for most things 600 is perfect.
Testing is key. @hugoender42 I get it that you just want it to be drag-and-drop simple, but there are a lot of variables when engraving, there’s a minimum complexity to these things. If you have a really firm and unmoving end result in mind, you can expect to have to work at it to get that result – it’s a little unavoidable.
I’m going to have to respectfully disagree on removing the masking. The masking is key to ensure a clean end result. Without masking I’d get residue all over the wood that I would then have to sand off. With the masking I just peel it off and it’s clean! I haven’t had an issue with masking messing up fine details.
I agree, however if I’m getting the result I want with the presets then why go through the trouble of testing and coming up with my own settings. There seems to be many ways to skin this cat and I was looking for a way that would save me time while still using presets. The raster may or may not save me time if I come up with my own custom setting for it. Will have to investigate.
Oh I don’t remove anything from inside the engrave. I don’t think there is anything inside my engraves to remove. Are you saying you get left over masking tape inside the engraves? That’s never happened to me.
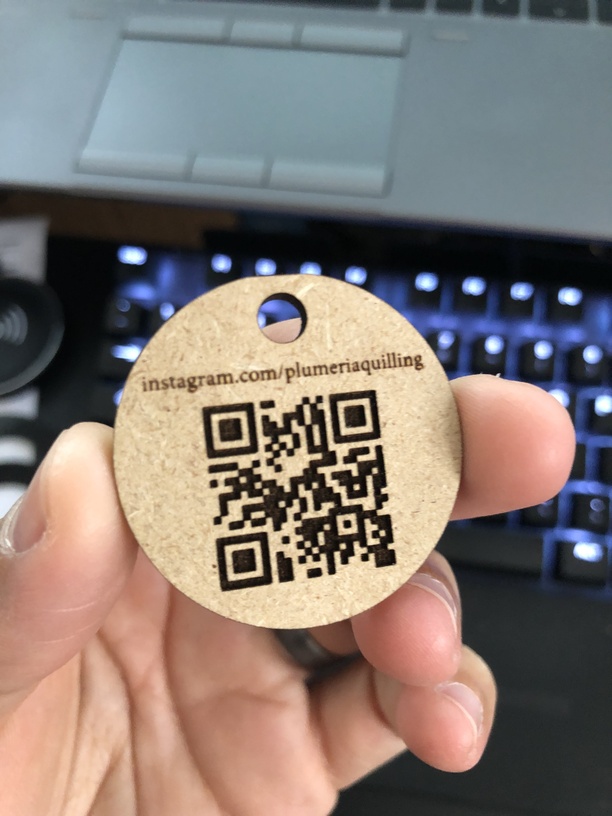
Here’s what my end product looks like after removing masking and doing no further post processing. Not sure it gets any cleaner than this! (the text looks blurry but that’s just me moving the camera while taking the picture)
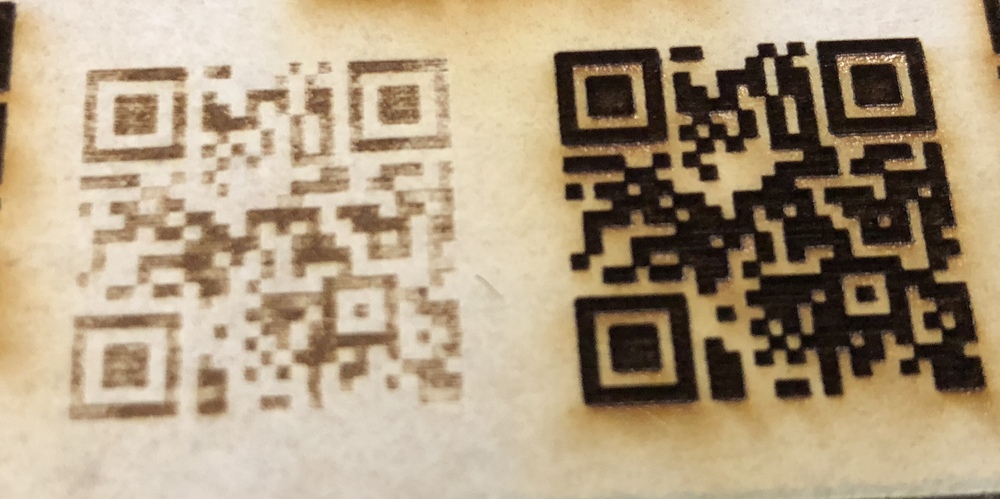
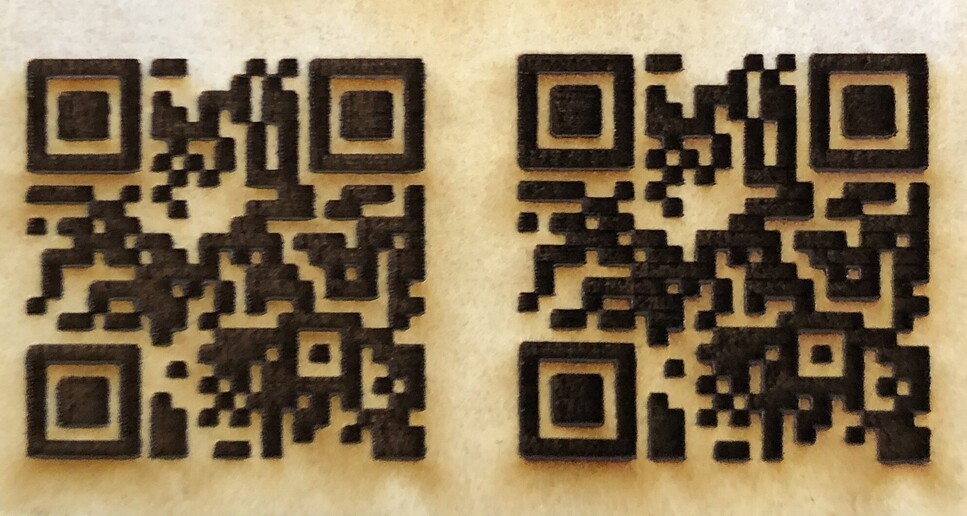
The question is why did the raster look so weak… did you see @geek2nurse’s comment about the color? Was your raster version black and white? If you’re seeing wildly different results on the named settings that seems strange. Then again, I’m no proofgrade settings expert, I almost never use the stuff.
Also, engraving on hardwood is a whole different thing. That’s when you’ll discover how much goo is in your engrave, because it will obscure the grain of the wood, and be hard to get out. It’s not a big deal with draftboard, since it’s basically made of goo anyway.
Well the real solution would be to have GFUI load the SVG exactly as I see it in AD and not use Non-Zero winding only. Maybe have a toggle button that lets you choose between the two fill modes.
I must’ve missed @geek2nurse 's comment about the color. It was originally green so I just changed it to black and tried again. This time it came out MUCH better.
Well, sure, but the SVG file format leaves a lot to be desired, which Glowforge has no control over, so don’t hold your breath. I’ve gone to using PDF instead; it doesn’t have as many issues as SVG.
But in this case the problem is 100% Glowforge’s fault. The SVG format has supported both fill modes from the beginning and any standards-compliant implementation of SVG needs to support both of them. Glowforge does not. That’s a bug and a pretty big one at that.
But don’t hold your breath waiting for Glowforge to fix it; I reported this bug back in 2017 and they hadn’t done anything to fix it. (It used to be worse, though. It used to properly display the SVG on screen, but then print wrong. Now they display it wrong on screen so what you see is what you get. That’s better (so you can see that it’s messed up before you print) but it’s still not a fix.
Glowforge does handle the even-odd fill mode better in PDF files for some reason. This is one of many reasons I prefer to use PDF with the Glowforge. (others include more accurate sizing (no worrying about DPI settings when exporting to SVG) and the ability to include text without converting it to curves. Not that PDF is perfect either; Glowforge has a habit of turning clipping rectangles (which are common in PDFs) into rectangles that it wants to cut. (So you have to go in and set them to “Ignore” or delete them possible.)
Affinity Designer’s tools have gotten better for editing curves in the last few years. It used to be that the “reverse path” tool would reverse all the curves in a particular path, regardless of what was selected. Now it only reverses the selected curves, so you don’t have to jump through the extra hoops of breaking things apart and recombining them. But that could all be avoided if Glowforge fixed their software.
I cannot agree with you more. Glowforge should fix this. If I can open up my SVG file in all vector programs (AD, Illustrator, Inkscape, etc) and it shows up fine and then I import it into GFUI and it’s messed up, then GFUI has an issue.
Magic is great but it needs real mechanisms in the real world. With insufficient data applied, the result will be insufficient. With even the humidity and the time since created being relevant variables, especially with MDF, only thoughtful care in deciding the settings will suffice.
When engraving an area, the masking will be gone where it is engraved, so removing the masking in just that area is no loss but the quality will be better as the masking will not make a mess of it. I do this by scoring the area first and removing the masking just there.