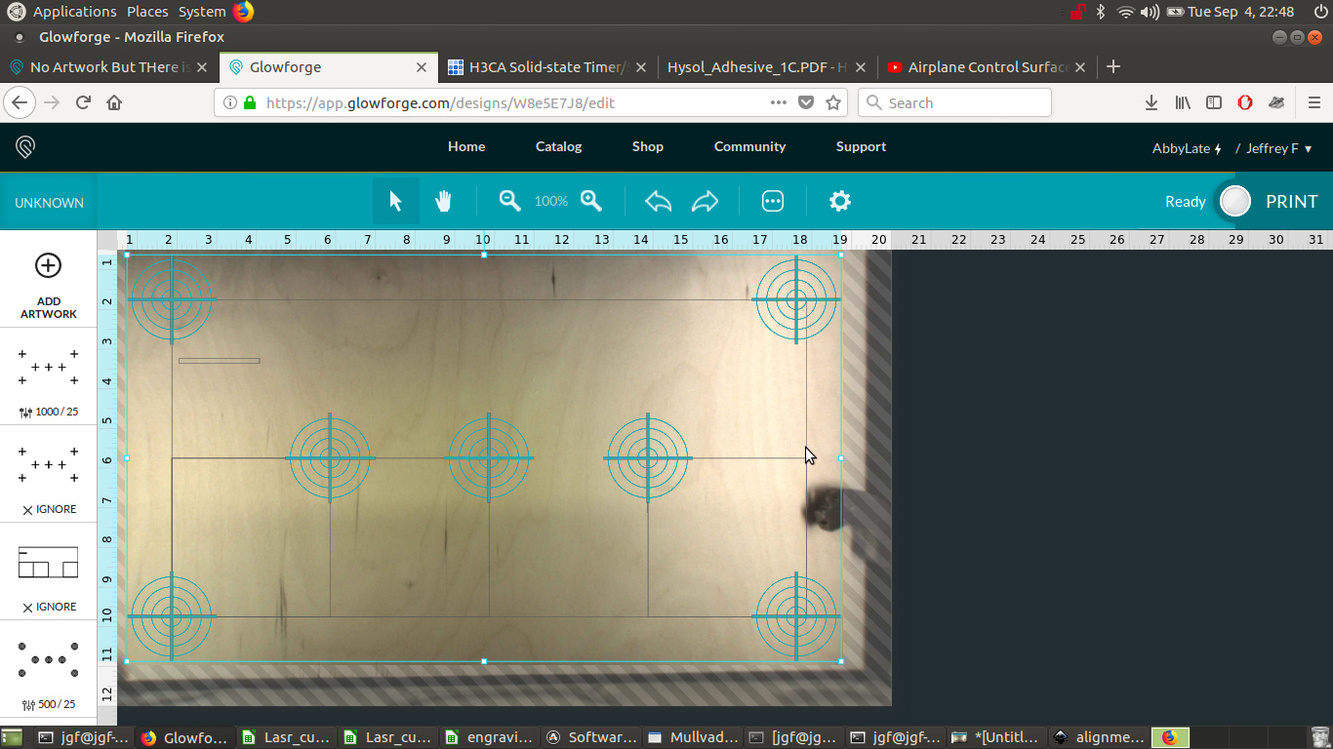
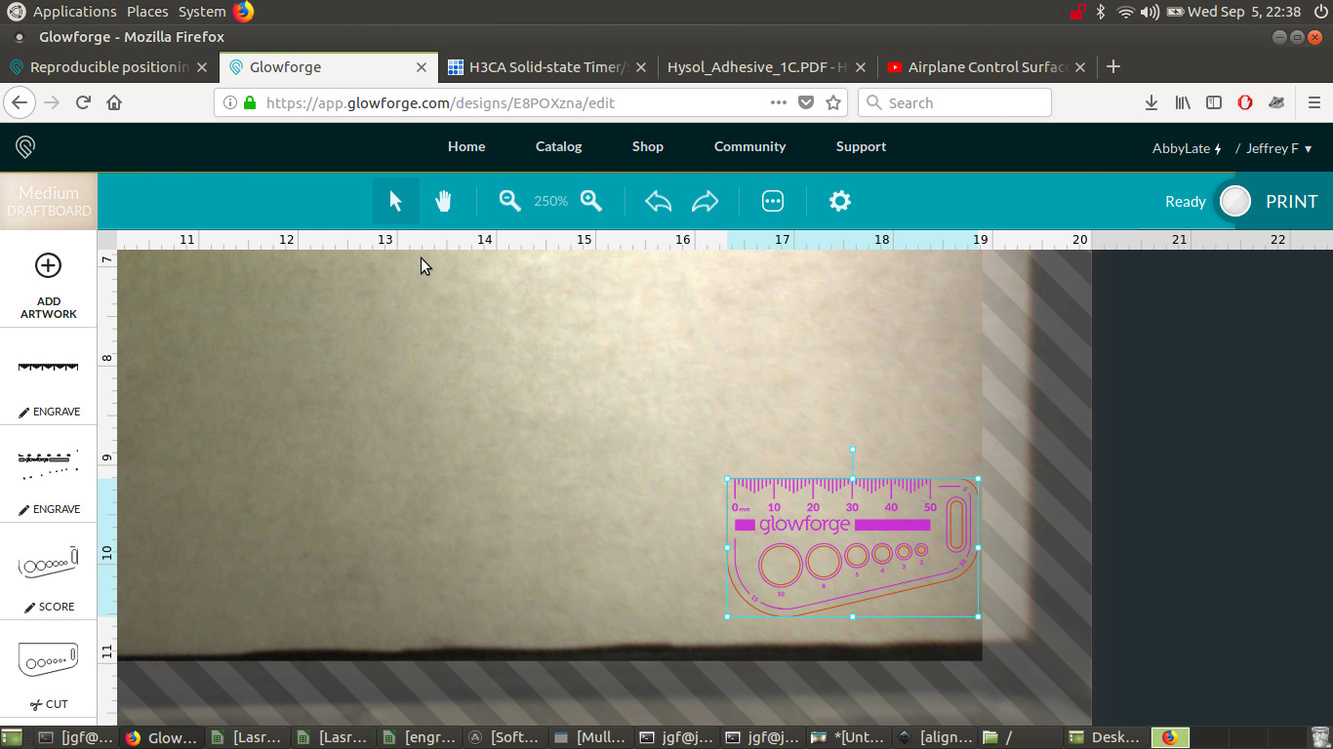
I created a set of widely spaced bullseye patterns to determine alignment offset on my pro unit. The original svg file was created on a 20"x12" work space and the outer four bullseyes were placed 2" from each edge. The bullseye pattern has 2", 1.5", 1" and 0.5" circles. An engraved cross in centered on each circle pattern. The right two targets were outside of the cutting area, so I moved them 0.25" to the left. In the image below, I manually move the set to the left a bit to be inside of the cutting work space outline by the hatched areas.
The material is 0.125" birch plywood.
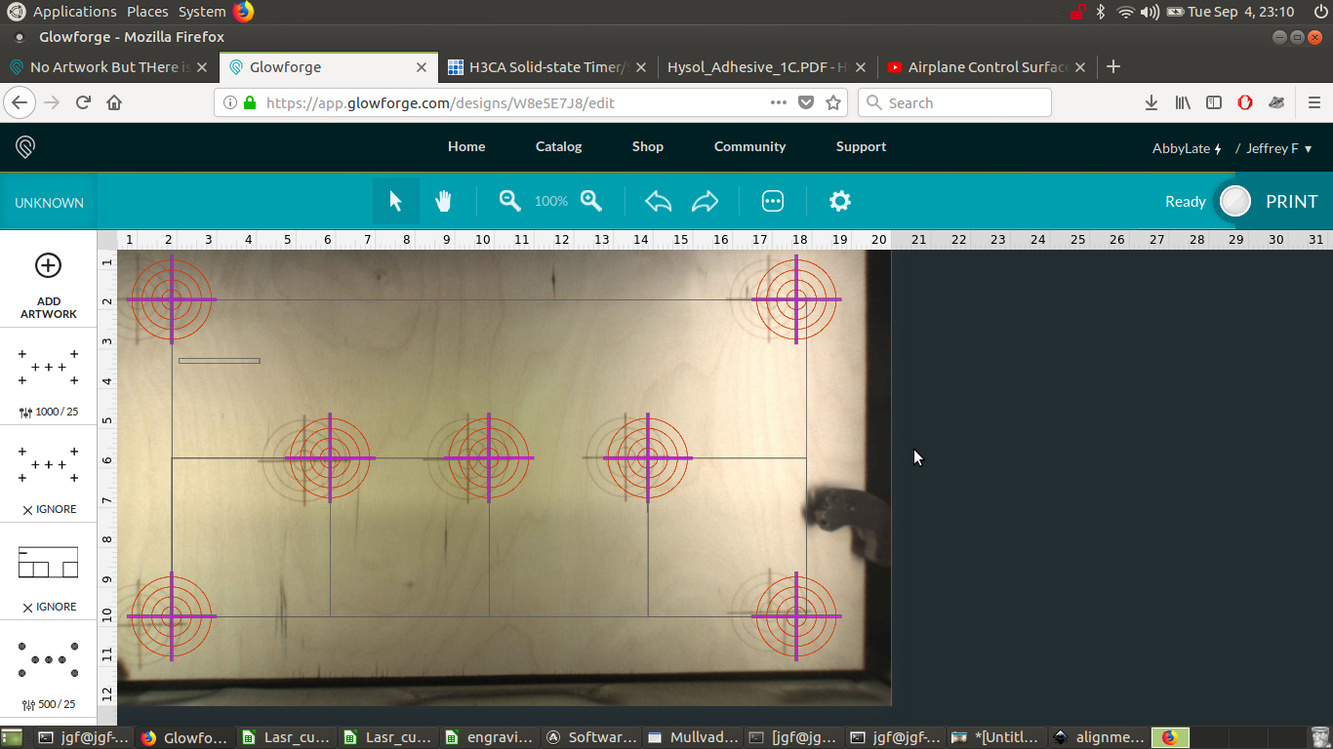
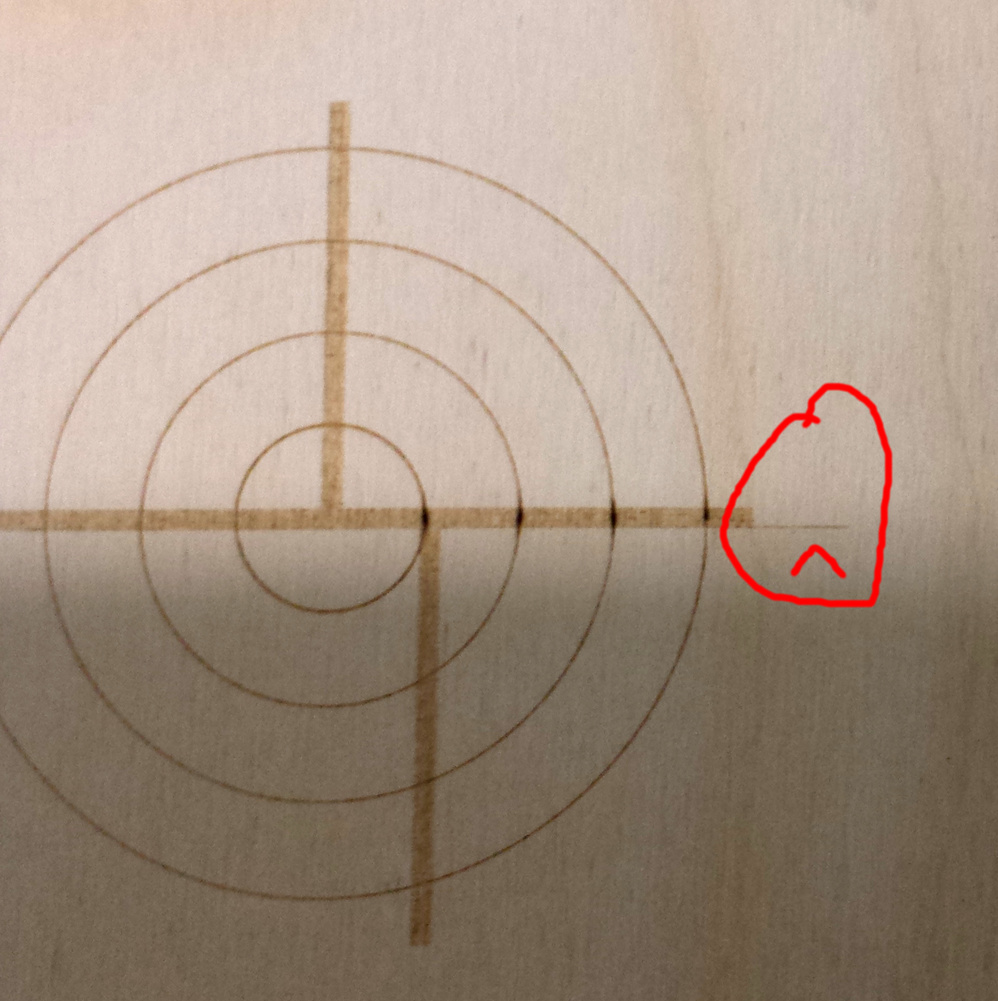
The engraving started at the lower right and proceded correctly until the horizontal arms of the cross was engraved and the first pass hit on the right side with a knock sound and caused the alignment to change, as seen in the after picture.
All of the engraved and scored lines have moved to the left.
I though that the design might be too close to the right side, so I moved the left two targets in the svg to the righ by 0.25".
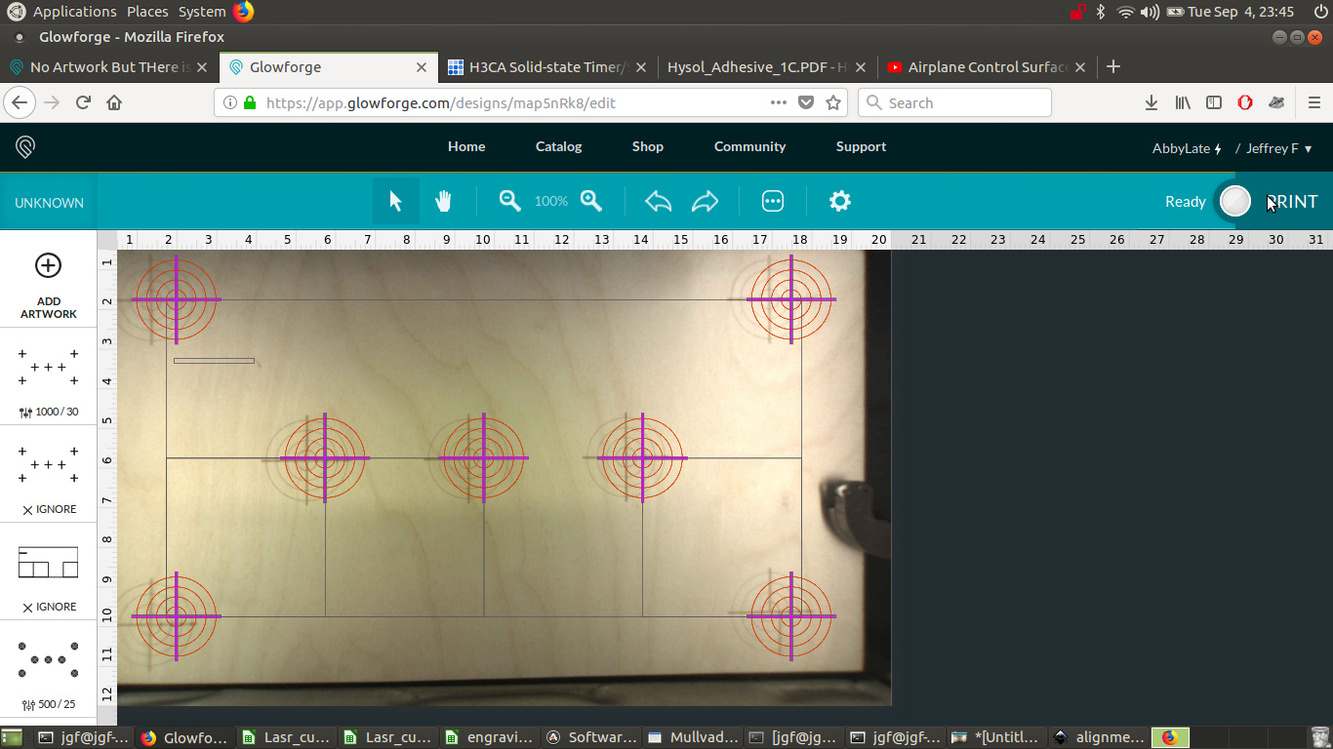
I manually centered the design so there was more space on the right side.
(no before image available.)
The same shift occurred with more space between the design and the hatched area.
Presumably, if I move the outer targets towards the center, especially those on the right, then this positioning error will not happen. The question is how far to move the targets to the left?
You’re definitely not the first to have encountered this problem. There seems to be an issue on some machines with the laser head hitting something in the lower right corner.
I just cut something in that area yesterday, possibly for the first time (I think I may have been subconsciously avoiding it) and apparently crossing my fingers helped, because I didn’t hit any problems.
Edit: You can probably save some time by printing a Gift of Good Measure on Proofgrade draftboard in the lower right corner, because that’s what you’re going to be asked for anyway.
I did the same thing right before my warranty expired. I’d been avoiding that corner completely. Then purposefully hit that corner just to be on the safe side before the warranty was up. Luckily, same as you, I crossed my fingers, and had no issue. I have yet to tempt fate though and run a job there again.
We included an extra piece of Proofgrade Draftboard with your materials shipment for troubleshooting. Place the Proofgrade Draftboard in the center of the bed.
Align the Gift of Good Measure design with the far right boundary of the printable area.
Print the design using the default settings.
Take a photo of the print, post it with your reply, and let us know how it goes.
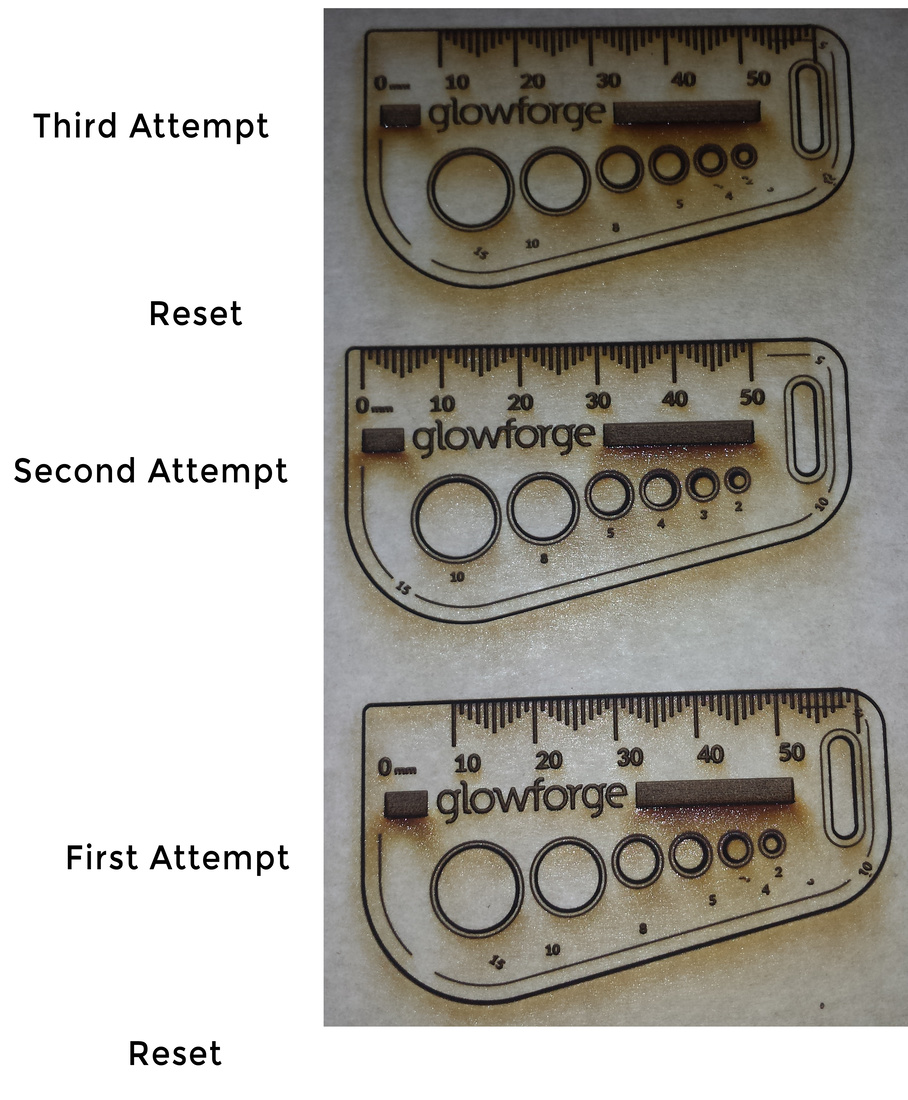
The design did not come out correctly. There are no ticks between zero and ten and
the small numbers are out of place.
I then moved the design up and to the left by about 1/16" and tried again. This is show in the middle of the photo above. This one cut correctly. The knock must have reset the calibration.
I then restarted the instrument and moved the design up and to the left a bit.
The result is shown in the upmost gift of good measure in the photo above.
It is also not correct.
I then restarted the instrument and placed the design ~1/4" from the hatched forbidden area as determined from the rule on the interface.
This also did not cut correctly, but the skip occured later in the design. Data not shown.
I suspect that moving the design farther to the left would resolve this issue.
Thank you so much for completing the test and posting the results.
Unfortunately, as we suspected, this indicates a hardware issue that we can’t solve remotely. I want you to have a reliable unit, so I’m recommending we replace this one. I’ll be in touch via email to sort out the details. I’m so sorry about the bad news.