Problem #1: When I cut it, the two bendy pieces are totally wrong. Both have a solid edge, so there is no bending possible. I see some people do NOT have this issue. Why doesn’t it work for me? All I did is open the design, no modification. I submitted this issue in the “report design” page. No feedback.
Problem #2: I wanted to start over. But I can’t “buy” the Retro Camper again, the option is not available. It just opens the existing broken design. Is there a way to delete projects from your dashboard?
Hi! Did you figure out problem #1? I’m having a similar issue… though my bendy pieces do bend, the tops get cut off… I am not sure exactly what to do… maybe the ‘square’ tops are supposed to be scored and not cut, but that doesn’t make a ton of sense to me either… but with cutting, it cuts both of the tops off where the square is… if that makes sense… is that happening to you as well?
I clicked “reset design” to load the file again. I looked closely at the parts on the dashboard before cutting. Everything looked great. I cut the bendy parts on 1/4 inch plywood. It worked perfect.
But I needed 1/8, so I loaded new material, changed the material setting to medium draftboard, and pressed cut. I did NOT inspect the part again on the dashboard. The original problem was back. The part was totally wrong, not bendy. One edge is solid. I looked at the dashboard and was surprised to see the same error there. Somehow it changed between the first and second print. All I did is move it around before the second cut.
So I repeated the same steps. Start with Reset Design. Try on 1/4 inch and it works. Perfect.
Change to 1/8 inch material. Design still looks correct. Cut bendy parts. Perfect.
It must be when I move the design around before cutting, somehow George (my glowforge) gets confused by all the lines. That’s all I can think of. I wouldn’t believe it if I didn’t see it happen twice myself. But I also couldn’t get the problem to come back again by moving the image around.
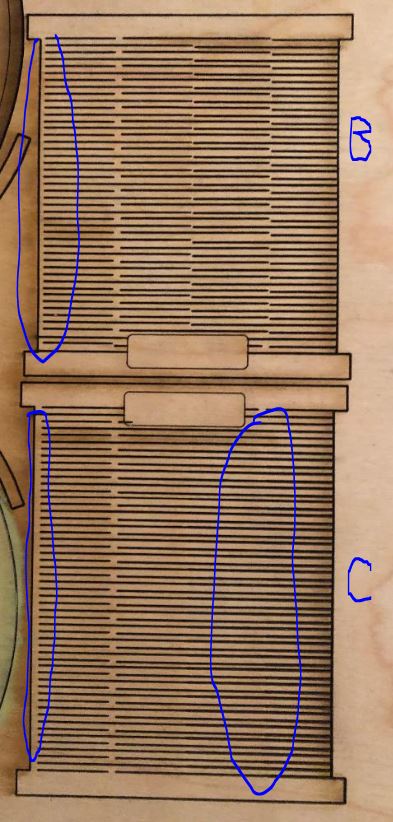
I did; thank you! I haven’t gotten that far yet, though I have the assembly instructions printed out… unfortunately, two of the pieces (pieces B and C) don’t seem to be cutting out correctly, which is my concern with this design. I may just try to put it together anyway and see what happens. Thanks for the response!
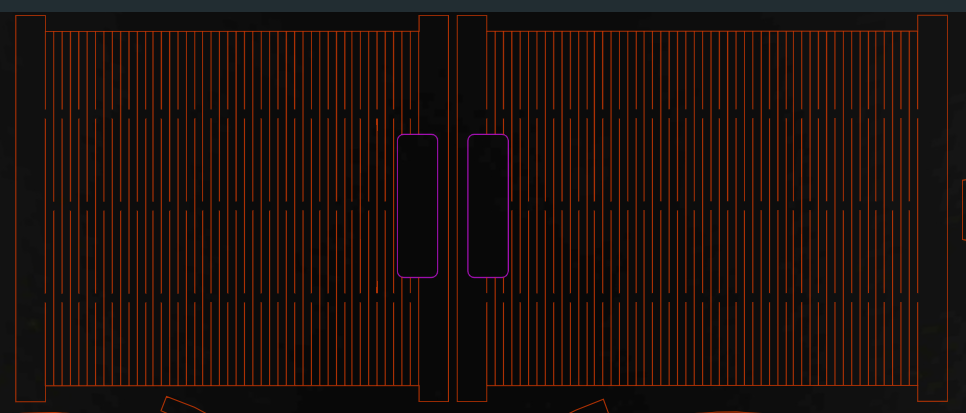
Thank you! That must be the issue then… the design opens and splits into 3 sections, with all set to cut, but I must need to change the top one to score instead
It looks like your head got bumped ever so slightly. Any chance whatever you’re using to hold down the wood got in the way of the carriage plate and/or the air assist fan (which hangs down lower than the carriage plate)?
I was not due to being bumped because AFTER the bad print - the image like you are showing was also bad. I tried for few days to fix it. I thought the design was bad.
When I finally learned how to reload the design, the image was good for 1 print, then bad after I moved it around. Nothing I could do to fix it except to reload the design.
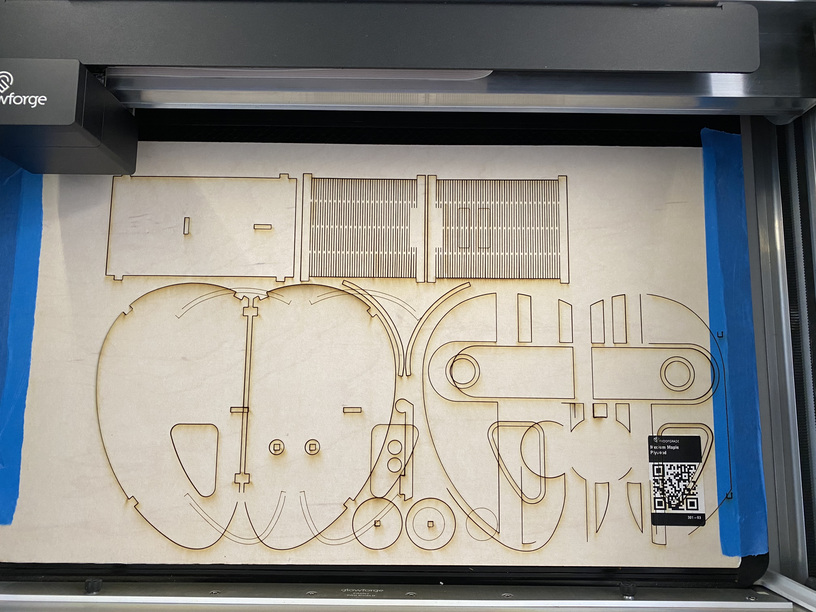
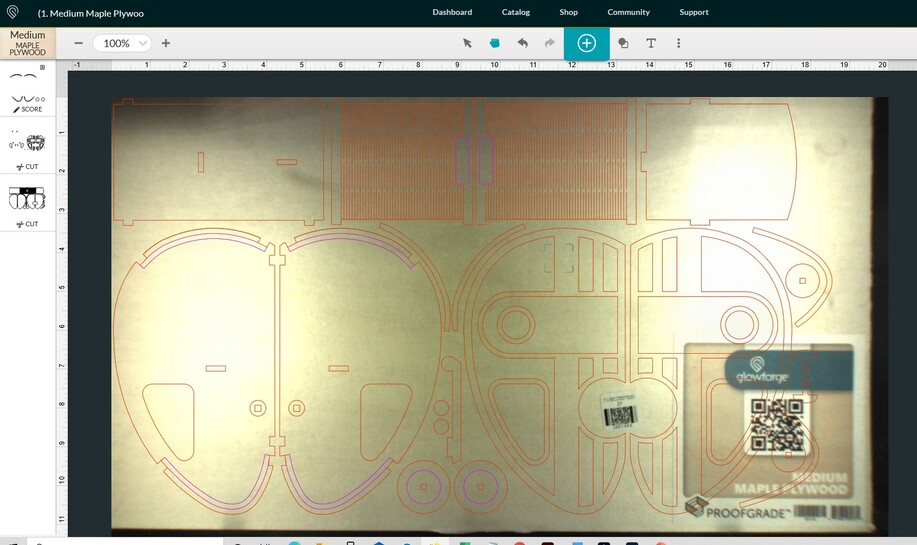
I opened a ticket on this design. I ran into several issues and the design is extremely tight to fit on a single board. So much so, my printer head ran into the front wall of the glowforge. You can see the wobbly wheel at the bottom due to the printer head hitting the wall.
Pre Cut (Looks good and there appears to be plenty of real estate for the laser to operate)
No matter what the design or where it is placed, your printhead should not run into anything at any time. Turn your machine off. Return the printhead to the home position (upper left). Turn the machine back on. It absolutely looks like your printhead got moved with the machine turned on.
I’m so sorry about the additional trouble you’ve experienced, but I’m glad that some of the fellow community members were able to provide some helpful steps.
Did the steps @dklgood provide help to resolve the snag? Have you experienced the behavior since working through those steps?
Let us know if you are running into any additional snags. We’re here to help!