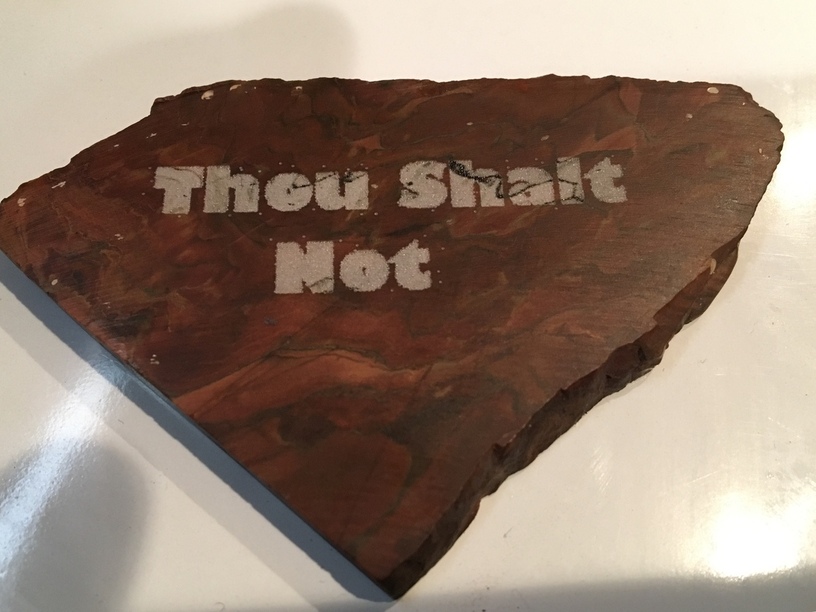
Last night (my second night after delivery) I decided to try engraving rocks, so I pulled out some slices that had been residing in my aquarium the last few years. Nothing all that exciting here, but I thought you might enjoy what I made for a militantly atheist friend:
31 Likes
Thou Shalt Not Rock !?
What do you have against the Stones?
(was punny to me at least)
8 Likes
I was thinking more along the stone tablets line, but that fits too. He’s a guitarist!
2 Likes
my first thought too 
They didn’t know it was time to retire forty years ago.
I was going to type thirty, then I did the math…sigh. I’m old.
6 Likes
Was this a made from a JPG?
Looks like there are some compression artifacts, or were the spots intentional?
If you refer to the dark areas, that is a matrix in the stone. Different minerals react differently to the heat.
1 Like
I have a bunch of river rock in my yard, so I scoured them looking for the flattest ones I could find. Then burned “I (heart) U” into one of them to give to my girlfriend, who loved it. It wasn’t any big deal, just an experiment, but it worked out for me that night! 
7 Likes
Correct. I tried to do a couple other slices I had, but they had too many inclusions that reacted badly - threw off some sparks as it was engraving, and some of it seemed to melt and bubble out black. These were pieces I picked up when my ex was getting her PhD in Geology - there was a bin out back where they would throw any samples they were done with. Wish I still lived close to there - I could have a lot of fun with these!
4 Likes
I did something similar with a piece I found that was leftover when our home’s previous owner redid the kitchen counter. Since I’m spending so much time out in the garage playing with this thing, I figured I’d better do something for her!
1 Like
He chose wisely.
2 Likes
This is what I’m referring to.
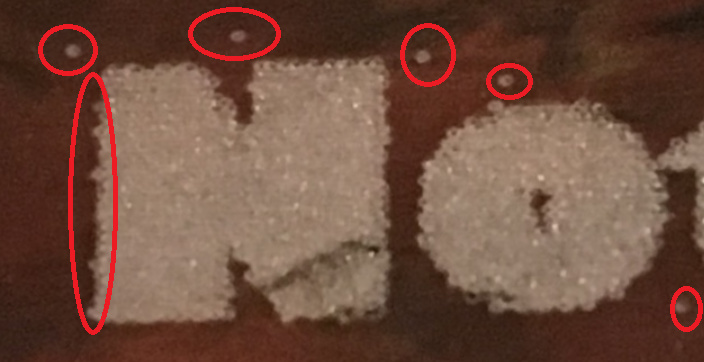
Some of my early engraves had these, making sure the image is truly B&W usually fixed it.
2 Likes
Chips from the engrave I think.
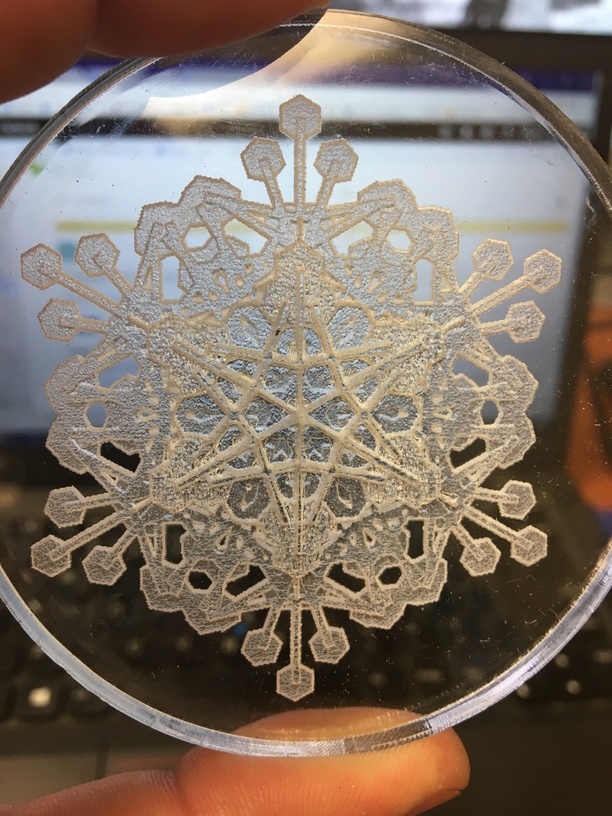
The stuff around the edges I’d say is chipping. I’ll have to look at it tonight for the ones outside the letters. As I mentioned, I pulled this out of my aquarium. I have Nerite sp. snails in there, and they leave tough little white egg cases that I had mostly scratched off. Those could be remnants of them. My process for this was very basic - just typed the message in Gimp, exported as jpg and imported to GFUI. I’m completely new to this and have a lot to learn. Last night’s lesson was depth maps, playing with laird’s 3D Engraved Snowflakes
Last night’s lesson was depth maps, playing with laird’s 3D Engraved Snowflakes
Cool! I’d love to see pictures…
I would recommend against this in the future. I am 99% confidant this is where the errant dots and ragged edges came from. GF is capable of crisp lines on engraves like this, especially at this size.
2 Likes
As I said, I’m learning. What process would you recommend instead?
With Gimp, I would say export to PDF png for something like this. .jpg is a very lossy format who’s artifacts get picked up by GF.
I’d also recommend getting inkscape (free), as you will need vector lines for cuts and scores when you get to them, and I don’t think Gimp is able to make those, and you can export as .svg which the GF seems to like most in my experience.
Here’s the tutorial page, which goes into far more depth:
1 Like
Well, ok, but please bear in mind that building the cut into the file so it is centered is tonight’s lesson!
12 Likes
If you want to keep it as an image, I’d go with .png or .bmp. I have not had any issues with those. They will engrave as is.
For just text, I’d do it in Inkscape. Format the text however you want and then select it and choose Path → Object to Path. If you load just the text (without making it a path) into the GFUI it will display an error message and do nothing with it.
2 Likes