Same picture on different materials

The last days I’ve been trying how to engrave images.
I’ve seen very beautiful results posted already.

I started by creating pictures from our sons in front of a white wall so it is easier to remove the background. This is the image I’ve been using:

I went to our local shop and got some nice materials.

First, a bamboo fiber dinner plate:


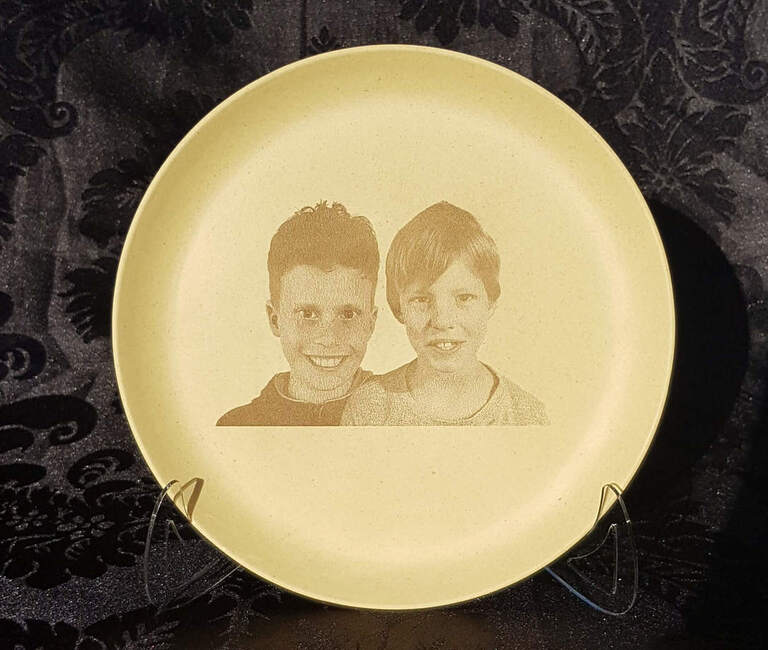
This one turned out mutch better than expected.
Settings: Engrave (225 LPI) 350/10

Next was a marble coaster:
20180504_151437
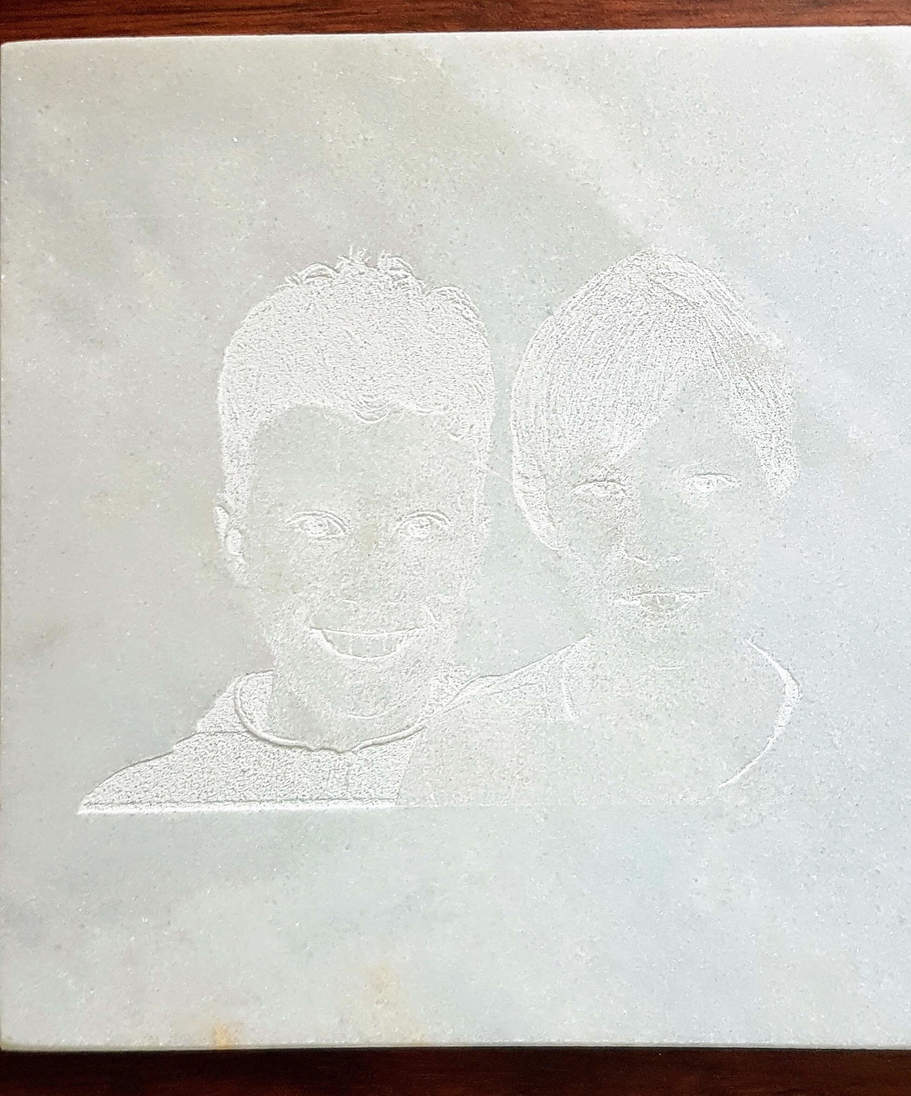
Not quite the result we’d hoped for. Not even after some painting:


I’ll need some more testing and investigation.
Settings I used: Engrave (675LPI, 2 passes) 600/Full (basic)

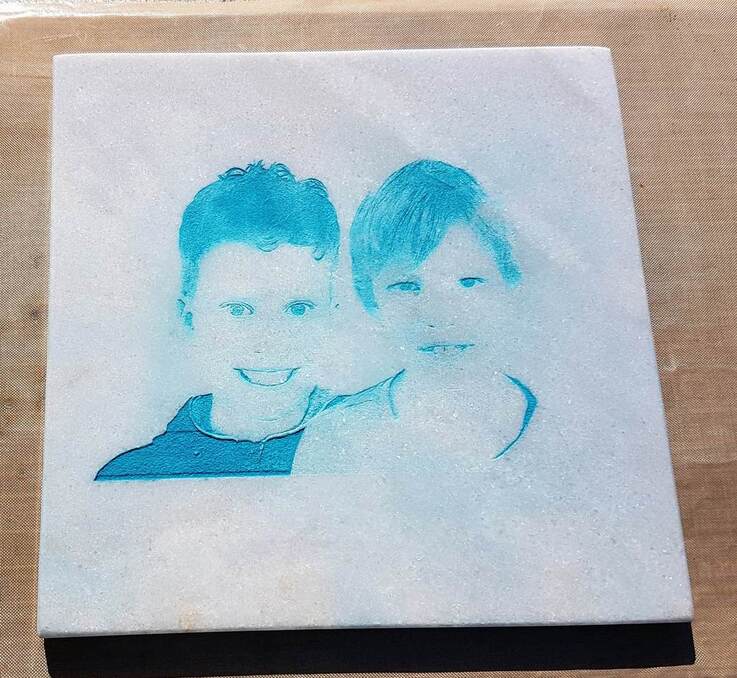
I also tried the back of a mirror. It works well but also lost all depth:


I took the picture outside, hence the blue background. At the bottom right I have a small test area.
For the mirror, I inverted the image.
Settings: Engrave (675LPI) 500/20

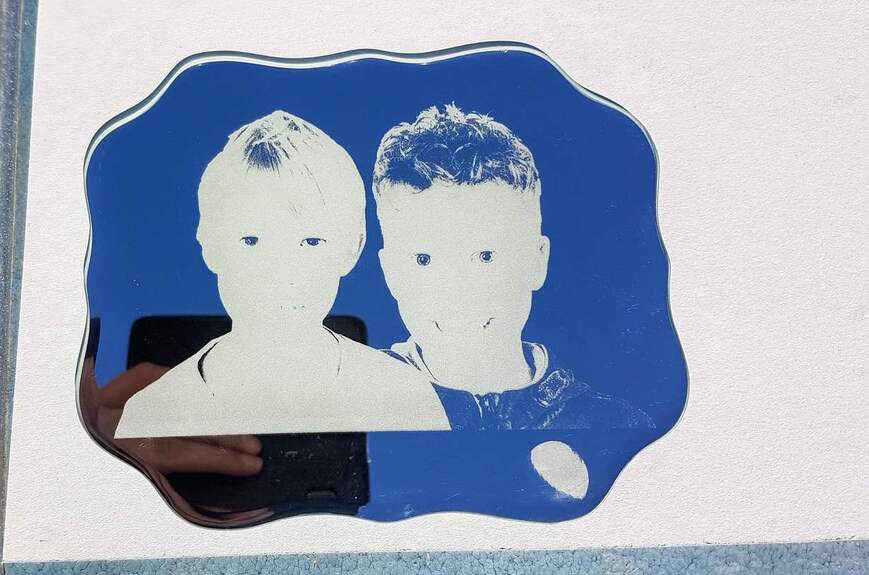
And I tried on clear acrylic:


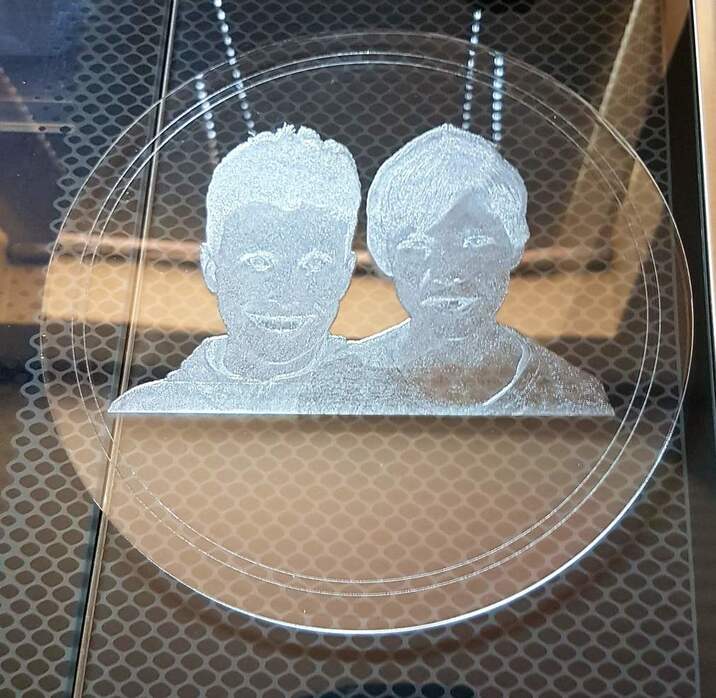
I intended to have a fully engraved circle. I created it in Inkscape using two circles, one smaller and intersected them. Resulting in a nice 2mm wide circle. When loading in :glowforge: it complained the art work was too complicated. I couldn’t find a workable setting so converted it to a score, hence the two circles.
The engraving also didn’t work out as hoped. I’ve seen posts where the results are almost opaque white. Not sure how to get that result. Might be my non-PG material or my settings.

After these tries I’m mostly pleased with the bamboo fiber plate. We already added it to our webshop.

22 Likes

There’s a lot of gray mid-range in the image. you want more contrast and less grays. it will not look good when you print on paper or view on screen, but it will look better engraved that way.

3 Likes

Both the tile and the acrylic would look better to me if the image was unverted like a negative. Black is white, white is black.

3 Likes

First off, that picture is so adorable! It might use a bit more contrast and maybe sharpening, but good job prepping it.

The results you are seeing are related to the material you are using. The bamboo looks good becasue it burns and the more burn, the more color. It gives you nice range of tones. (That plate is awesome! I’ve never seen them before.) The other items do not burn when lazered and it’s just minuscule amounts of material being blasted away and/or melted. The only tonal difference you can get is by removing more material and going deeper. (The glass image looks flat becasue most of the thin mirror backing was removed. ) You can get some tonal ranges in these materials, but it can take a lot of adjustments and finesse. To make matters more complicated, organic material like rock will have unique composition and no two rocks will engrave exactly the same. :expressionless:

Acrylic in particular does not hold detail well compared to wood. Not saying engraving photos can’t be done with it, it’s just can be very tough to get good results. You can get good results with images with solid colors though. My examples were vector graphics that I turned into bitmaps to engrave. (Something else to keep in my is you need “cast” acrylic to get good results. The other type of acrylic, (extruded) does not turn white when lasered. )

1 Like

Did the GF give you the warning that there were too many colors or would it not process the image at all? If it was just the warning, I ignore those all the time and it works fine :slight_smile:

I’m guessing it was a high DPI and exceeded buffer time (again: just a guess).

When engraving on clear acrylic you want the photo to be a negative image (invert colors). It will look better.

1 Like

I agree with what @reltham said, also as a side not to that I seen someone try engraving on acrylic with the halftone option and it looked stunning. But if you need any help with preparing a photo for deeper gray scale changes, here is a write up I did on it for my superman comic cover and how I did it. https://www.facebook.com/notes/fresh-start-customs/photo-engraving/430971814025912/
Hope it helps, if you already knew this disregard and maybe it’ll help someone else out here.

2 Likes

Thanks all for your suggestions and tips.

@kittski: It was an error message and I could not continue. And thanks for the tip on cast vs extruded. I’ll pay more attention to it when I buy new acrylic.

@shop and @wenning08 I understand what you mean, but I have a hard time to get it done in photoshop since I’m a newbie in photo enhancement. Do you know a good website which explains the steps needed?

1 Like