Scoring/Engraving Acrylic

New user, here. I’m trying to make some tokens out of acrylic for gaming. I’m doing some test prints on the proofgrade clear acrylic that came with the machine (ordering different colored acrylics for final product).

Here’s the SVG file I’m using: (My uploaded file is showing in the edit window, but not in the post.)
Damage%20Test

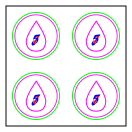
The plan is to cut the square out on the first pass, flip it, and cut the green circles on the second pass. The red would be engraved on the first pass (front side), blue on the second pass (back side), and purple on both.

What I DID:
I told it to ignore the green circles and blue 5s for the first run-through.
I told it to cut the black square, score the purple shapes, and engrave the red 1s.

What I EXPECTED:
I expected the entire square to be separated, with the purple and red to be partially cut into the acrylic (I was assuming 25% through or less).

What HAPPENED:
The square was cut, appropriately, but so were the purple shapes.

So, I tried the same thing, but marked the purple “layer” as engrave, instead. This time, it engraved the areas within the purple circles and outside of the droplet shapes.

But, what I want to happen is just an engraved “line” on the purple shapes. So, all of the white areas, inside and out of the purple, are just the untouched acrylic.

How would I accomplish that? Do I have to use manual settings, and, if so, do I just need to experiment with different power levels/speeds? I was really surprised when the scoring just went right through the acrylic completely.

What design software are you using?

Inkscape

You will either need to Expand those lines into a filled shape, or you can just rasterize them if you are planning to engrave them. (My computer is sluggish this morning …stand by…)

Okay sorry, that took a minute…

Select the purple objects - they will show a stroke color of purple and a fill color of None.

Click Path > Stroke to Path, and they should shift to a fill color of purple and a stroke color of none.

That will turn them into engraves. (It might be necessary to first do a Path > Object to Path depending on how the shapes were created.)

1 Like

I think the issue isn’t how to engrave, it’s why the purple was cut when it was set to score. I’m not sure I have a good answer for that…!

Scoring should not go through the acrylic - it doesn’t on my machine. Do you have it set to draft score? That is what I use most of the time. Maybe check for double lines?

1 Like

What Jules shared should solve the problem, though. The step also could have been overlooked. Sometimes I forget that just because I change the color, it doesn’t mean that the software knows which line I want cut and which line I want scored, and the default is cut no matter what. It could also be that the lines are doubled up, overlapping score lines are about enough power to cut through to the other side.

1 Like

Her suggestion did work, but it was (of course) much slower than the score. I noticed that when I have a single print run with multiple settings, it doesn’t seem to always switch appropriately.

For instance, after her suggestion, the new file, when uploaded, had the cut lower on the order window than before (it did cut first, then score, then etch, previously). It etched everything, that time, including the cut of the main square at the end.

So, then, I just did a separate print run for each operation. That produced the right result, but I might try to run the scoring separately, as well, to see if I can speed up the print.

Thanks, everyone.

As an aside, how long does the burnt smell on the acrylic last, usually?

You’re aware that you can rearrange the order in the UI, right? Just click and drag those guys around! Also, yes, it definitely takes longer to engrave a thin continuous line. Technically a box that’s filled in, or the outline of a box engraved should take the same amount of time, as the laser works in LPI so it’ll go back and forth the same amount of times, but the laser just won’t fire as often in your case.

Yes, I’m aware of that. I’m not sure why changing the objects to paths in the file altered the order of the operations, and I didn’t really care the order at that point to rearrange them.

Thanks for the answer @Jules , that’s right.

Regarding the smell of the acrylic, how long it lasts will depend on where your print is and how it’s being used.

I’m going to close this thread - if the problem reoccurs, go ahead and post a new topic. Thanks for letting us know about this!