So Fun Story, For some reason my system is not aligning all of the layers to register correctly. This is not a one off issue and has happened several of the last print runs. To the point I can’t trust the Glowforge program to not mess up my material by not lining up scoring vs. cutting lines. The garbage can is filling up. Anyone have a suggestion as to why this is happening and how to correct on my end?

1 Like
I’d be surprised if it’s not registering the operations properly. More than likely the culprit is that it’s losing steps somewhere and that’s throwing off everything after that.
Head could have been moved by hand and it hit a boundary limit, could have hit a hold down pin, loose belt, broken wheel, etc.
If it happens on one job, the head is essentially lost. It parks at 1016 Avenue A instead of 1000 Avenue A. The system needs to be rebooted for it to recalibrate.
If the head wasn’t moved by hand, all of those things above need to be checked.
2 Likes
Also, if you are moving the design on-screen between your score and print operations, don’t do that. It’s a guaranteed way to make them not line up. The on-screen view of the design after it runs is not accurate enough—if you leave it alone the two operations will occur in their designed places.
2 Likes
I have also had mis-registration on a couple of cuts where the travel speed (between operations) is fast and abrupt. The head seems to jump. I solved that issue by rotating the cut 90°… and that forced the GF to recalculate where it is going next, and that mean that the change of direction in the transition isn’t abrupt.
2 Likes
Hello @tylr_pae I am so sorry to hear about the alignment trouble you are running into. I’ll do my best to take care of this problem for you.
We’d like to have you try a few troubleshooting steps for us:
- Turn off your Glowforge.
- Check for small pieces of debris or dust.
- Check the lower door to make sure it closes all the way. It may require some force to open, but open it, wipe any dust off the edges, and close it all the way.
Remove the tray and clean any dust or debris from the surface underneath. Pay careful attention to remove all debris from the four dimples where the tray rests.
Check the lid to make sure it closes all the way. Small particles of material, such as dust or debris, can prevent it from closing completely.
- Check the surface your Glowforge is on to make sure it’s flat. Ensure it is not twisted slightly and that there is no debris propping up one side of the machine.
- Turn your Glowforge back on.
- Place Proofgrade material in the part of the of the bed that you are having the most trouble and print the Gift of Good Measure using the default settings.
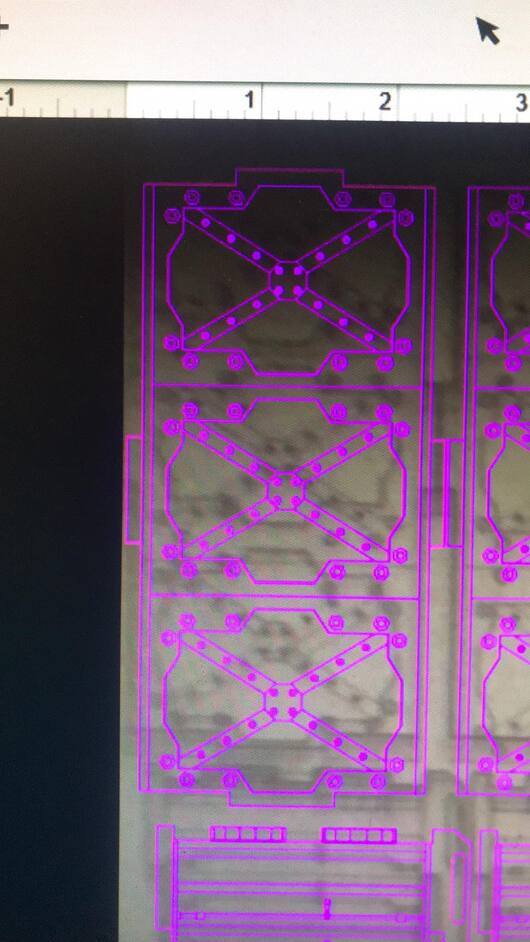
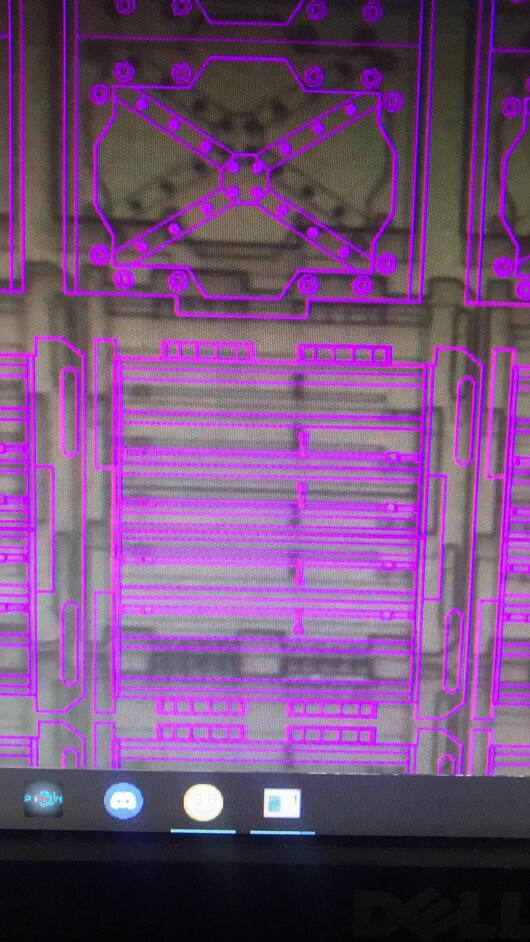
- When the print finishes, leave the lid closed and wait until the fans stop and the picture updates. Without moving your artwork or your material, take a screenshot of the Workspace to show us the difference between the artwork placement and the actual print placement. Make sure to include the rulers in your screenshot and show as much of the bed as possible.
- Mac: Press Shift-Command-4 and click and drag a box around your image. You’ll find the screenshot file saved on your desktop.
Windows: Click on the Start Menu and type “snipping tool”. Open the Snipping Tool > New then click and drag a box around your image. Click the Save icon and name and save your file.
- Send us the screenshot along with the date and time of the print, and we’ll investigate.
Lastly, In order to take a closer look at this for you, would you please send me the following photos?
First, power off your Glowforge and remove the crumb tray.
1.The belt under your laser arm with the head pushed to the left:
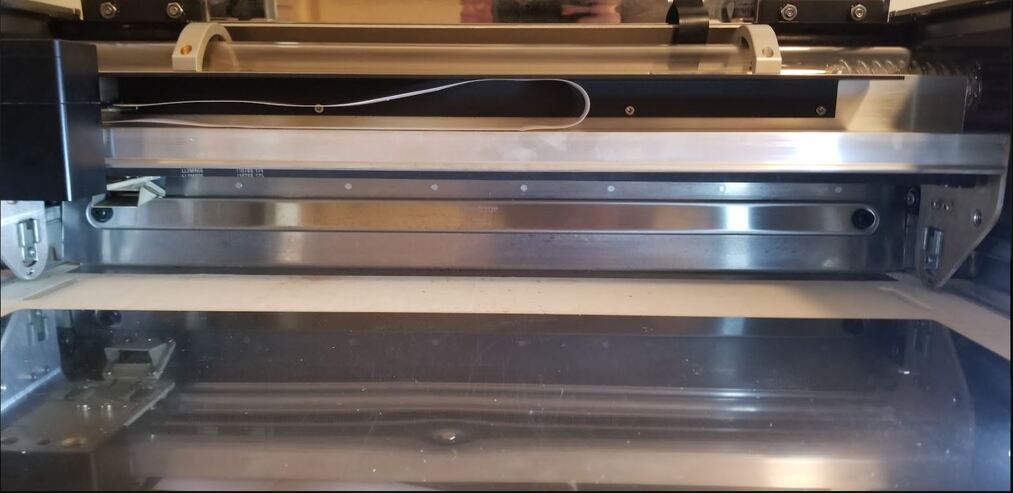
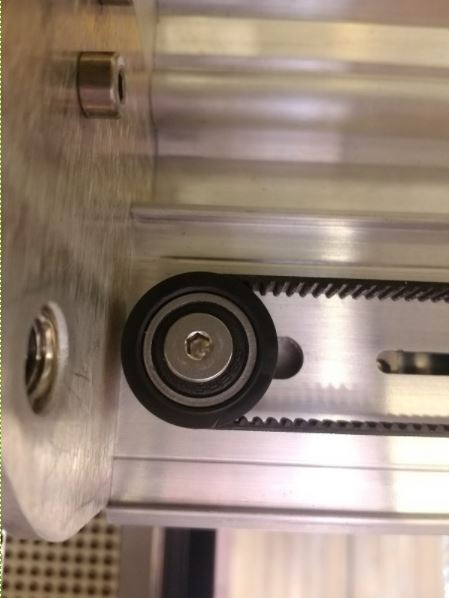
2. The pulley under the laser arm on the right side from the front:
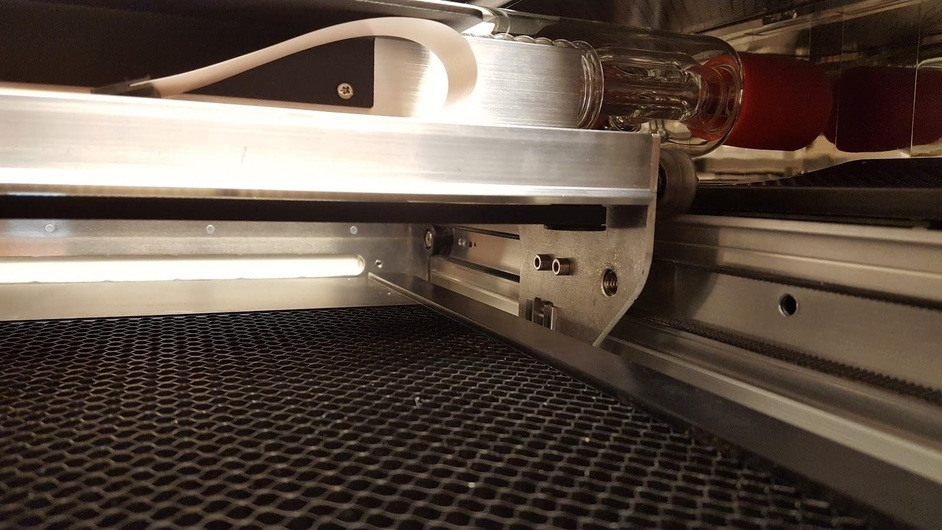
3. The right side pulley under the laser arm from underneath:
Once you reply back with those photos I will be more than happy to help with next steps! Thank you!
Attachments
![]()

![]()
The issue is now resolved. Thank you. I powered down the system cleaned the rails and the pullies and its working well again.
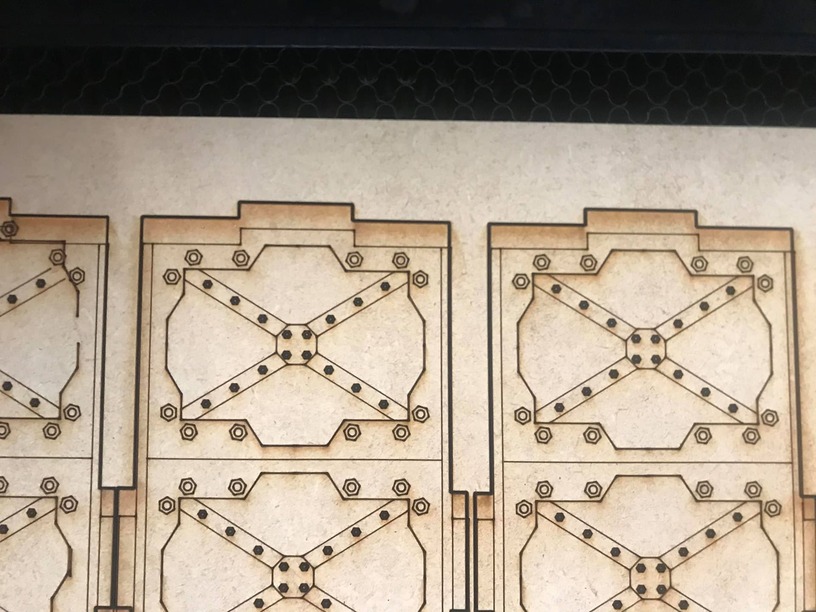
The pieces were cut dimensionally correct. The layers of scoring did not line up correctly as compared to the original.
Resetting the machine seems to have worked. Cleaning the rails should help keep it more accurate. I clean the rails inside constantly.
Ps. Id like to make sure im using the correct cleaner on my rags. What do you recommend for the removal of the resinous build up inside of the machine?
Hi @tylr_pae. I’m glad to hear everything is working now!
The recommended method of cleaning for most surfaces is isopropyl alcohol on a lint-free cloth. Important: Never spray liquid on or in your Glowforge printer.
You can find more information about cleaning on our Clean Your Glowforge support page, as well as in the Glowforge user manual, which can be found here: https://glowforge.com/manual.
This topic was automatically closed 30 days after the last reply. New replies are no longer allowed.