My Pro arrived today with the side belt loose. I have tried to see how to either insert it in a possible clamp or something but I cannot tell how to gain access to where it would go. Has anyone dealt with this before. I saw another post but I didn’t see how it was solved.``
Hello @shardastockstill,
Thank you for reaching out to us. I’m so sorry to see your new Glowforge has a loose side belt!
Below are the steps you can follow to get your belt secured. Please let us know if you run into any trouble getting it fixed.
You’ll need a 3mm hex L key to complete the steps below.
Removing the belt
-
Turn off your Glowforge.
-
Open the front door and carefully remove the crumb tray.
-
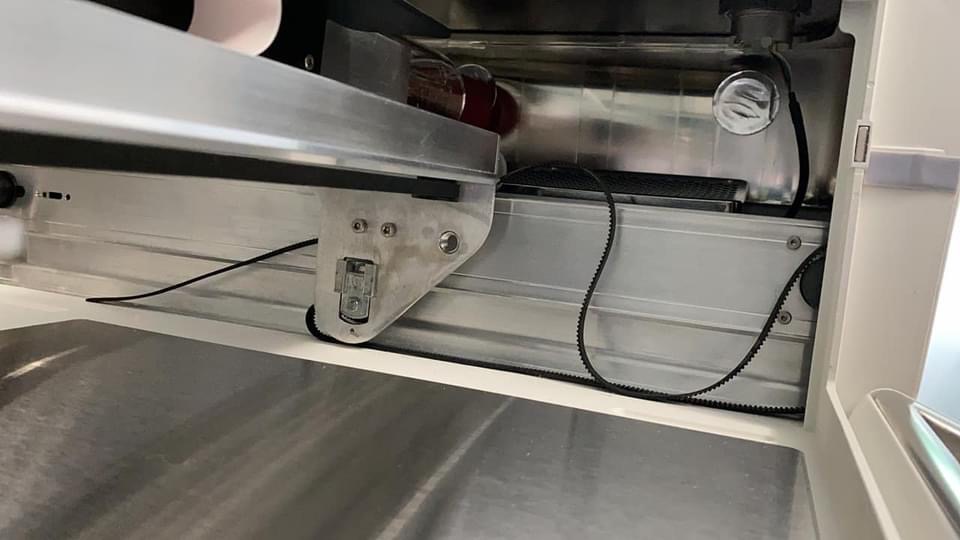
Underneath the laser arm on the right side, you will see two small screws. Using your 3mm Hex L-Key, remove both screws to free the belt clamp.
- Using both hands, gently slide the laser arm towards the front of your Glowforge to reveal the belt clamp.
- Slide the laser arm back towards the center and unhook the belt from the motor on the front side of the unit.
Re-Installing the belt
-
Grasp the belt by the clamp and pull the rest of the belt through the laser arm towards the back of the unit to remove it.
-
Pick up the new part so that the clamp is in the center of the belt. Make sure the holes in the clamp are facing you and the screw is at the top.
-
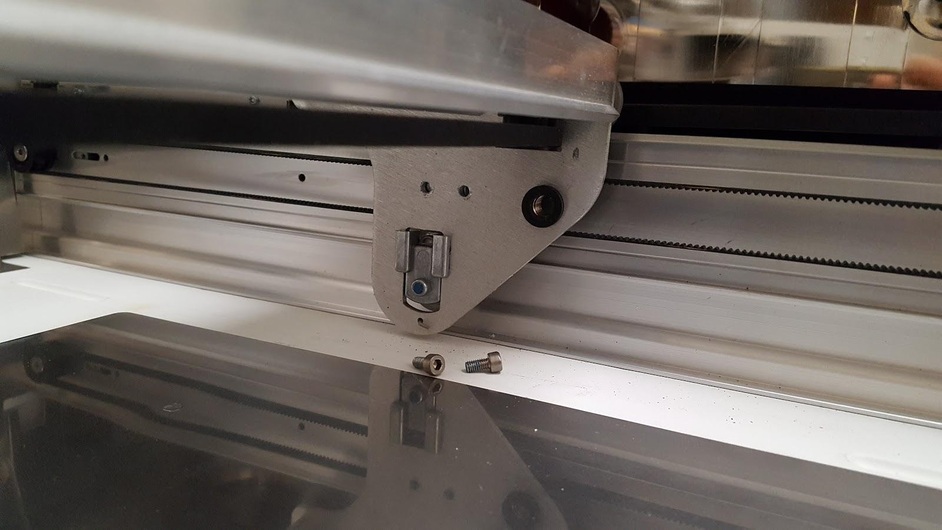
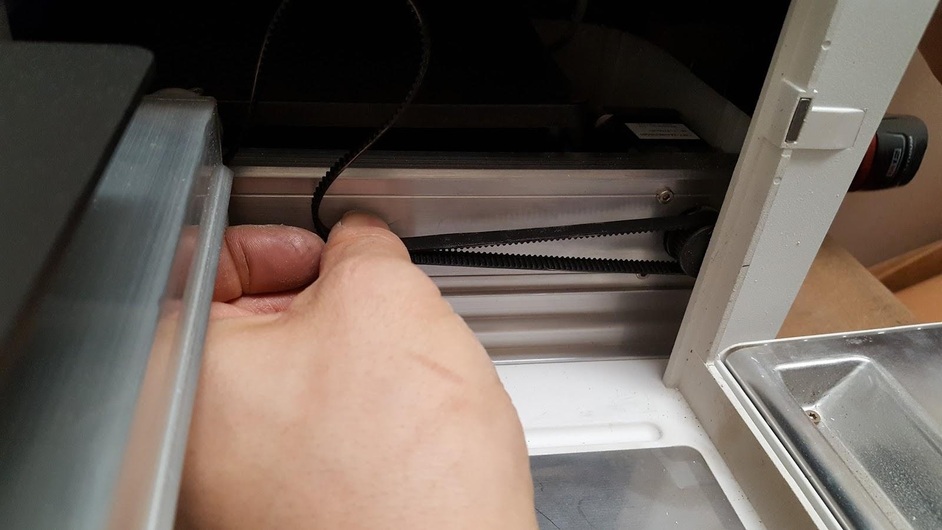
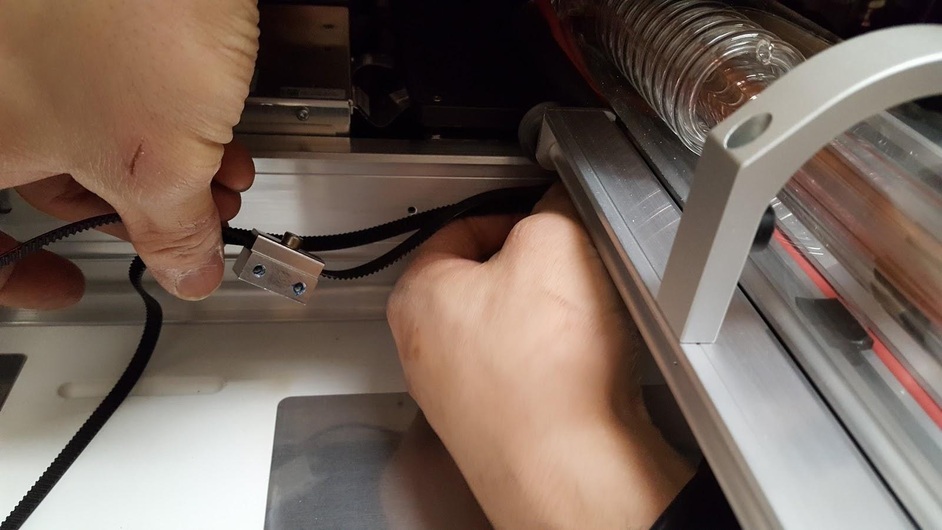
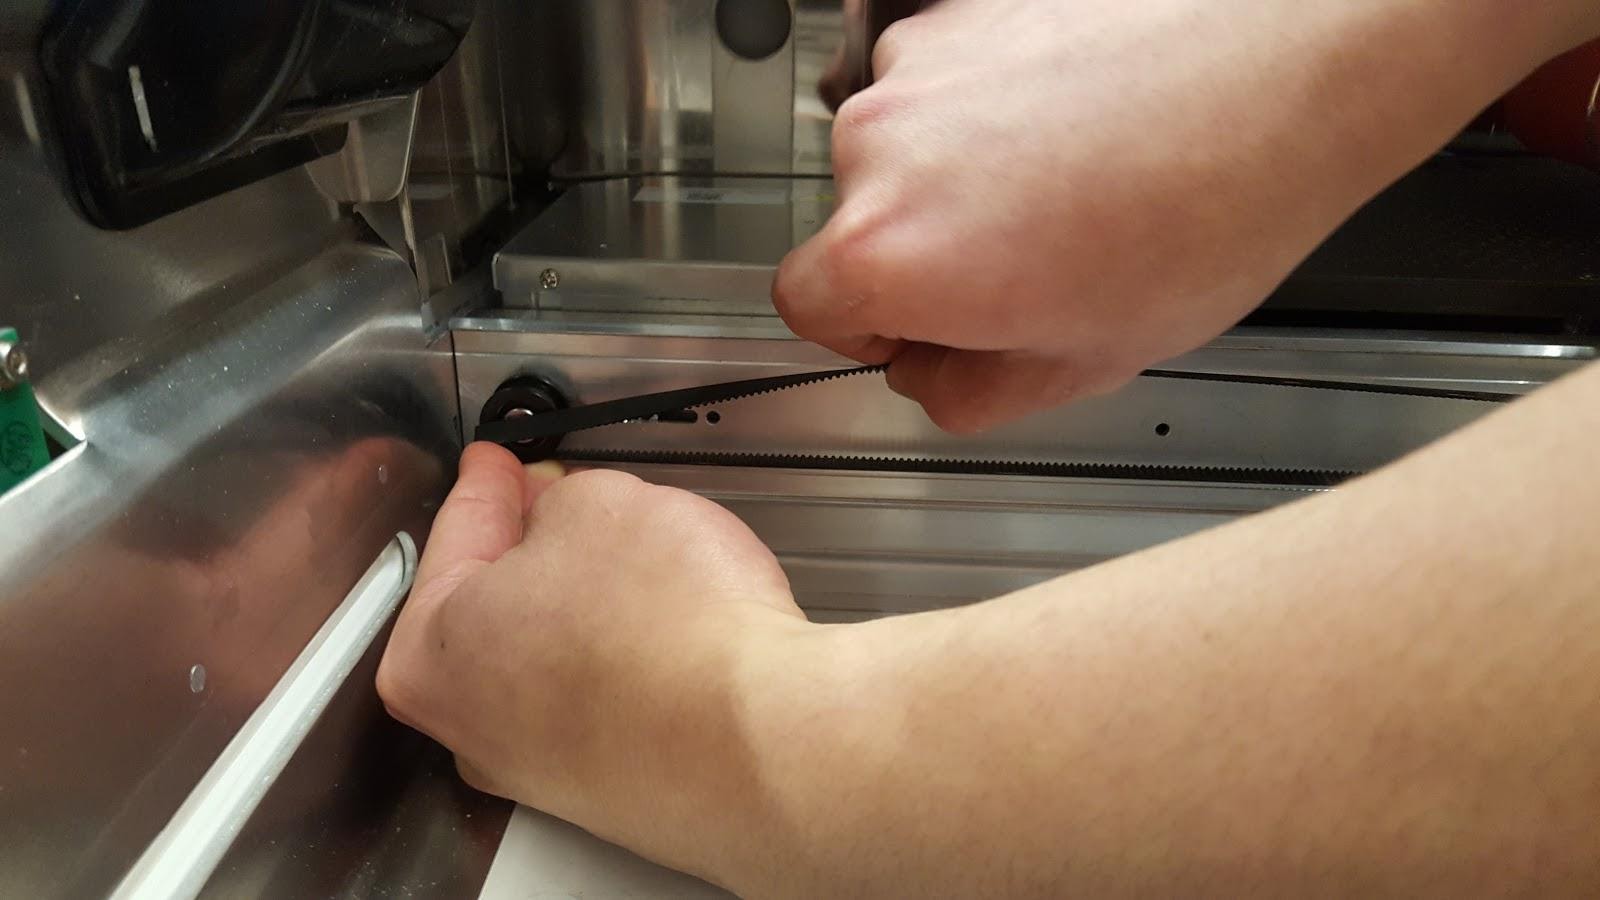
Thread the right side of the belt from the back of the laser arm to the front of the laser arm as shown in the first photo below. Make sure to insert the belt between the holes on the top and the metal part on the bottom of the laser arm as shown in the second photo below.
- Loop the front side of the belt around the motor.
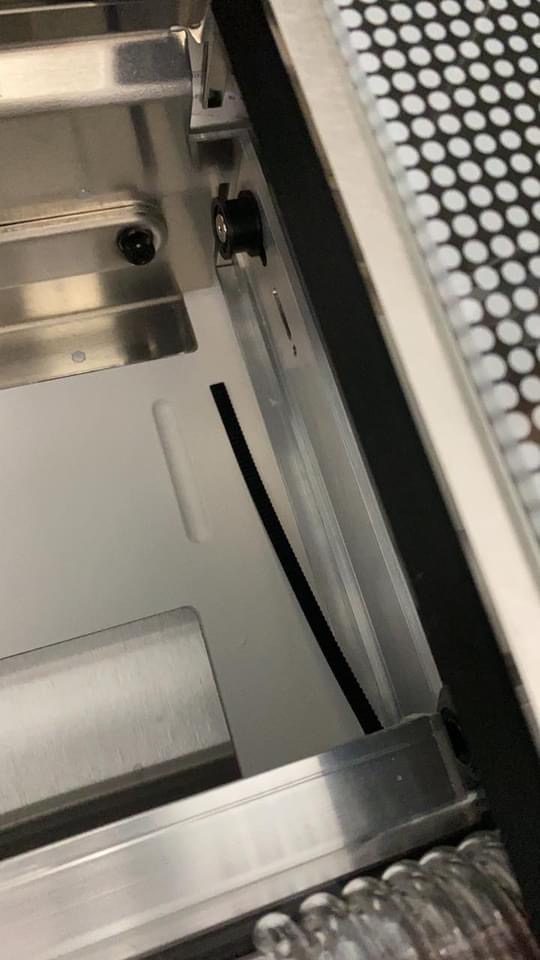
- Using your left hand, grasp the far end of the belt and set it on the bottom back half of the pulley. Use your index and middle finger to hold it in place. The belt will not be fully on the motor.
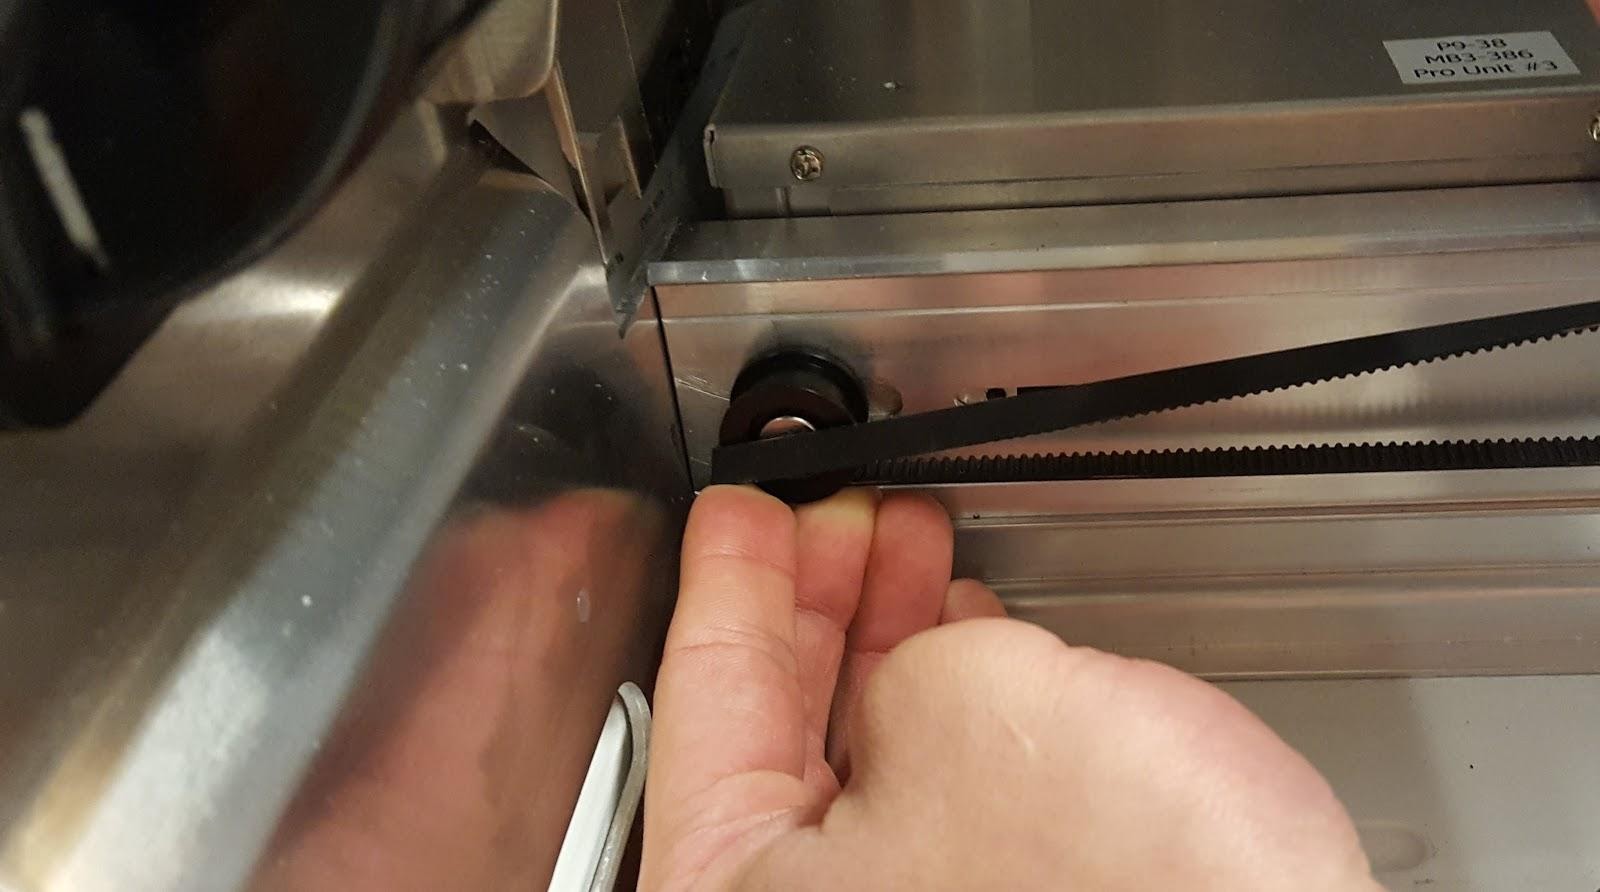
- Still holding the belt firmly in place with your left hand, use your right hand to gradually pull the top portion of the belt towards you. The belt should roll onto the pulley until it is secure.
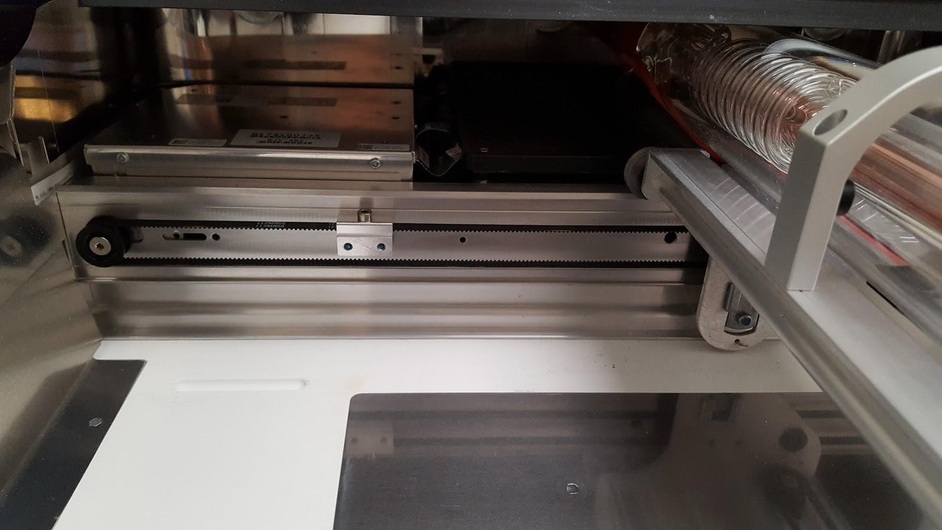
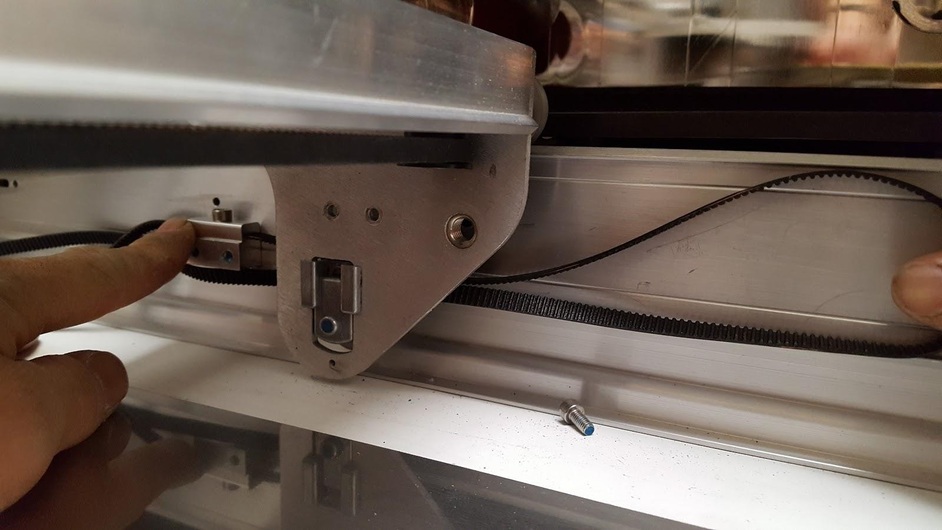
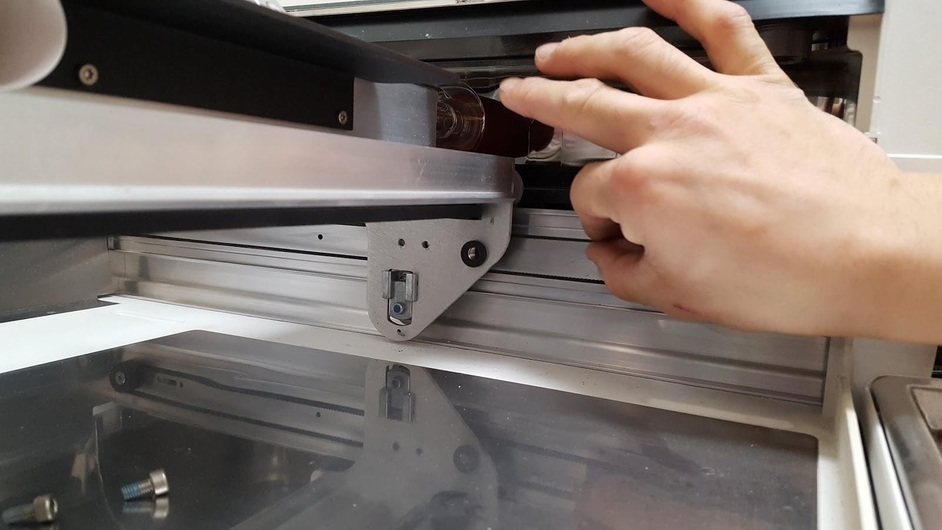
- Push the laser arm back so the clamp is hidden behind the plate that holds the laser arm to the rails.
- Line up the holes in the plate with the holes in the clamp. You may have to pull the belt up a little, as shown in the photo below, to get them aligned correctly. You can check to see that the clamp and plate are lined up by inserting the tool into the holes and ensuring that it goes through both parts.
- Replace the screws using the tool. There you have it! Your Glowforge is good as new.
Please let us know how it goes.
1 Like
Hello there!
It’s been a while since we’ve heard from you so I wanted to check in and see how things were going, and whether or not you were still in need of any assistance.
It’s been a little while since I’ve seen any replies on this thread so I’m going to close it. If you still need help with this please either start a new thread or email support@glowforge.com.