42 Likes
Very nice! The walnut complements it well.
4 Likes
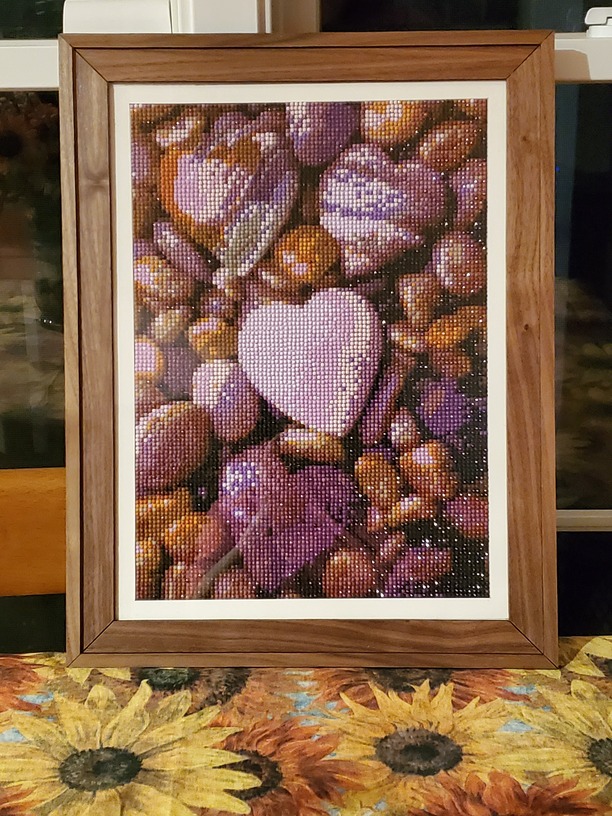
The frame is lovely, and so is what’s in it. Who did that? And what is it? Looks like little dots?
1 Like
Looks like diamond painting, kind of a mashup of paint by numbers and counted cross stitch, done with small faceted round or square plastic “diamonds”…
3 Likes
Thanks. It’s diamond dots. I made it from a kit. Gooddog had it about right. The picture is printed on sticky canvass, separated by a grid, and you place these tiny plastic diamonds on the grid according to a key. They really sparkle in the light. My husband collects rocks so I chose this one for him.
I used leftover Optix for the “glass” because I doubt I’ll ever use it in the Glowforge again. It smells so bad!
5 Likes
Making personal frames is one of the things I use my GlowForge for.
1 Like
Looks great!
Beautiful work!
Please, could @r-oatman or @pauline.lally share your techniques on making frames. I have a need for that and have no idea how to go about it.
Thanks in advance.
4 Likes
Did you engrave the dipped area?
Here is a simple one I did long ago:

3 Likes
Wow! I do not think it could be more simple. It is the thing that first comes to mind when folk say “nothing is simpler”
1 Like
This looks great! I came to the forums looking for ideas to actually make a frame for another diamond painting  what did you use for the back? and how did you attach it?

I apologize for the delay in my reply. I’ve been swamped at work.
To make my frame, I cut one set of the thick frame pieces out of my selected wood and one set of the thin frame pieces out of my selected wood. I also cut one set of the thin frame pieces out of draftboard.
Next, I glued the thick pieces together at the corners with wood glue–using tape and some T-Squares to get a nice shape. When dried, I glued the wood set of thin pieces to the top of the thick pieces. Again, I used tape to hold in place until dry.
Next, I glued the thin pieces of draft board to the back of the frame to create an inset of sorts.
Then, I cut a piece of Optix (by hand–because it smells so bad on the glowforge) to fit the inset. Then I placed my matted artwork. I padded it slightly with some thicker cardboard to keep it from sliding around. Then, I glued a piece of cardboard to the thin pieces to cover the back and keep everything in place. I could have used some sort of toggle piece which would allowed me to open the frame–but since it was a weird custom size, I figured I’d never open it–so glue it was!
Lastly, I hung the frame on the wall with two removable velcro strips. I love those!
Thank you for asking. I’m sure the community has already posted fancier and more functional frames, though! And I would appreciate any thoughts or suggestions.
Happy Mother’s Day everyone!
8 Likes
No, I was going to try, but then I decided it would be easier to glue another piece atop the frame to make it look like a single piece.
1 Like
That will come in handy, thanks!
2 Likes
Thank you for the frame, I appreciate the write-up.
Thank you, @pauline.lally for sharing your frame, as well! Very kind of both of you!