Quickie demo:
Watch what happens to the pink image while the sliders are dragged.
Quickie demo:
Watch what happens to the pink image while the sliders are dragged.
I’d posit that if you have to watch the main screen while adjusting a UI control to understand what is going on, the UI control is doing a poor job.
I don’t, but it is pretty freaking cool to play with! ROFL! 
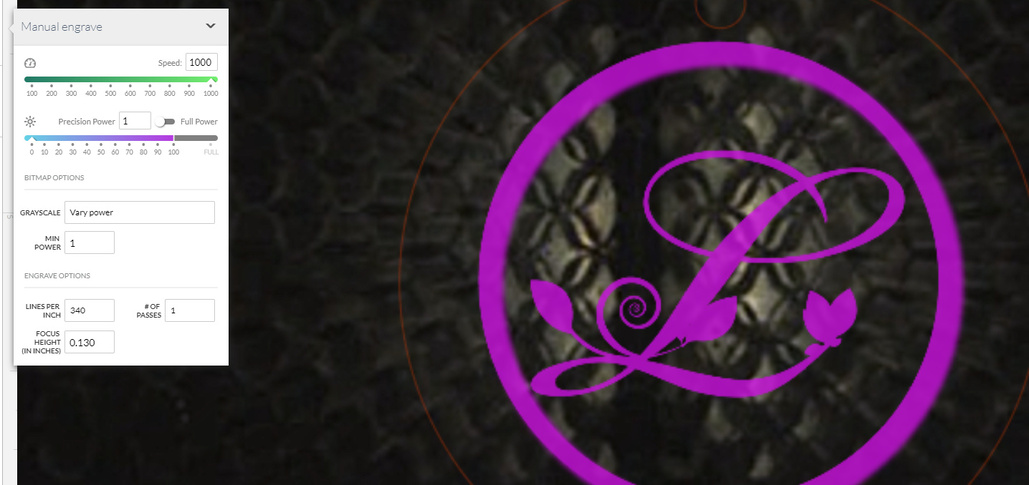
These will all be full power - you’re only changing the density of the pattern to approximate tonal value.
The input is a range of tones from light to dark, left to right. Light on the left, dark on the right. Dithering is an attempt to represent a tone by pattern density. Lighter areas have a lower density of markings, darker areas have a higher area of markings. The power is the same for all markings.
The left slider is setting a minimum density for the lightest values of an image. The right slider is setting a maximum density for the darkest values.
I don’t think so. It appears to be a software update, not a firmware update.
Right… That would be a nice thing to see. However, I really don’t think there’s any firmware associated with this change. That said, logoff of the GFUI and clear your browser’s cache and see if that gets you there.
you should only need to do that a few times to get the hang of it. once you’ve used it enough, i would think you could predict what would happen.
and it’s essentially the way all control sliders work in adobe apps.
if you don’t know what moving sliders on the levels palette in photoshop will do, the preview will help you understand. once you do understand, you can often do most of the big adjustment moves by looking at the histogram and sliding, then you watch the preview as you make fine adjustments to the image. seems like this would work the same way.
That’s so cool! I will be having some fun with that. Thanks for the demo!
I hope GF is going to offer a training class especially for the locals… Seattle area (podcast for the other users)
at the end of the presale…
I don’t get the sliders even after closing and reopening.  don’t know if I;m messing up or because of having a PRU?
Oh sorry - you have to load a bitmap image before they show up. (Wasn’t the opening and closing that did it.)
It doesn’t show for vector engraves. 
I’ve loaded a jpg and went to manual engrave. The preview is updated, just not the control box!
Huh! That’s odd. It might be a PRU issue, but I’m seeing it. Did you also close the app and let it refresh?
You’re essentially setting clipping thresholds for shades of grey, and they’ve adjusted it from raw numerical input to sliders to make it faster to adjust.
Personally i’ve found this option to be dangerous and prefer to leave it alone and adjust my art instead.
@dan with these kinds of updates, perhaps a couple of examples of how the team is using the new feature to give us an idea of what problems are being solved, and what results we can expect? /2 cents
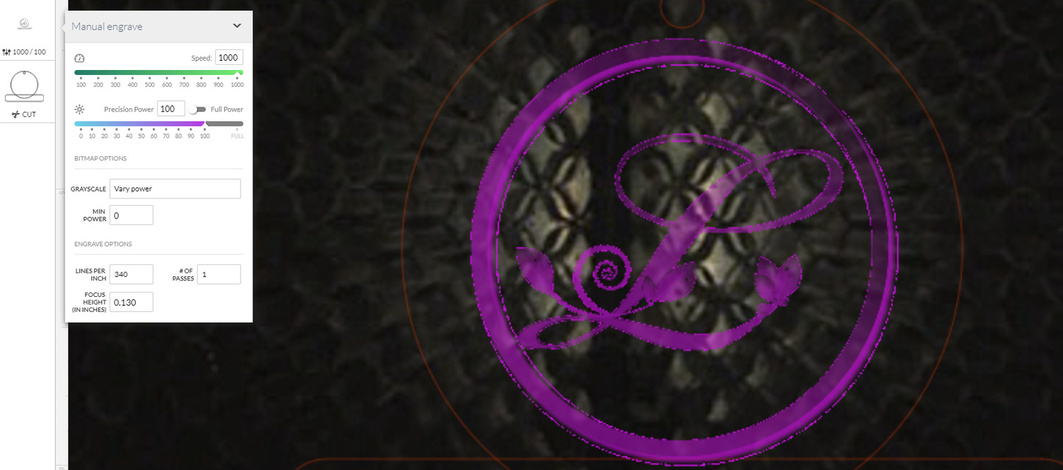
Also, there is a bug in the varying power option. You can’t set it to 0 as the minimum which reduces detail and forces the laser to always be on even when engraving white.
Default won’t allow 0
Tricking the UI into allowing 0, look at that extra detail!
The Map Grays to Power setting has always been like that. The only way to get 0 power was using proofgrade material selections instead of unverified material, otherwise it’s always had a minimum setting of 1.