One of our candidates joined for Laser Thursday last night and wanted to cut a bee pattern out of a black skirt that she owned. @aeva had a little experience so we asked for her advice and everything worked out really well!
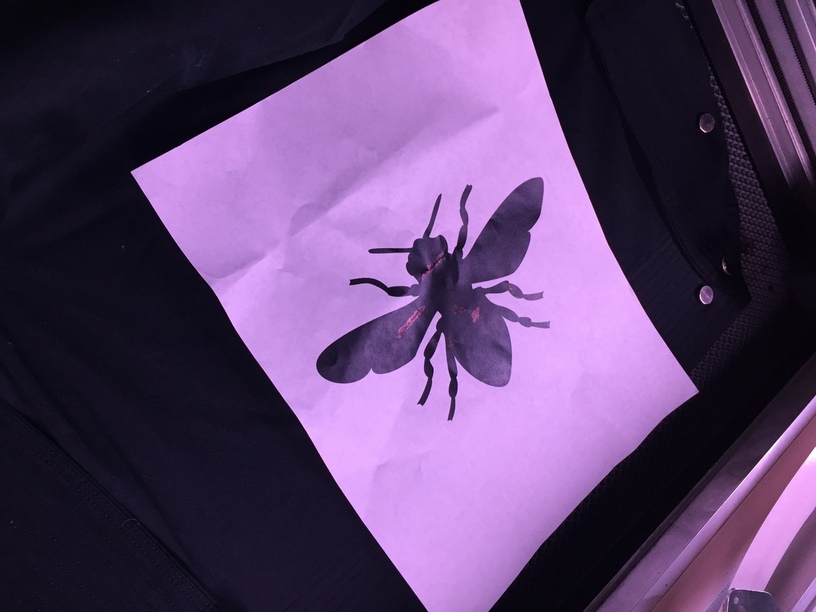
The fabric was 97% cotton, 3% spandex. Luckily the candidate brought a print out of her design along, so we used the ‘@Kiko method’ and used the trace feature. We set up the skirt in the forge, using magnets on the handy magnetic honeycomb to keep the edges of the skirt down and out of the way of the laser, then just placed the image over top.
The camera lid took a picture and we isolated the bee image (the same way that acrylic traces are done in our other demos), and then just bumped up the speed and gave it a whirl!
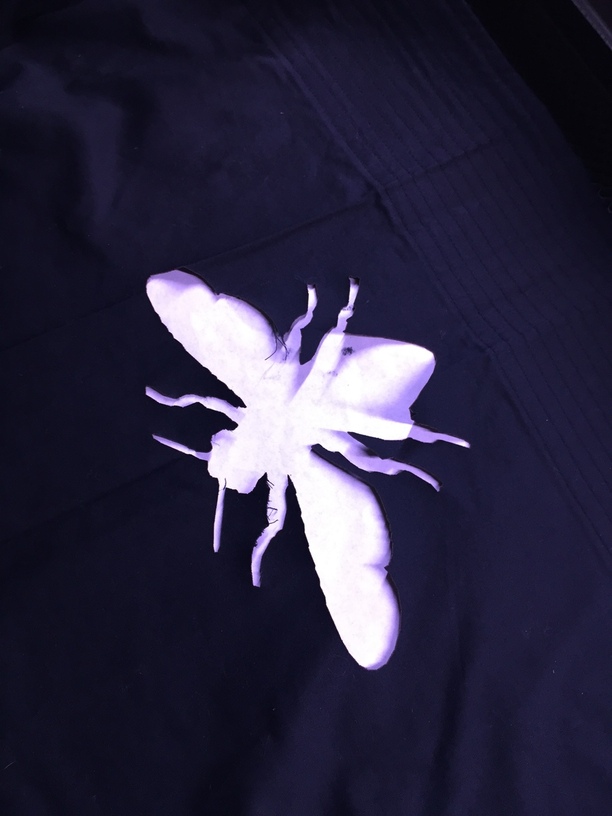
I picked a speed that might have been a smidge high, so we had to cut the fabric at a couple points, but it came out really awesome. I put a piece of white paper under it so that you can see. The owner of the skirt is planning on backing it with some colored fabric and sewing it to prevent unravelling.
Thanks for the good explanation of the work flow. Looks like I’ll start collecting magnets, although I might have enough fridge magnets for the paper and material. And get some magnet sheet (laser friendly) and could cut some nice jigs for different pieces. Nice design too.
I just showed this to my Glowforge co-buyer, and she is psyched!
If you are looking for a source, neodymium magnets are super strong, come in lots of shapes/sizes, and are surprisingly affordable.
(I love magnets almost as much as I love lasers)
There are lots of sources (even amazon is a good one), but I have bought from this place with good results. http://www.magnet4less.com/
The camera-enabled trace is obviously something I’ve been aware (and excited) about- but for some reason I’ve only been thinking about it in terms of capturing hand-drawn images like the acrylic demos. To have the ability to generate cut paths just by placing a black and white printout of something in the bed- and I thought I couldn’t get any more anxious for my glowforge!! Thanks for sharing @Kusmeroglu!
I’ve used them on an 80w laser - great results, but they can be a bear to remove unless they still have a bit of mounting hardware attached.
Hmm… Bet some thin material could be 'forged as a holder for them. Solid layer as base and a traced cut layer around the magnet (With handle). Glue together & voila!
Good idea. Now, if I only had a laser to make the holders…hmmm
Gonna have to be some might strong glue to keep the holders from pulling away from such a strong magnet,
I would guess gorilla glue/super glue could do the trick. But hard drive magnets do have quite a pull to them… If all else fails, a trusty drill and a well placed screw will definitely work.
Those magnets are strong enough to be behind a fairly thick layer of something, and still hold something down, which will also make it easier to pull them off. Even just putting a layer of card stock under them will make it easier.
They stick really well to each other, but we keep ours (store-bought) on the cards they were shipped on, and they slide apart quite easily that way.
That’s the secret to get them apart if they do get directly connected, btw; slide them off of each other, don’t try to just pull them straight apart.
Since they are so strong, you can buy really small ones that are not so hard to pull off. You can get quite a few for cheap and use them on lots of hold down points to keep things flat and stretched tight. I like these tiny square ones which are basically 10/$1.00 http://www.magnet4less.com/product_info.php?products_id=1050
This may have just simplified my quilting process. I’ve been wondering how the GF would do with fabric. Now I’m wondering how many layers I could cut through simultaneously if the stack of fabric is held down with magnets. This could be amazing for piecing as well as applique.
Very cool. I’m wanting to make just this sort of project. I already make skirts by using a variety of stenciling, cutwork, and applique. Followed by embroidery and beadwork. Really excited about using the laser to do the cutwork, making my own stencils, and more.
Get Plasti-dip and coat your “too strong” magnets with it. Added bonus that the magnets don’t chip as easy. But the primary reason is to force the magnet to have a minimum distance to anything else, and thus be easier to remove.
Funny you mention that stuff… I was just wondering about whether plasti-dip in the spray form might be laser-safe…
either way, coating magnets with it is a great idea, could also make them easier to see by using the brighter plastidip colors