Thanks for the tutorial, I will be trying that in Fusion this afternoon.
1 Like
Hey @Clone your the first person to sort of get how I ever did mine. I used the excel spread sheet I made up some time ago(ill dig up the link later…) and just graphed it out. I used a sine wave and plotted around a circle with some variable to change the frequency and amplitude. The spreadsheet made a graph I could save as a PDF then load into Inkscape. The spread sheet took less then a minute to run, and Inkscape took no time.
Looks great! Nice 3D rendering
Edit: I think if you look through @karaelena link above to my original post you should find the spread sheet I used, I think.
2 Likes
Just an idea: once you have the design set up, make a multilayer jig (with whatever ugly alignment holes and pins you need) out of UMHW or PET(G) or polycarbonate or whatever other wood-glue-immune material is handy.
1 Like
My GOD, thank you!! So beautiful, can’t wait to make these…
Illustrators blend tool might be a quick alternative method.
don’t know what that is nor am I willing to pay for any adobe software
1 Like
i just use a curved syringe from Lee Valley with a 50/50 wood glue-water mixture. Do a layer then put a few heavy books on it for a few minutes. Wash rinse repeat
1 Like
so pattern was much faster however… when I went to change bowl size in parameters I’m clocking now well it recomposes everything. before I applied the patter resize was instant.
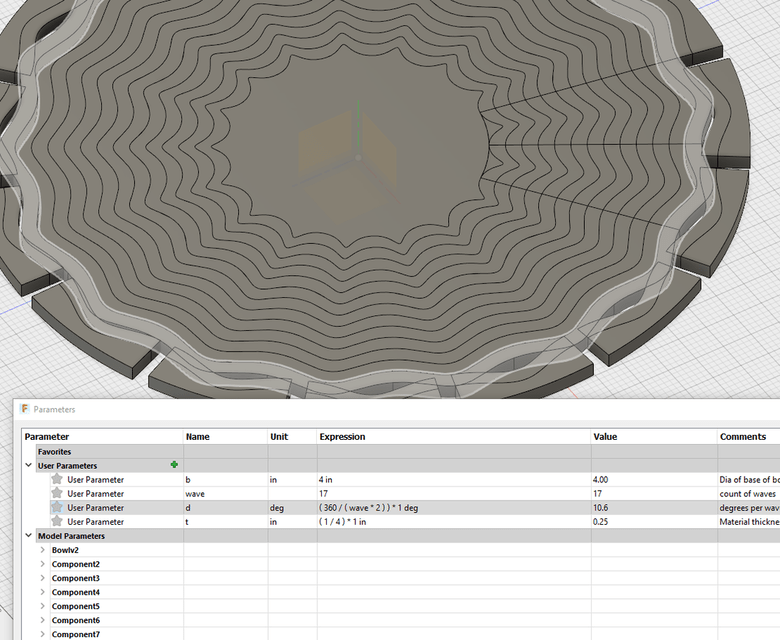
so this is 100% parameter driven so the bowl size(base), material/rib thickness, count of waves.
the thing that I still have not figured out is layer count, so right now its kind of static based on the rings I put out. so will think more on this but I think it is what it is
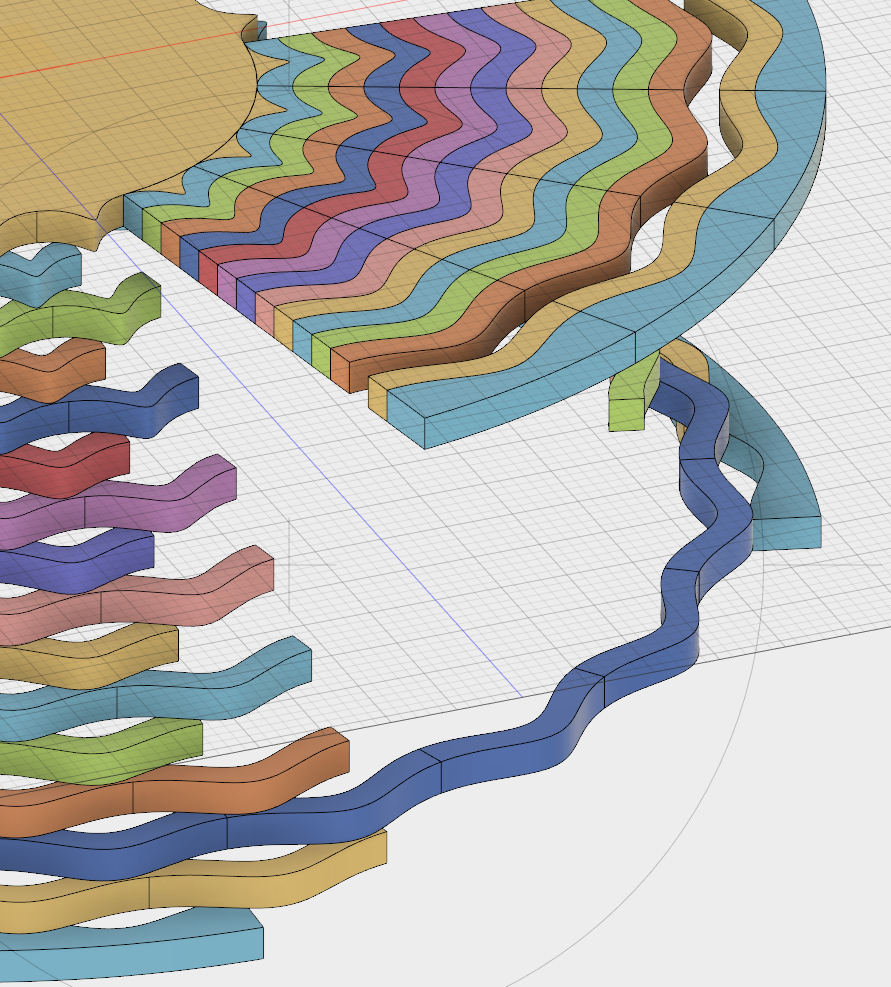
edit recompose finished looks like on the dynamic resize the tangent got lost so its just a radius, wonder if I need to include the tangent in the pattern

re did the pattern and selected the tangent but nope still busted full radius instead of smooth waves. would really stink if I have to delete the pattern resize and remake the pattern each time going to try that now
nope cant edit or delete the pattern I delete the pattern and the objects all remain ger…
ok so I did undo until good and everything is back, so I said what happens if I just slide the sketch a we bit… well all the smooth curves vanished back to radius
ya if I make any change what so ever the replica’s of master loose what they should look like

6 Likes
That’s no good! (Tried it and it did the same to me.) I’m guessing this is a bug rather than the way it is suppose to work.
A possible workaround is to “cap” the ends of the initial splines and use them to create short 3D sections of a single wave and… argh, so much easier to show than explain…
I made another video and it’s uploading… It here…
PS When I said I couldn’t find a “join” option, I meant I couldn’t find a way to automatically join the result within the pattern tool.
PPS Oh, I guess a way you could save some entries in the history would be to extrude each of the single waves individually (note: use the “new body” option to create a new body for each extrude and avoid automatically joining them to any existing bodies). Then move each of the single waves to the position you want them to be. Then array… I mean pattern… all of them, then do a single join to merge all the bodies into one.
This image might make sense…
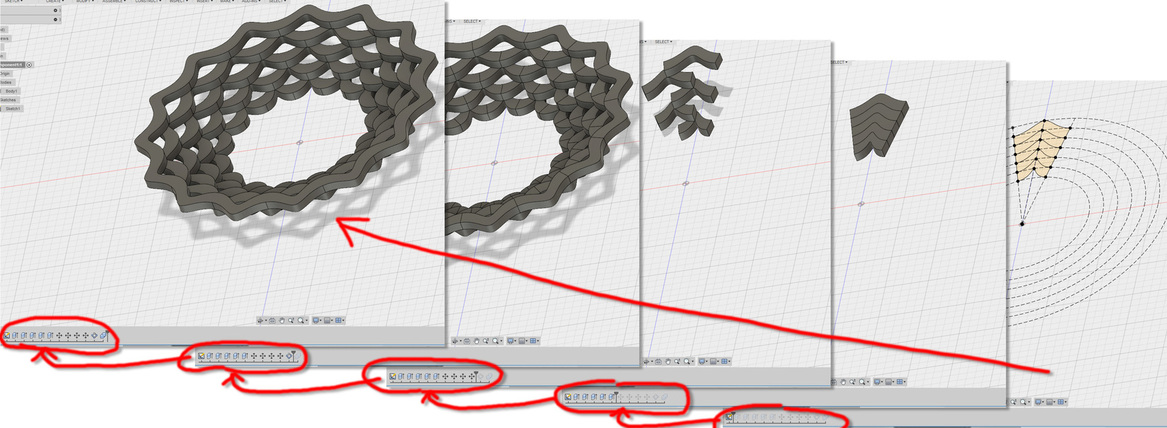
Ooh! You could even save a number of the extrudes by selecting every other one. OK, I’m going to stop now. ![]()
7 Likes
great work around using the body as a pattern, ya defiantly seems like a bug for the sketch to blow out like that
ya all the match with constraints and that using only 1 cpu thread eck
1 Like
yup works like 90% resize of dimensions works but resize to increase or decrease wave count causes some type of problem
they add but for some reason my two outer rings get wonky
figured it out was missing two constraints
3 Likes
fully parametric now, still no way to remove extra layers and have a nice full circle on the top but eh ill live. when adding waves you have to re combine body when removeing waves it just works.
by using move to align the parts when waves change the rotation alignment messes up but its cosmetic not functional
some how I made one tier auto combine herms…
4 Likes

When I went for a look the model was a flat, featureless circle, after I clicked the back arrow on the browser I got to see the “real” model.
Normally fruit baskets don’t get me very excited but this thread quickly evolved into parametric, maths, and better use of Fusion 360. I’ve been loving it.
The only thing I see missing is dowel holes so it can be perfectly assembled without a jig. They should be parametric of course. 
5 Likes
ya no clue when I click it is grey flat circle, when I click back I come back to the forum. its only a right click share in fusion and copy paste link so I have no idea how it actually works for shareing
ya so my other model that didn’t use the pattern body method but did all the splines does have the dowel holes a parameter p but in this method it would have created holes in every wave when really you only need a pair of holes per tier so going to work on that in a bit because ya with out the joints its a pita to build using move instead of joints
I was also thinking of using a biscuit of the same material so a biscuit that 1/4 x 1/2 x 1/16(or1/8) this way it will all stain or spray poly to the same color and blend nicer
7 Likes
I was playing around with it and then got out before I started to click all the buttons and figure out what they all could do. Didn’t want to “break” it. lol
ya i have no clue how sharing works. When I clicked the link I only got a disk with no features
I clicked the link entered my email address and they send me a link to download the file, worked great, that way I don’t mess up your file I have a copy
3 Likes