Some layer-stacking experiments

I’ve been thinking about layer-based stuff a bit the last few days, inspired in part by some of the work I’ve seen on the GF forums and from artists I follow elsewhere, and I wanted to futz with some stuff this morning.

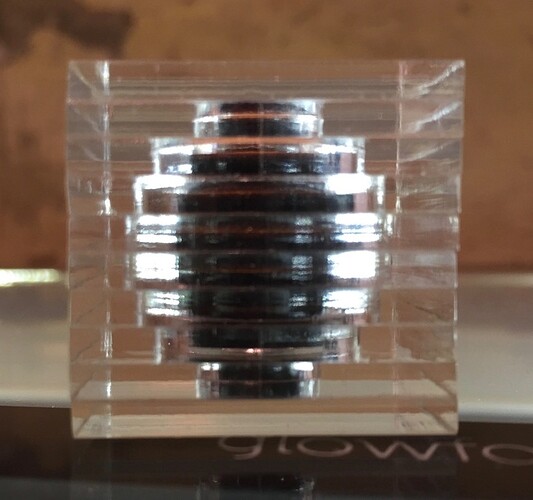
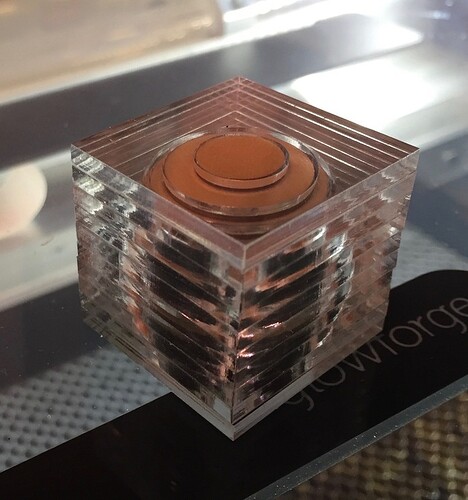
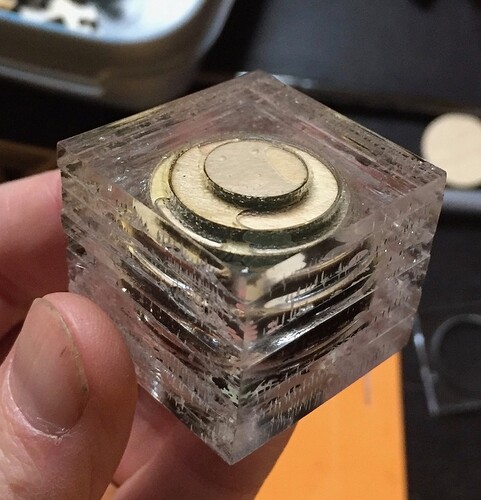
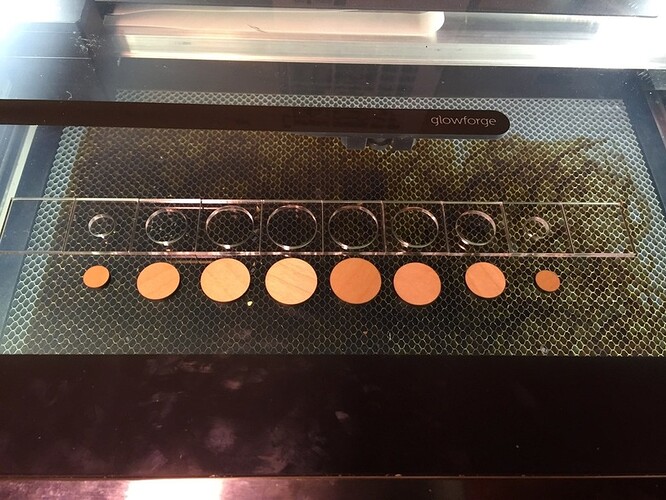
One idea: enclosing a stratified wooden sphere in a clear acrylic cube. Experiment was easy to mock up, results not thrilling me but I’ve got some more bits I want to try. Here’s the cut pieces – it’s a 1.25" cubed object cut from 1/8" acrylic and 1/8" plywood, made cut out as ten layers of acrylic, including a solid square top and bottom piece and eight pieces with holes cut out, and 8 corresponding interior layers of wood discs.

18 Likes

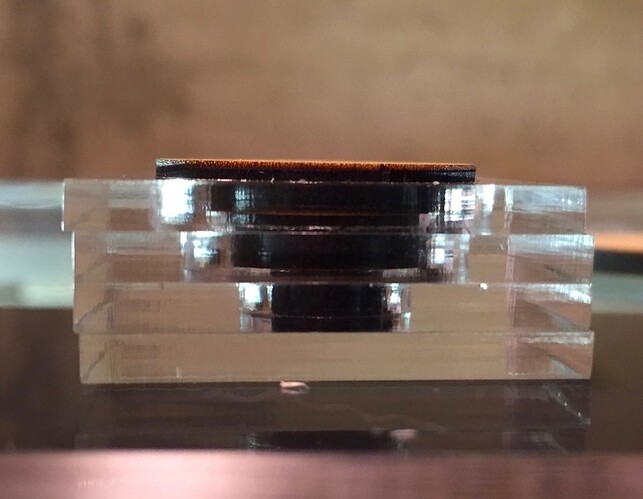
Of course, there’s 1/8" and there’s 1/8". It became clear as I started assembling the pieces that the thickness of the ply was measurably greater than the thickness of the acrylic. This thing wasn’t going to stack correctly as is.

I’ve done a couple experiments with plywood that had fussier tolerances than e.g. acrylic or hardwood maple, so I’m not shocked by the outcome, but this is definitely a non-starter situation for using it for non-experimental stuff in the same design style in the future. In general, I suppose the lesson here is account for the possibility of additive error/tolerances in projects.

12 Likes

Can’t wait to see it assembled!

1 Like

In this case, I could just cheat: I set aside one of the interior discs, and finished assembly, and that makes for a pretty good fit in the end. Stroke of luck.

That said: not the optical effect I’d hoped for! So much refraction going on with the acrylic, the sphere shape (which was already a stretch at this rough level of stratification) just totally goes by the wayside; it ends up looking more like an odd football or durian in there.

Not to say it’s not interesting, but it’s not what I was imagining.

9 Likes

My next experimental step with this is to get some welding cement and see what happens when I actually melt the layers together, and potentially polish the edges to a smooth surface. I’m curious how much that will affect the optical feel of it. Won’t help with the degree to which the internal discs/sphere aren’t flush with the material, that’ll just need to be a future iteration, but it’s definitely something I want to play with.

I haven’t layered/welded acrylic since middle school shop class, and haven’t even thought about doing so in probably 25 years as a result; a lot of memories came rushing back last night as I was thinking about getting up and doing this today.

13 Likes

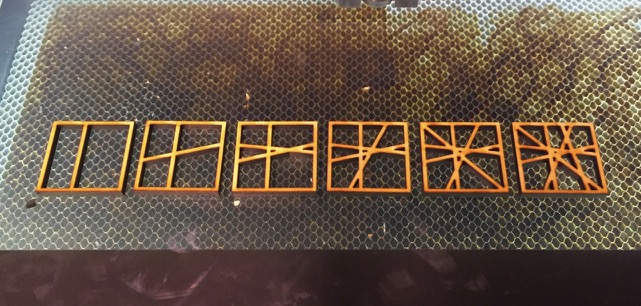
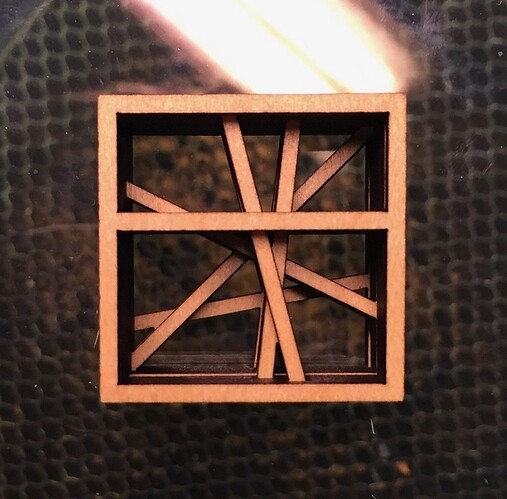
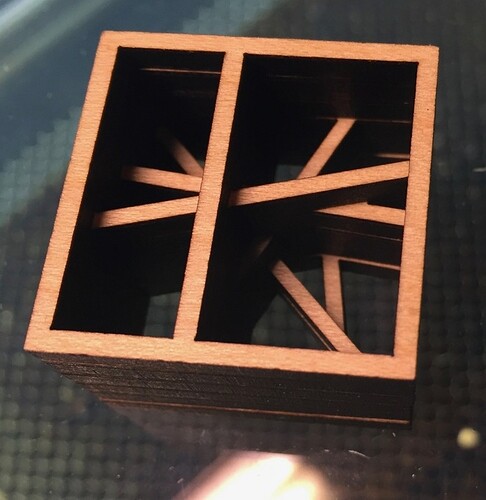
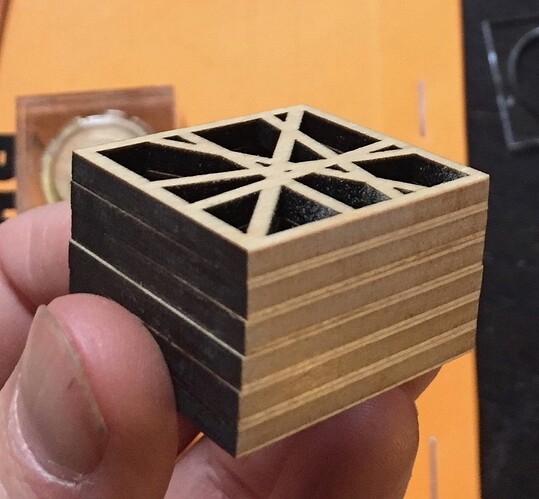
The other experiment this morning was a little simpler and so more successful in terms of doing what I wanted: doing a stacked-layer experiment with a simple abstract design of accumulating bisection. Similar scale, cutting about 1.25" square layers from 1/8" plywood.

bisection lattice 2

8 Likes

The resulting object when assembled has a progressive complexity as you move further into it depth-wise.

This is similar to, and simplified from, the fractal lattice experiment I was working on yesterday: fewer parts, thicker material, thicker lines, but otherwise continuing with the idea of cutting distinct layers from a consistent frame for stacking.

13 Likes

I think this would be more interesting looking at a larger scale – so small like this the light falls off quickly and there’s just not much room for the eye to move or for a complex design to emerge. I also like the idea of taking paint or stain to the various layered surfaces to create more visual interest in the emergent pattern.

But as a basic take on the idea, it feels promising; having cut it down about as far as possible with this variation, I feel ready to start building up the complexity and size more.

11 Likes

Your acrylic box with a spherical hole inside would be pretty cool with a marble trapped inside.

2 Likes

I’m thinking marble run. Really tall one with a lot of layers. :grinning:

3 Likes

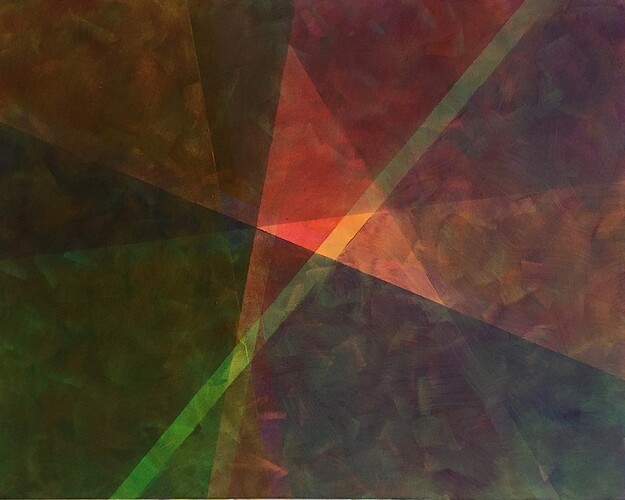
For context on the bisections piece, I’ve been working on a similar theme of accumulating layers of bisection of space on an oil painting the last few weeks. The resulting aesthetics are very different between these two, it’s really literally only the stacking of bisected lines that relates them, but I have some ideas for more elaborate laser cut assemblies using transparent colored acrylic as part of the process which might end up bridging the gap between the two.

9 Likes

Here’s a great big damned mess coming out of further experimentation: I grabbed some plastic cement and did a very rough job of gluing the whole thing together, using what felt and looked like a generous dose of cement for each pair of layers, getting the pair totally flush and clear looking with the cement in between. Was probably too short on patience, though, since after seeing things apparently set up fairly well after about 30-60 seconds of hand-applied pressure, I moved on to the next layer, and the next…and after the fact there was a lot of mottled separation between every layer.

Using Elmer’s Model + Hobby Cement for this experiment because it was the only plastic solvent glue they had at the local art store; will try to track down some Weld On or TAP acrylic cement and see how the performance differs. But I could also experiment with a more careful/patient approach.

I do like the the refractive properties of the thing changed where there was sufficient gap-filling. If I can get that gap filling itself to be more consistent (with difference cement and/or better application of it and/or closer fitting of internal and external parts by worrying more about kerfing and so on) that’s promising for the kind of optical effects I was originally thinking about with this. And I had fairly good success hand-sanding one edge of the exterior after, to take off the waste glue and smooth/shine the whole surface. Not crystal clear – I might have to resort to flame polishing or buffing to get there – but decent.

6 Likes

And in that spirit, I also gave an edge of the assembled bisection lattice a good sanding as well and that came away nice and smooth. Whether specifically bringing out the lamination of plywood like that, or getting rid of that dark char look, is actually the way to go for any given project is another question, but it’s nice to have tested it out as a possibility.

9 Likes

Nice work!

Hey Josh, I’d be willing to bet that Discourse now sees you as a seasoned pro and will allow you to post more than one photo per post. Give it a try!

Heh, I wish but no such luck. Tried again today for the avoidance of doubt but whatever the trigger is, still no dice there. Would love to not string stuff out across multiple comments like that but that appears to be what I’m stuck with for now.

Which, heck, got me curious enough now that I’m thinking about it again to go poke around on the Discourse github repo to see if I could find configurational defaults for an install, and this looks like the right spot: site_settings.yml has a load of default config stuff, which most installs are gonna run with.

And if you search for “newuser_max” (I didn’t know to do so, just skimmed down the file till I got there), boom, around 550 lines in a few thing show up that look familiar:

newuser_max_replies_per_topic: 3
newuser_max_mentions_per_post: 2
...
newuser_max_links: 2
newuser_max_images: 1

All of which is unsurprising as a conservative default for new, potentially untrusted users on a given forum. There’s also references in some of the configurational definitions around there to ‘TrustLevelSetting’ as a variable value, which is probably what new-ness is tied to numerically.

And heading down to around line 850, boom, the “Trust” section, which is where all the good stuff we’re looking for is defined.

trust:
  default_trust_level:
  default: 0
  enum: 'TrustLevelSetting'
default_invitee_trust_level:
  default: 1
  enum: 'TrustLevelSetting'
min_trust_to_create_topic:
  default: 0
  enum: 'TrustLevelSetting'
...

And so on. A little bit later, blocks like this for various trust levels:

tl1_requires_topics_entered: 5
tl1_requires_read_posts:
  default: 30
  client: true
tl1_requires_time_spent_mins: 10
...
tl2_requires_topics_entered: 20
tl2_requires_read_posts: 100
tl2_requires_time_spent_mins: 60
tl2_requires_days_visited:
  default: 15
tl2_requires_likes_received: 1
tl2_requires_likes_given: 1
tl2_requires_topic_reply_count: 3

Which, my guess is trust level 2 is what corresponds to the elimination of the newuser_max_* limitations (and I’m guessing the awarding of the Basic badge, but haven’t looked for badge code at all yet).

By my read I’ve covered all those tl2_* thresholds…except maybe just the “days_visited” one since I joined the forum just about two weeks ago. Which means that if this Discourse installation is running with those defaults, I’ll probably tick over into trust level 2 in the next day or two? We’ll see!
4 Likes

Haha, well in my book you should already be there. Did you know that you have the New User of the Month badge? Congrats!

2 Likes

Yeah, got a message the other day, thought that was very nice of 'em.

1 Like

Not sure if the layered look is essentially or if you just want the appearance of an enclosed sphere. How about using 3 disks that slot into each other (x, y, and z axes) instead?

That could be interesting too, yeah. The strongest argument for the layered look in my eyes would be to get a really flush match between the outer hollowed cube and the inner material, which pretty much demands a stratified cube and cube-hollow in this approach, but other containment possibilities (up to and including building the hollow differently as well to match a different sphere build) could be interesting.