Something wrong with some vectors and power settings

Other people here and on Facebook are having the same issue.

It’s easy to recreate.

Have 2 vectors, 2 different colors, over each other, in one file.

Then ignore one, engrave the other. Then switch.

Do this on anodized aluminum. The image that is set below the other will be very faint as pictured above.

@jbmanning5, I just don’t have it with me, but I could creat a test file for you. Give me a minute

That may work. I can test tonight

1 Like

FWIW, I’ve done a file just like this in the last week, and had no issue.
When did it start?
I’ll try to find some time later today to test mine and see if there is an issue now.

Here is a file with 2 tests. one with vector. one with raster. The power variation is noticeable with anodized aluminum. please use that to recreate. wood takes so little power in comparison that I’m not sure it would have the same affect. but I guess you could try and see what happens

INSTRUCTIONS
engrave one of the overlapping images with the other ignored, then switch which is ignored and test again on the other side of the material or a different location.

BUG TESTING.zip (50.2 KB)

here are screen shots of my project so you can see what I’m talking about.

I can’t even get this to go full power on it’s own. can someone please look at this and tell me what they see?

SCOTT Z side 1.zip (182.4 KB)

Something is definitely very wrong here.

I think it may have something to do with transparency and the way the PNG file is

But that still wouldn’t explain what was happening with the to Victor images

Here is the engraving done with the PNG I exported from inkscape.

And here it is the same image I opened up in Microsoft paint and hit Save which gets rid of any transparency.

When I zoom way in to my logo which is vector on the import artwork side it looks like this

Not sure the grey inside is normal

I exported an image of my vectors as png. Imported it and traced it…

What the heck is going on?!

New svg on left. Original svg on right. Same power settings.

So I’m convinced it’s the vectors now but why is the question.

You’re doing a whole lot of testing with different files, asking questions about the results, suspect the vectors are the problem, but no one can verify or look further into it without the actual file that you’re using.

No one even knows for sure what settings you’re really using… I see one recent screenshot with some settings (speed/power but it would be helpful to see what you’re doing with the actual engrave settings as well).

1 Like

I posted it a few post up

Speed 600
Power 100
Dots 75
Lines 340

Same on all tests.

Have you tried full power rather than 100% precision power? They are not the same.

Yes. But that’s not the issue 100 is what burns away all the anodizing and turns it bright whitish.

Watch the video. Theres absolutely no laser coming out of the head.

Thanks so much for letting us know about this. I’m looking into it now with the team, and we’re running some additional tests to investigate further. Unfortunately, I don’t have any other information to pass along at this time, but I’ll update this thread once I know more.

1 Like

Thank you Vee!

Thank you for your patience.

I wanted to check in and say we haven’t forgotten about this, and we’re still looking into it. We’ll follow up when we know more.

1 Like

Thank you @pip!

Thanks for your patience.

I extracted the logs to investigate the problem you reported, and I believe I found two separate issues that have been contributing to the inconsistent results you’ve been seeing.

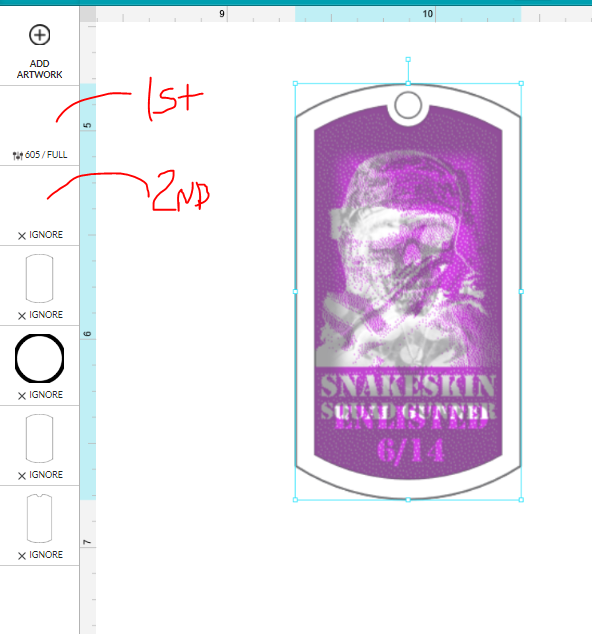
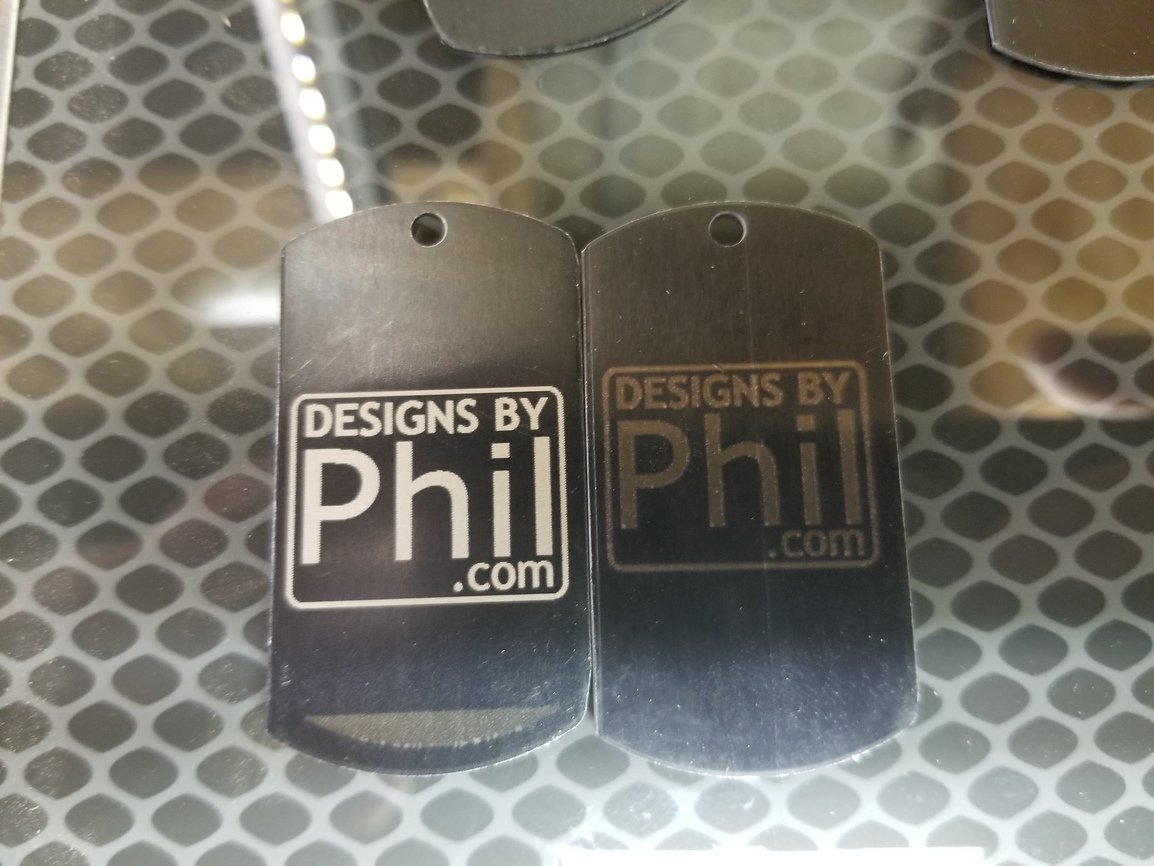
The first issue relates to the autofocuser that happens when the app says “Scanning your material”.

When working as expected, the print head moves over the area where the print is going to take place and shines a low power red laser we use to accurately detect the material height, and focus the main laser.

In your case, the red laser was striking parts of your jig in unanticipated ways that was causing incorrect results, which in turn was causing poor laser focus. This poor focus is the cause of at least some of the the inconsistent results you were seeing.

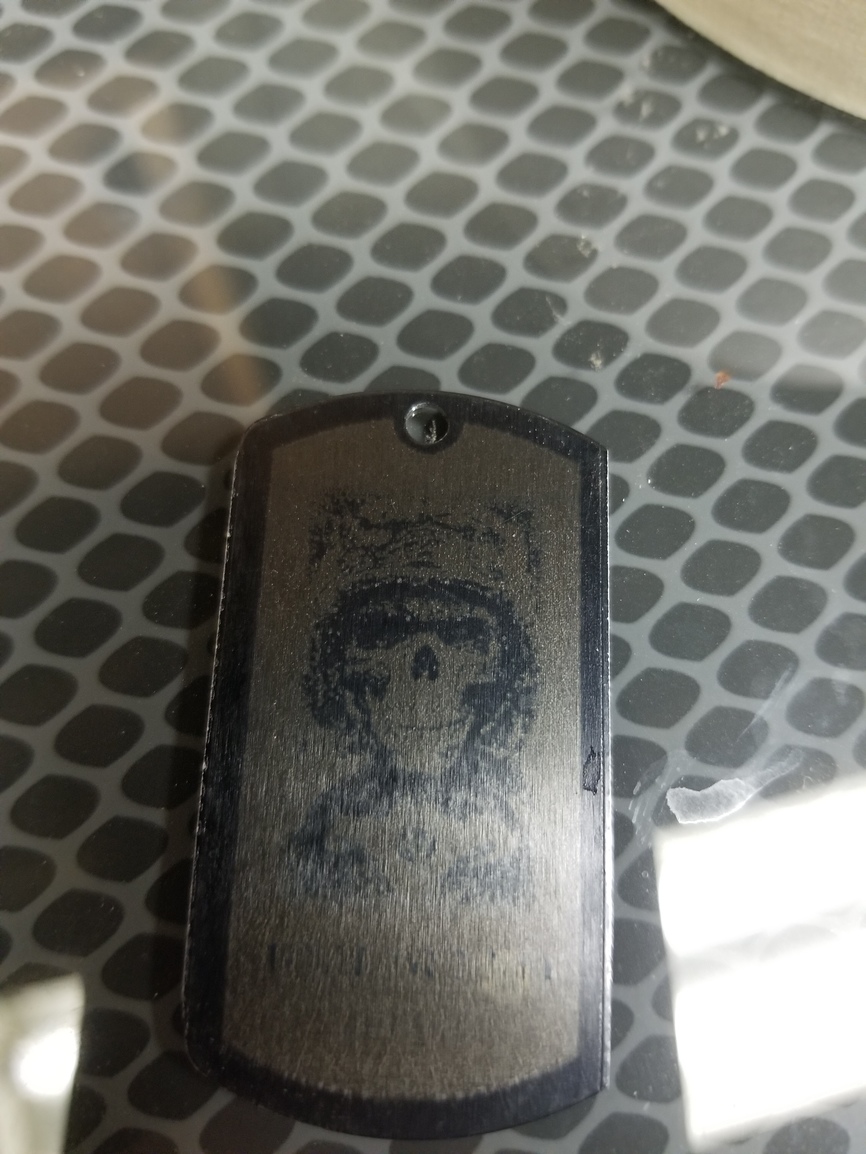
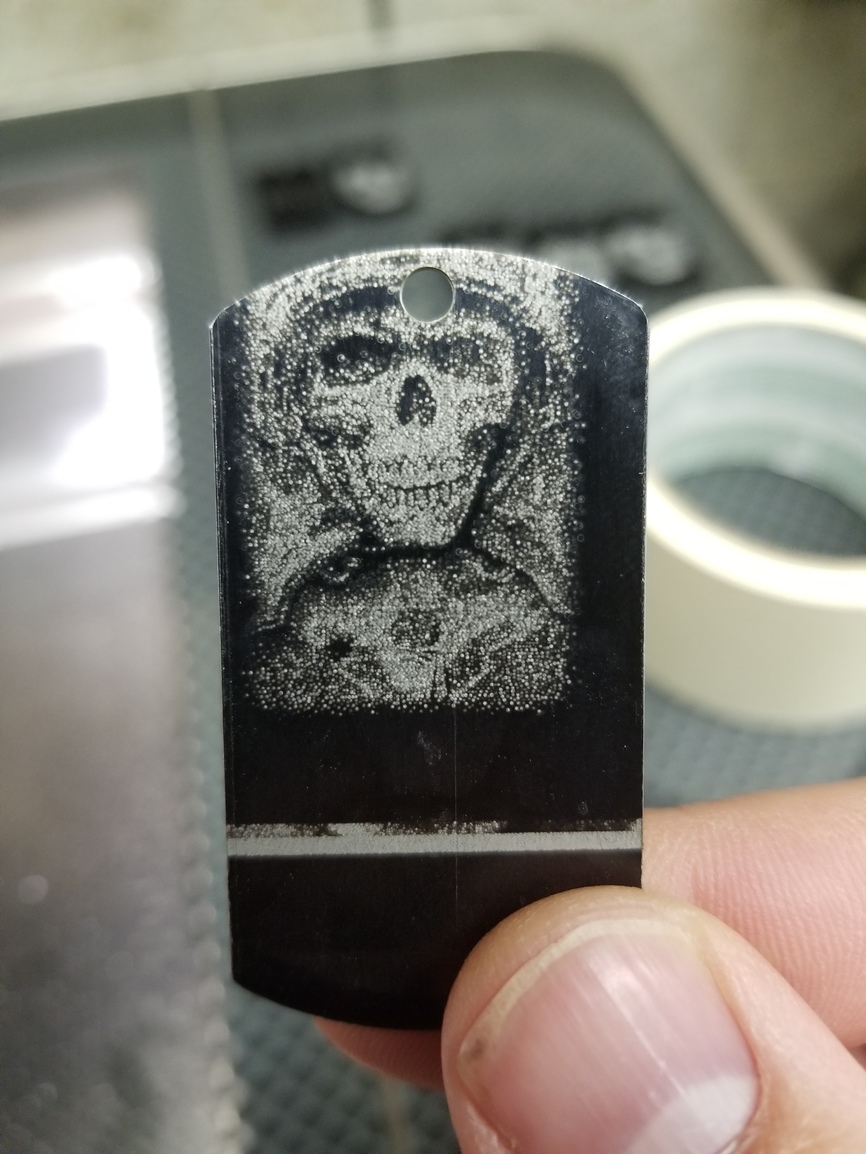
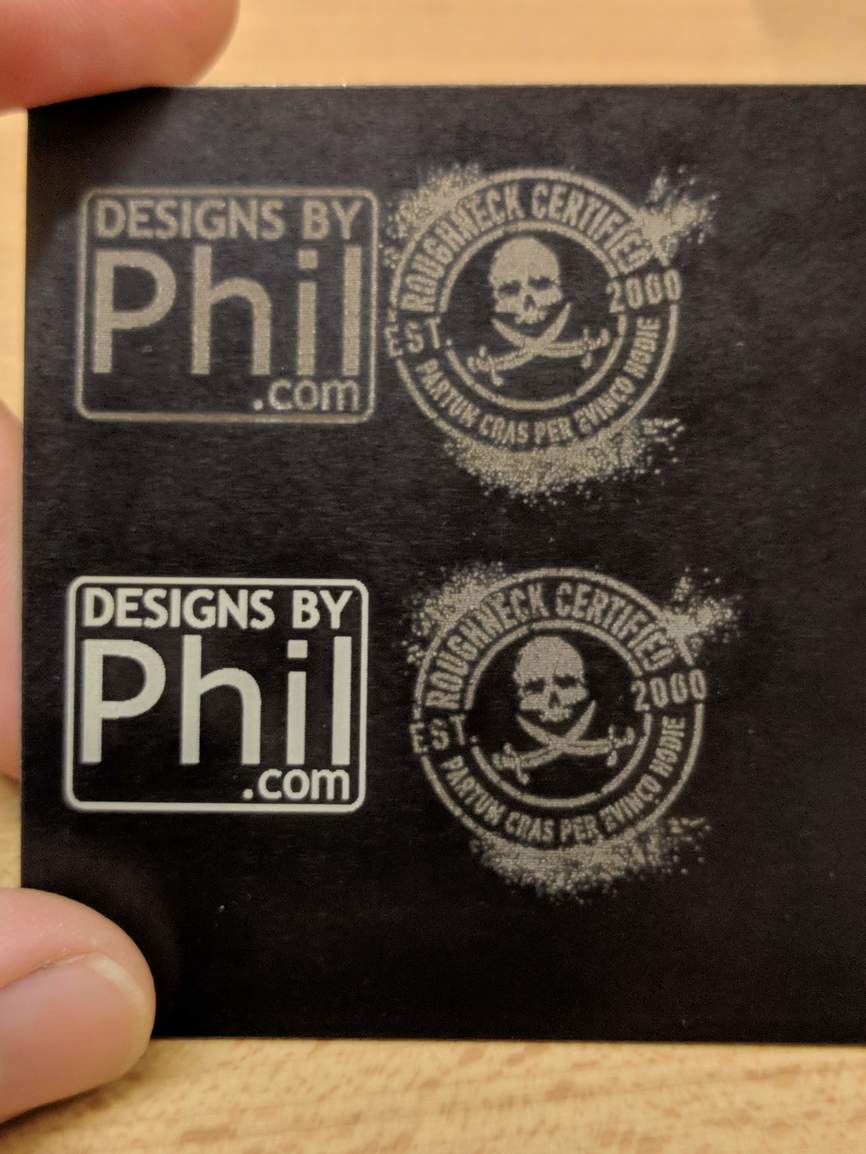
I ran a couple tests here in the office using your designs, as well as the settings extracted from the logs.

(Vector on the left, raster on the right)

In the first test (the top two), I simulated a focus error of about 6 mm (based on the logs from one of your prints.)
And for the second test (the bottom two), I simulated a focus error of about 3 mm.

What to do about it:

You have a couple options to work-around this issue:

Option 1: Make sure the autofocuser is measuring the correct spot

  • Make sure the red laser mark strikes the surface of the material you’re trying to print.

  • If you see the red laser mark hit something else (at at different height), cancel the print and make changes to the design, the setup, or the layout and try again.

Option 2: Manually set focus

Regarding Vectors and Rasters

Our software handles the engraving of vectors and rasters differently.

What to do about it:

Depending on the design you’re working with, it might be easier to use design software to convert vectors into rasters, or visa versa.

I hope these details help you get more consistent print results.

3 Likes

I had the material set at .031 I believe or close to that. If you set the material thickness, doesn’t that set the focus?

And thank you for your work digging into thisp.

So if I’m understanding you correctly, setting the material thickness on the top of the screen doesn’t set the focus to manually focus at that height?