I made one stamp and accidentally forgot to invert my image so it engraved out the positive space which was not my intention.
So I fixed my file. I inverted my image in photoshop so it would engrave the negative space and leave simply the vector I wanted the stamp to be.
I have tried saving this file in different formats and uploading into the app. EVERY SINGLE TIME it takes my image in the left column and inverts it back to the wrong orientation. What the hell is going on? The app has NEVER changed one of my files before like this. I am so angry and unable to get my work done. I can’t find this situation in the forums and don’t know how to make this work.
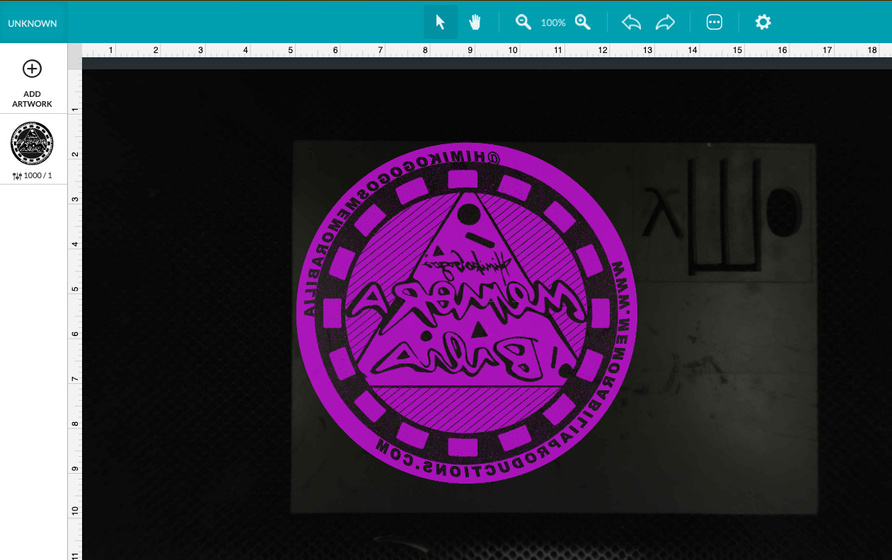
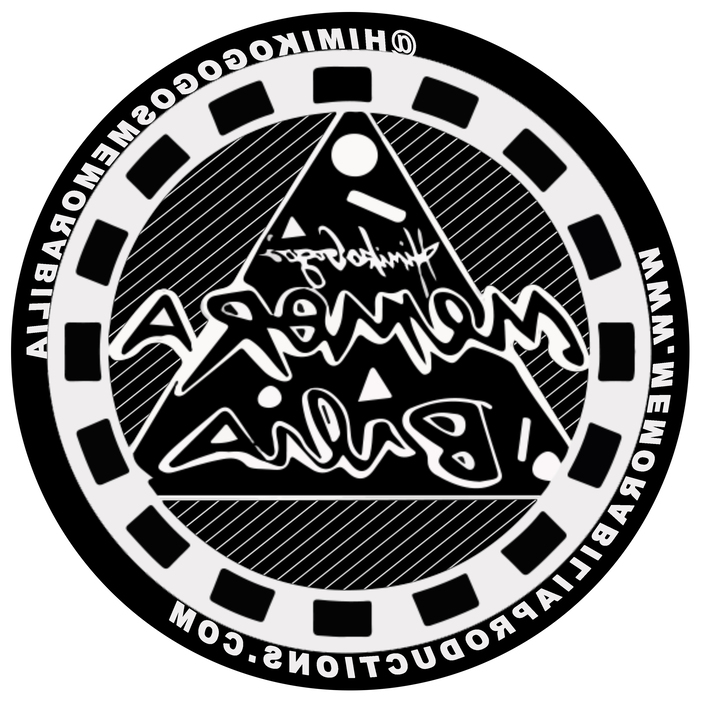
Anywhere you have filled vector shapes or raster images in your artwork, those will be engraved. The image is showing you (with black in the thumbnail, and pink on the bed) where it’s going to engrave.
If you upload your image here, we can see for sure what’s going wrong and try to help you with it.
I just did an engrave job with the opposite of this image with the graphic in white and it engraved the positive space which I didn’t intend…
So I went back and fixed the file making the black in the image in the negative space so it would engrave the negative space.
However when I upload the new file, it appears in the bed to want to engrave the wrong part of the image again like it did the first time, only it shouldn’t be because that isn’t what my file looks like.
Okay, this is a little hard to explain…the part that you see in pink is the part that is going to be lasered, so it makes that part deeper. (Removes the material there.) The result is going to be…all of the white areas in your original design will be higher than the black areas. Is that the part that you want to ink for a stamp? If so, that is doing the correct thing for making a stamp.
For any kind of vector operations on GF, it’s not about whether the graphic is black or white or any other color. It’s about whether there is a shape or there is not a shape. You’ll have to knock out all your white pieces to get it to work the way you intend.
OR
Rasterize your image and set the engrave to “vary power” to skip all that work.
An easy thing @Jules has it right. everything the laser will not touch will be in black, everything that will cut will be purple, the image you posted is a jpeg so will need a circle in vector if you want to cut it out.
If you cut what you posted white will be high and black low, If you have it in vector format, it will do a cleaner job but might take some work to get the high and low places correct.
The image you uploaded is a raster, but it sounds like the one you’re working with is a vector image. The raster image will have deeper engraving for darker colors, and shallower for lighter colors, so it sounds like it should work the way you want.
However, if you’re working from a vector image, fill gets engraved, period. That means white = black = red = blue. Regardless of color, anything with a fill will get engraved. The only thing colors in vector files is separate out individual steps of the operation.
Yeah, this use to get me all the time too as it does seem like it’s backwards. Our brains equate the pink to being the light color in our design, but it’s not. Pink is the part that’s going to be engraved away (black in your design) and the dark areas are the places where nothing is going to happen.
Just stick a white piece of paper in the glowforge (temporarily) so that the background is white, not black, and you’ll be able to understand what is going on a little more easily. The dark background throws off some people because design programs almost always have white (or sometimes a medium neutral grey), but the glowforge doesn’t.
Also, try not to think of the design in terms of black and white when you’re dealing with the glowforge – think of it as positive and negative. Negative space is not white, with regards to the glowforge; it’s nothing. There should be nothing where you want the glowforge to do nothing. If you put a colour in an svg file, for exampe, even if it’s white, the glowforge interprets that as positive space. In other words, you can’t make something disappear by making it white; you make something disappear by removing it. Stick to that for vector and raster and you’ll run into fewer problems.
So, the graphic on the left is showing you the imagine in black, NOT in black and white. The graphic on the bed is showing you the image in pink, NOT in pink and black. They’re identical, not opposite.
I’m so sorry you ran into trouble. Some great advice has been given in this thread explaining some steps you can try to resolve the issue you were running into. Were you able to get the results you wanted by trying these suggestions? If not, please let us know and we’ll be happy to keep looking into it.