Still having issues with alignment. I have followed all the instructions I was given.
“Use Proofgrade™ materials.
If you don’t use Proofgrade materials, use a precision set of calipers to measure your material, and enter the thickness in the “uncertified materials” dialog.
Use material that is not warped or tilted.
Place your design near the center of the bed.
Clean the area underneath your crumb tray, particularly the four indentations on the floor.
Reboot the machine. Alignment can drift over time, particularly if you bump the head of your Glowforge while removing material.
Should you finish all of these steps, and find that you have an alignment error of more than 1/4”, please try the following troubleshooting steps:
Turn off your Glowforge.
Check for small pieces of debris or dust.
Check the lower door to make sure it closes all the way. It may require some force to open, but open it, wipe any dust off the edges, and close it all the way.
Remove the tray and clean any dust or debris from the surface underneath. Pay careful attention to remove all debris from the four dimples where the tray rests.
Check the lid to make sure it closes all the way. Small particles of material, such as dust or debris, can prevent it from closing completely.
Check the surface your Glowforge is on to make sure it’s flat. Ensure it is not twisted slightly and that there is no debris propping up one side of the machine.
Turn your Glowforge back on.
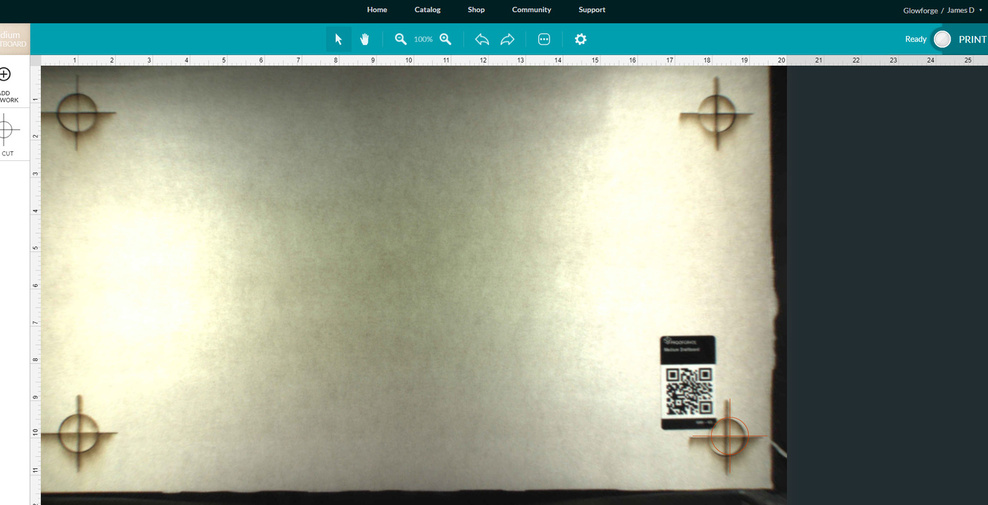
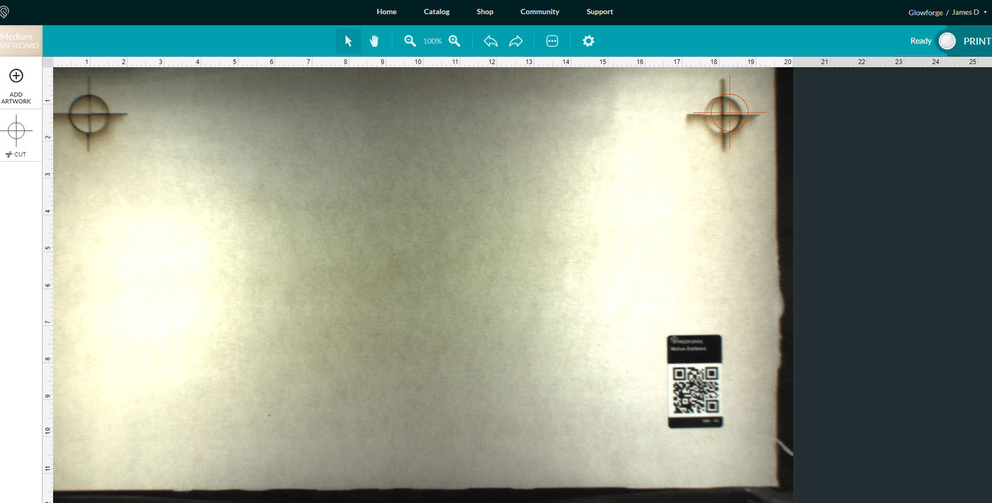
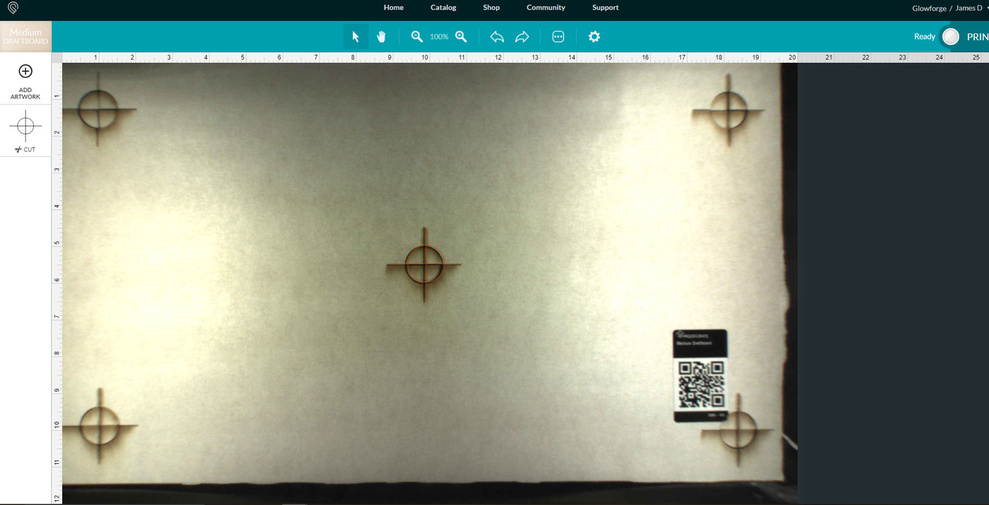
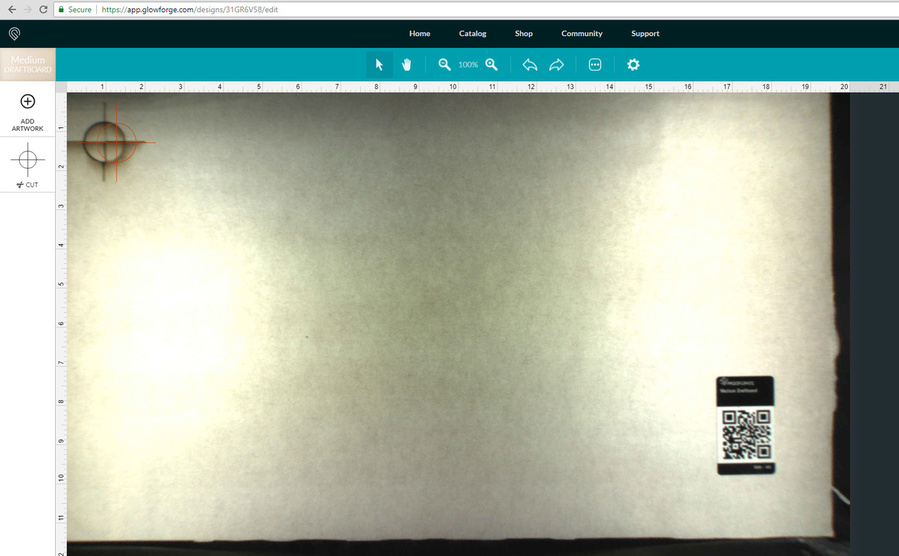
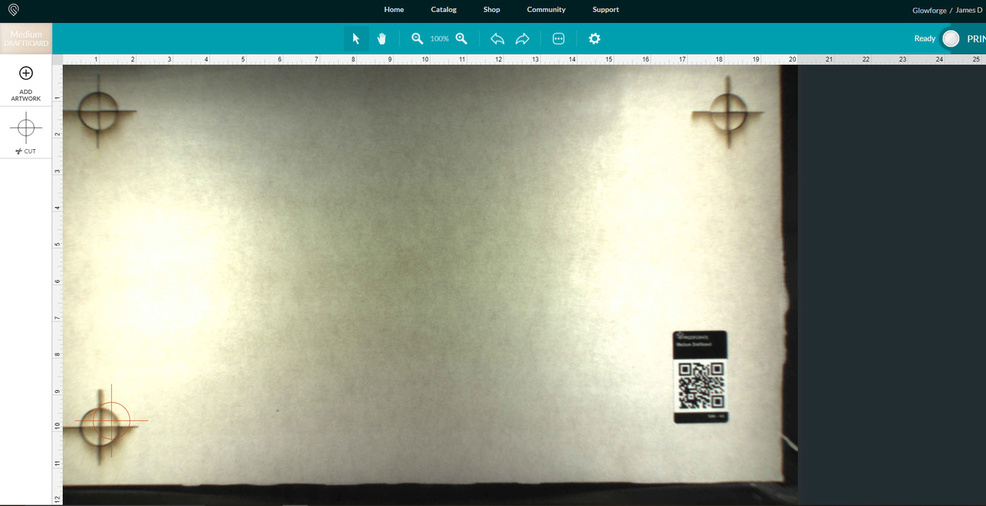
We included an extra piece of Proofgrade Draftboard with your materials shipment for troubleshooting. Place Proofgrade Draftboard in the center of the bed and print the Gift of Good Measure using the default settings.
When the print finishes, without moving your artwork or your material, take a screenshot of the workspace to show us the difference between the artwork placement and the actual print placement. Make sure to include the rulers in your screenshot and show as much of the bed as possible."
The alignment seems more than 1/4" now in the left side. I though alignment problems were being fixed? Please advise and see attached photos. Date was 8/14/18 at about 8:00 AM EST.
This is the biggest problem I’ve seen with the Glowforge. No way to calibrate. These do not come calibrated from the factory. If they are supposed to, I’ve seen a lot of alignment issues, so they aren’t doing a good job. I’m hoping you get a real answer. I have the same problem and the only answer I ever get is to put the part under the camera. Well, sometimes I need to print multiple parts and they won’t be right under the camera. Plus, I paid for a whole laser and want to use the whole bed.
Agreed. Even if they could have the head camera recognize pattern or color as a hard 0,0 so we could measure off that I would be happy. I want to add logos and designs to items, not just cut draft board parts out. They said 1/4" is normal… and that it would be fixed. I figured 3 years would have been enough time.
it’d be nice if they just had a system where we calibrate it by looking at the picture of what the camera sees, and align 4 arrows to the corners of the tray, that way it can use that to calibrate 1. what it sees where 2. where center is.
I agree. I posted something similar to this a couple months ago.
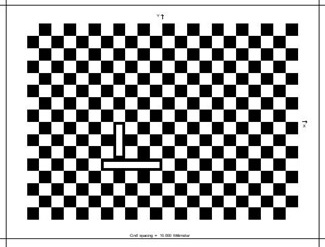
Have a mat that looks like this that we load into the crumb tray and the camera would know that each square is .25" and align everything that way. Then its just a calculation depending on the material height that could be done in the software. I work with industrial vision systems and this is how we calibrate cameras for robot material handling.
I shouldn’t have to cut out a jig for every thing I want to cut just so I can align pictures.
1920x1080 is the res. Not sure exactly what you mean in the second part. Changing from proof grade shouldn’t change the view unless you change the height of the focus.
Exactly. I am just frustrated as I thought by buying this I wouldn’t need jigs or worry too much about true zero. They also had way more than enough lead time before actual production to figure this out. It is a pretty big issue considering how they advertised this engraving ipads and laptops. People wouldn’t be too happy with a 1/4" off engraving.
With recalibration do jigs even work? Do you need to do test cuts/marks each time then adjust?
I ask the second part because that is exactly what happened on my last unit. It would be half an inch out of alignment (with the correct measurement input) for proof-grade settings but perfectly aligned with the “undetected” camera view.
I’m so sorry for the frustrating experience. Thanks for taking the time to run those tests and post the results. Unfortunately, it looks like your unit is experiencing an issue that we can’t resolve remotely. I want you to have a reliable unit, so I’m recommending we replace this one. I’ll be in touch via email to sort out the details. I’m so sorry about the bad news.