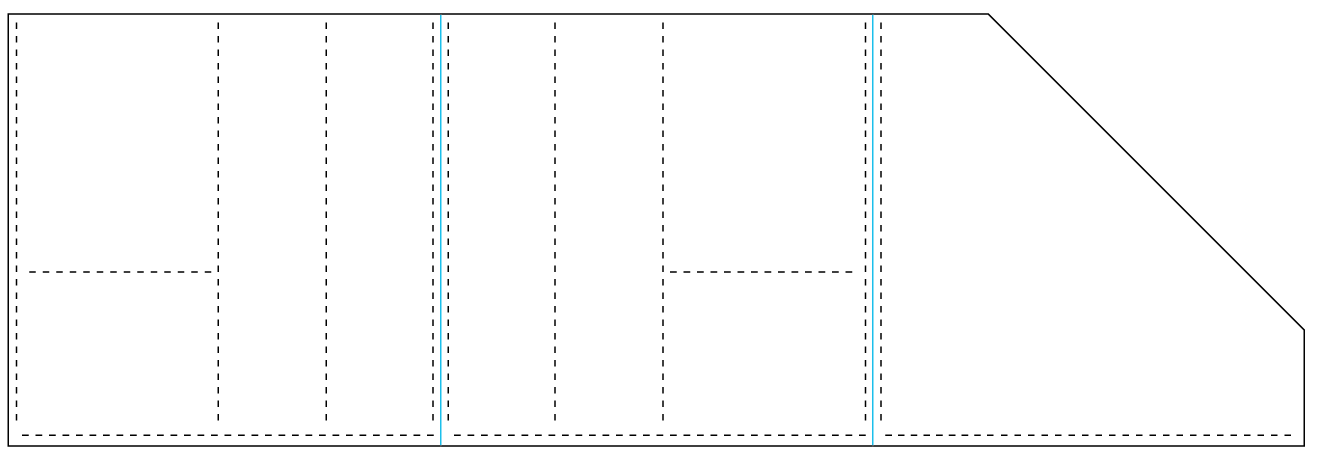
I’ve been wanting to do some more with leather and decided I’d make a nice pencil holder for the notebook I embellished. I started by taking a scrap of paper and folding it and stapling it together around some pencils to roughly estimate the design I was thinking of. Then I took the staples out of it and flattened it out again to measure the spacing between my “staple seams”. I cleaned it up a bit in Illustrator and ended up with this design that is basically a tri-fold of 4"x4" squares with the corner trimmed off of one (which lined up nicely with the remnant material I had).
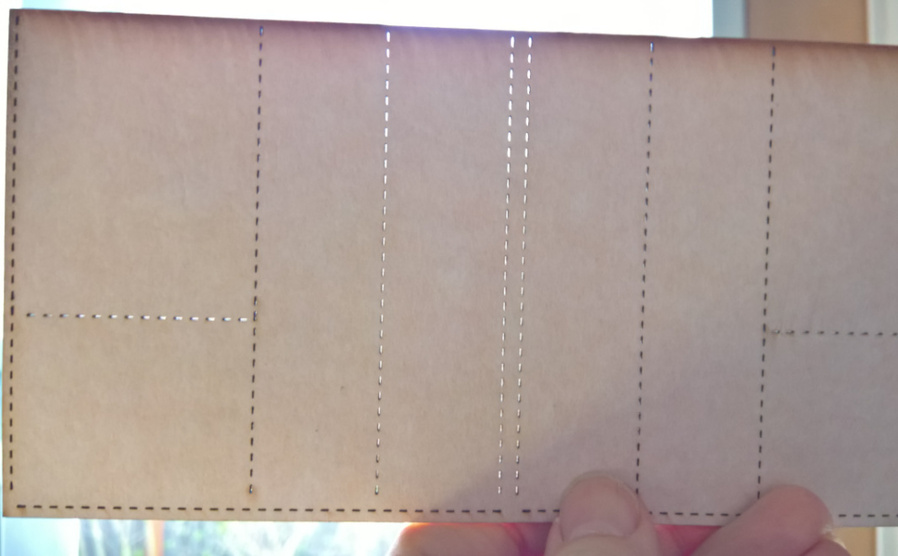
it fit well enough when I placed it on the material I had and cut quickly and cleanly, though still has that burned leather smell that tends to linger for a bit. Maybe we should come up with some patented treatment for the protective paper that counters the smell of burning leather

the little dashed lines I used to prepare for sewing worked great. You can see the light shining through them here.
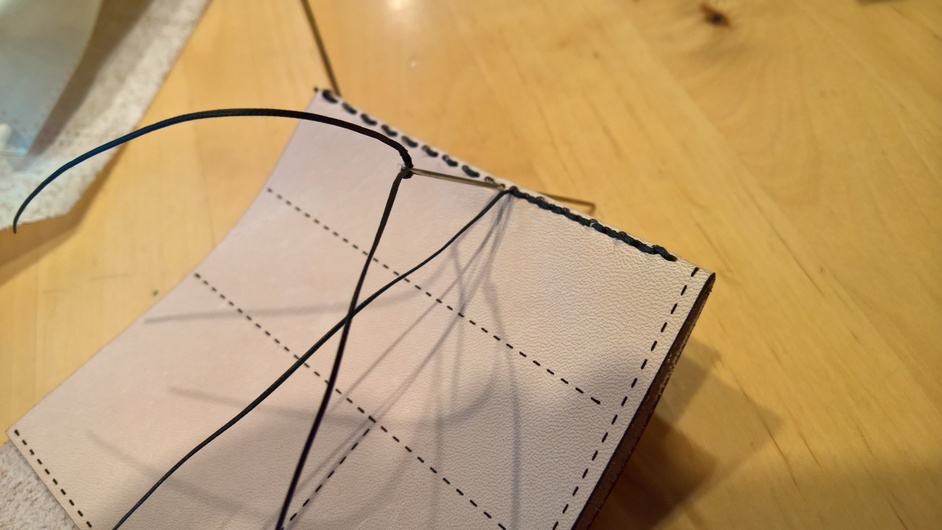
After removing the paper it was time for some finger numbing stitching work.
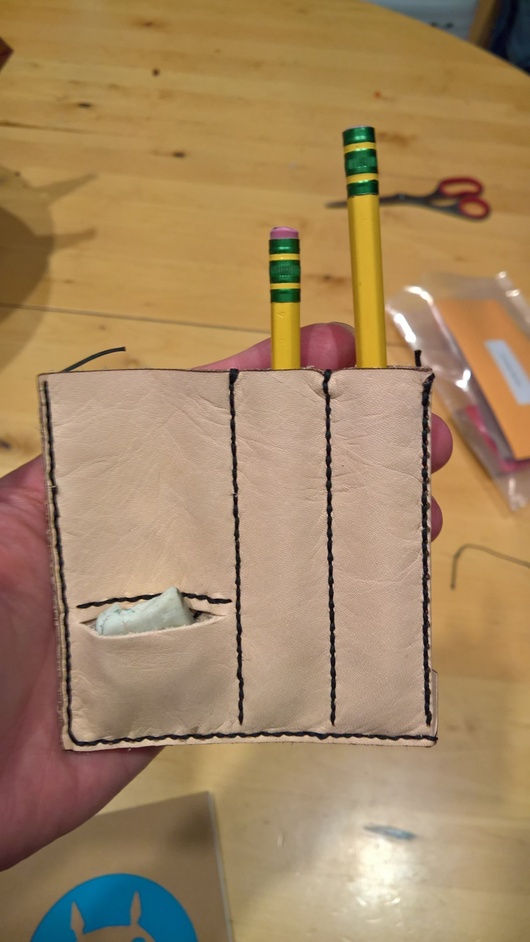
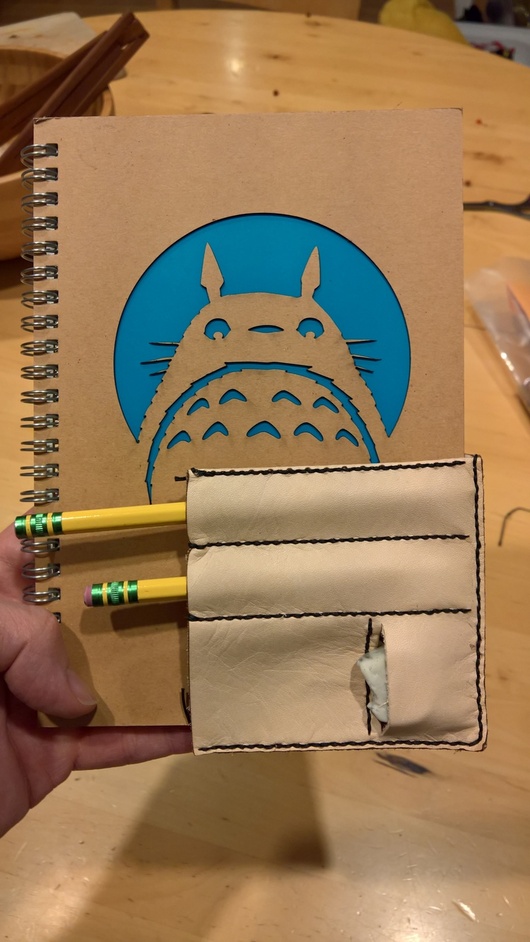
I was pretty happy when I found the pencils fit right into the pockets and so did my eraser. I figure I can use the larger pocket for new erasers, then the smaller one as they reduce in size. Maybe a pencil sharpener in one of the pockets if I don’t use my mechanical pencils.
and here it is from the back…
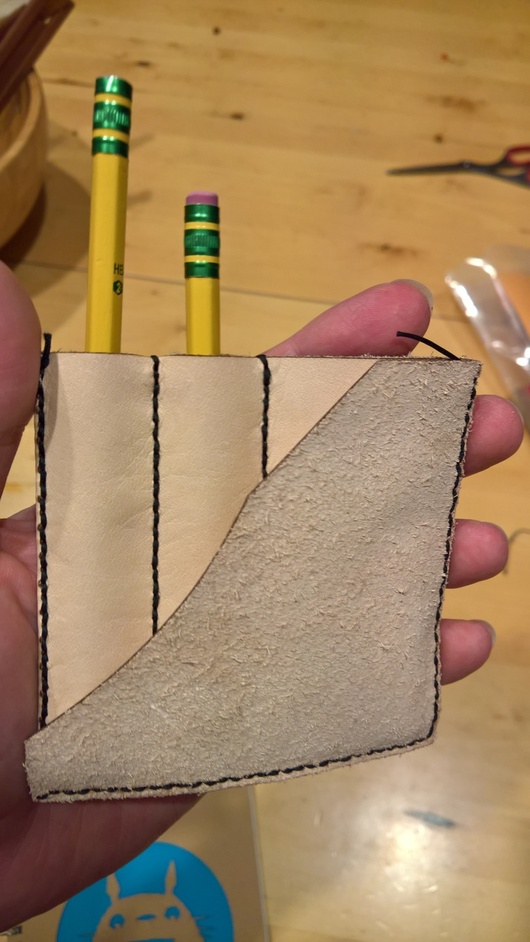
I’d actually intended to fold it the other way around, but I’d gotten the sides mixed up and reversed it. It still works well, just aligned 90 degrees off of my intended design (I wanted the pencils vertical to fit the notebook better). Kind of hard to tell which side of the leather is smooth under the protective paper. I should note it next time
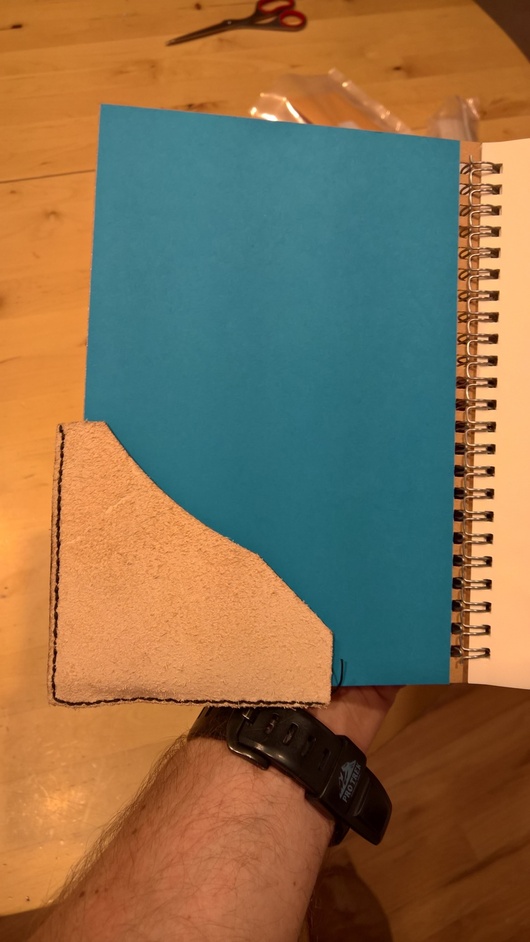
and inside the cover where it attaches to the corner.
I should probably etch something onto the front of it as well for some decoration, maybe to match the book if I give it as a gift. I’ll have to wait until my fingers recover form the stitching though before trying another