The trials of a noob: Uranus Shadowboxes

I have never laser cut before and have been a fly on the wall around here as we waited. Mine finally came and I put these tributes to Uranus together in 24 hours.

I did some furious forum searching after sending my black and white, text and line .ai image to the Glowforge and finding it interpreting everything very differently than I had intended. A huge thank you to the pioneers and regulars here who have been so active and helpful in this community. Things would have taken much longer and been much more painful if not for all of you, especially Jules.

I needed to make these quickly, so I had to convince the Glowforge to just see the black and white image. I used the following workflow and _am open to ways to improve upon this method, as I and other newbies may have to employ it again:

  1. Open .ai file in Photoshop
  2. Export as high res .bmp
  3. Open .bmp in Illustrator and trace it.
  4. Export as .svg

The cuts that came out of the Glowforge were very clean and precise. Moreso than I had anticipated after having done the above.

I had forgotten about the waiver we all agreed to a year ago saying that the actual cut area of the bed would be an inch or so less in each direction. That forced me to try and resize things within the GFUI and that was not a pleasant experience. The level of inaccuracy was the exact opposite of what I am hoping to achieve by owning one of these.

My next project is to make double sided coins. Not very excited after this experience to get the UI’s assistance with that job, but I am still excited about this wonderful tool and all it can make.

22 Likes
  1. Open .ai file in Illustrator
  2. Convert text to outline
  3. Export as .svg
5 Likes

ROFL! Well, those turned out beautiful, especially when lit! (How’d you get the awesome prism effects with the background? Is that a special acrylic?) :grinning:

It usually helps to do any resizing in Illustrator before you export the SVG, that way you can save yourself some nail biting, but it looks like you figured it out pretty quick, so great job.

(And thanks for the nod to the regulars, they all worked their butts off and all knowledge came from them.) :wink:

3 Likes

Very Nice! :sunglasses:

Easy enough, People here squared me away when I did a job of 1,000 two-sided 1-1/2" tokens.

  • Secure your material with magnets or tape so it cannot move.
  • Nest the designs for the two sides together, one on top of the other in the same file - a different color or each side, with a third color for the cut.
  • Engrave the first side and cut, ignoring the other color.
  • Take a piece of tape and lift each piece and flip it over, put it back in the hole it was cut from.
  • Run the other color.

After the cut, don’t be freaked out when the camera image shows the second side displaced. If the material hasn’t moved it will engrave exactly where it is supposed to.

If you are doing a full sheet, I found it much quicker to pull the mask off and drop 10 or so in rubbing alcohol and wipe the stain off instead of spending an hour weeding.
Also, I recommend cutting a full sheet down to half, or where ever you can get a divide between designs. That way you can get the maximum use of material instead of losing the peripheral area you can’t reach.
Here is an example. This is a full sheet of proofgrade.

11 Likes

Ooooooo, glittery wonders! Really like that effect. How are you gonna top that?

2 Likes

Hubble just spotted something massive coming out of Uranus.

2 Likes

I never realized how smooth and pretty Uranus was. Just like a beautiful robin’s egg blue marble.

4 Likes

No giggling at the back, please.

I have found that speaking or thinking of the planet using the long a as in ahhh a good thing when trying to talk about the planet and not body parts.

In Russian apparently the translation of “Black Hole” has similar connotation and set back Russian cosmology for years.

2 Likes

It’s a good thing Uranus doesn’t have any asteroids, that would ruin the beauty.

2 Likes

I have found that a 4" tile not only establishes a distance but also a line parallel to the front face of pass-through gard. My magnets are round so unless there are two pair near opposite corners there can be considerable rotation and of course engraves are best done parallel to the machine anyway so a mid field reference that won’t burn is also handy.

A reference that will stay accurate even if the material is removed and replaced is very handy also

1 Like

Or just save as PDF. No conversion needed. :wink:

1 Like

Is the GFUI able to process fonts embedded in PDF’s?

1 Like

Yup, no need to convert to outline.

1 Like

From what I read, that will work if the image is just text. I added some white blocks in to bridge areas of the fonts (you can see it in the bigger one) and a few graphics. Converting to outline didn’t work for those parts.

I saved the .ai files as PDFs first, assuming that would work, especially if I disabled layers, or whatever those settings are, but the Glowforge interpreted the PDF the same as the .ai file.

Just a neat posterboard from Michael’s. Would be pretty cool to cut my own acrylic background though…
Definitely got the resizing concept after all was said and done, so the next project will be a bit easier.

1 Like

Awesome idea! I got excited for a second, but I’m hoping to make a ton of coin sized coins and realized pretty quickly how long that’s going to take. If I find a better way that isn’t already on the forums, I’ll post it.

1 Like

I sent you a private message to pick your brain a little bit more. I’m hoping that, if this isn’t already addressed somewhere on the forums, that I can create a decent workflow for consistent double sided engraves.

I haven’t received a PM from you…

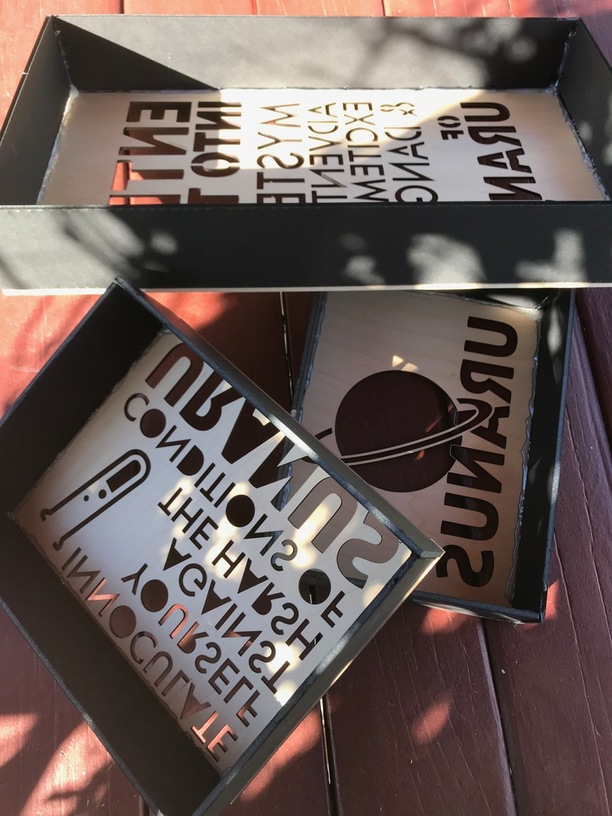
For starters, I would not try to do all of them at once, putting all your eggs in one basket as it were. if one goes wrong they ALL go wrong. #2 you cannot use all of a slab of proofgrade particularly with engraves, and so lose half an inch all around.

If on the other hand, you have a piece of proofgrade cut into slices just bigger than your coins you can cut the first one, take it out and flip it over and engrave that, you have thus risked only one, by the time you get to 4 or six or whatever fits on a slice you will have a very good idea of what can go wrong and are ready to move to the next step. In that case, you make a batch of however many fit on a slice and do those then you just pop out the old slice an put in the new, and hit print again, As long as they are horizontal the time it takes for a slice is the same as many slices vertically, though horizontally, you can do 5 in the time it would take for three one at a time.

Now your only problem is to have all the slices the same and a way to ensure that they are in exactly the same place each time. When I was at Home Depot I was running about looking for things to cut and engrave (and also magnets} and among many other things picked up four white 4x4 bathroom tiles thinking to engrave them. I accidentally engraved one so I can see it works great but most importantly, as it turned out, it is a great way to establish a parallel line in the prime cutting area, being up against the front wall on the other side of them by putting the inch or so magnet up against the right-hand rise in the crumb tray you establish an absolute dimension on the right that is outside of the “no engrave” zone and thus available to do your coins. then you put magnets on the other two sides and you have established an absolute (and repeatable location for slices. You would have to be very precise to have the group so just flipping it over would give you the other side but the circles are precise and you could flip the coins inside each of those, with a tight control for positioning you can remove and replace the slices as much as is necessary making double sure they are tight against the tiles and the end magnet in each case as those are your measurements,

The reason the center is the most accurate is when it is directly below the camera there is the least distortion so if your whole group is positioned by the one nearest the camera it will be the most accurate. However, to make sure you are within the bounds set all the engraves on ignore and set the cut at 5% and 500 zooms which will make a barely visible line if that is correct then set the cut to proofgrade and just one of the engraves to proofgrade engrave. there are settings there as well and that is what the first time one at a time is for. To explore the settings you prefer, so when you do all of them you will know the settings.

once you get going with the individual strips ( you could do all the same side at first and after just drop in the coins in the last frame and hit Engrave only (no need to cut again) and you will move very fast and have a lot of control so any mess up will be limited in damage.

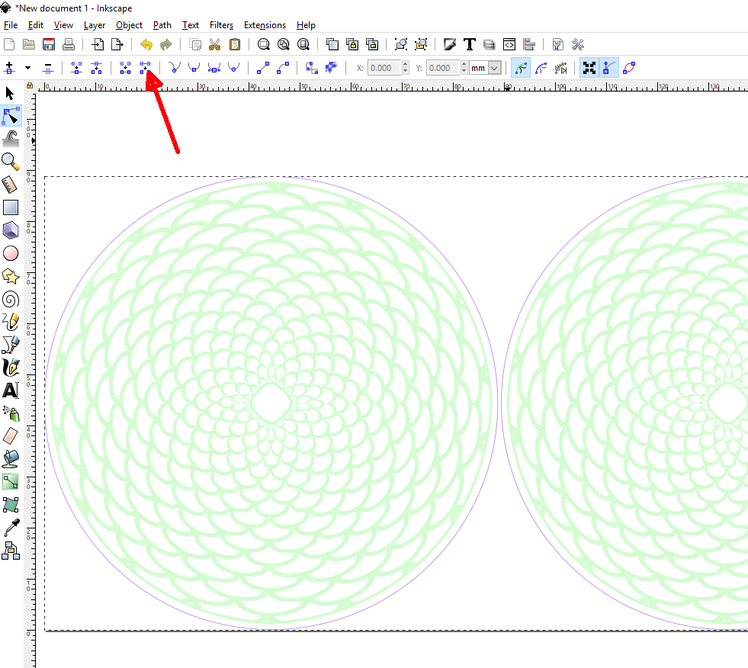
To get a line that is just one move and does not cross itself, you make a rectangle, go to paths and hit “make object path” while the rectangle is selected, then go to the node editor and select two nodes and hit the button the arrow is pointing to and the line between those two nodes will disappear. then hit the delete key and the nodes will also go away and you will have a straight line, but a special one that will not be two lines on top of each other make them 9.5 inches tall If your coins are just under an inch then copy the vertical starting at one inch and then two etc make those a group. then copy the group and make them 2
-inch tall exactly aligned with the others but make them a different color for both edge and fill (it does not matter what color but just different)

When you lay in your whole sheet of proofgrade bring in that file and line it up with the numbers at the top, you will have two groups of lines at the side the long ones and the short ones. You set the short ones on ignore and try to hang the long ones just over one edge and as far up as they will go. Do not try to adjust the size (if you do accidentally hit undo) as you can only adjust in both dimensions and you already have the correct horizontal size, the do the proofgrade cut and the cut will not go all the way. then you flip the sheet vertically so the uncut area is at the bottom but otherwise in exactly the same left to right, so now you set the long lines on ignore and the short ones on proofgrade cut and they should perfectly cut the rest of the way.

2 Likes