Also consider if you can flip some of the pieces so that the slants match. Others have had success with that.
1 Like
I’ve had excellent results speeding up the cut and doing two passes. (In other words, deliberately try to not cut all the way through the first time.) The second pass (at the original surface focal point) evens out the channel.
2 Likes
Flipping the pieces won’t even out the cuts, but that’s not a bad idea. Cutting twice seems possible, and maybe a good solution. Thanks for the help.
Cheers
It actually works really well; you should take a look at some of the discussions about kerf and inlays. ![]()
2 Likes
@TwoBeard: As usual, @geek2nurse is right! In my experience “flipping” mating pieces works well—and with the right kerf adjustment the fit can be more or less perfect in every way. 
2 Likes
Sorry, I meant that it won’t work for my project. The alignment would be near impossible on the opposite side. I’ll be looking at the kerf alignment threads soon, I couldn’t remember what words to search. Thanks!
Cheers
1 Like
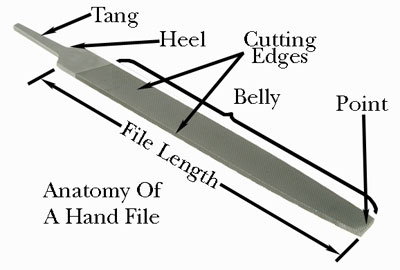
If all else fails there are always hand files that can get everything straight. Sometimes you can spend several times longer playing with settings that the two minutes a hand file would take.
1 Like
I’m not sure what a hand file is, or where to find it, but the double pass @Jules suggested has already worked wonders. I’ll just have to write notes or create custom cut settings, as it seems to work best at about a 136% PG cut speed, but it’s not exact. Thanks for all the help and input!
Cheers
1 Like
Face meet palm. I walked right into that.
On the other side, I have now more than 150 of these to make, so every minute counts. I do make some adjustments with files and razors, but if I can get this thing together without minor hand adjustments I’ll be happy.
Cheers
2 Likes
Hi @TwoBeard - would you mind posting a photo of the edge of your print so we can examine the issue? Additionally, do you remember the time and date of the print? Thanks!
A bit of sandpaper glued flat to a length of scrap also works well to straighten edges even on large numbers of pieces. as the amount of material that needs to be removed is tiny and you do get a better glue joint on unburnt material,
As for making a joint 90 degrees I have a solution there a well,. Every time I make something with finger joints, I get scrap with matching fingers if I put two pieces of scrap together and am careful to make the joint 90 degrees I have a very strong tool to hold other things to 90 degrees,
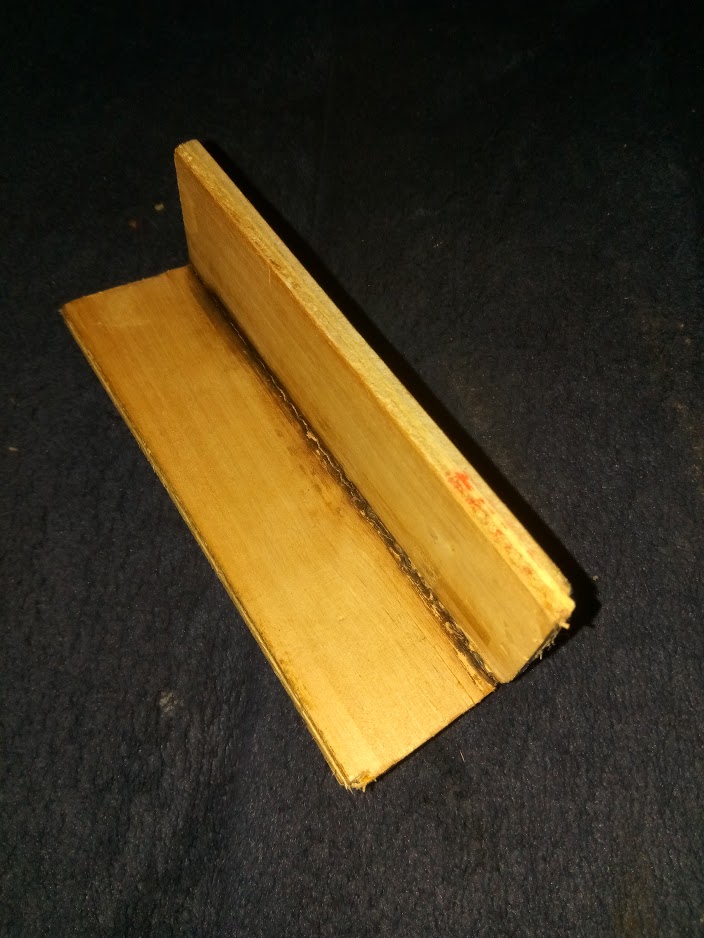
I also have those with sandpaper glued to just one side and where I want a nice 90-degree face that will do a good and quick job of it.
3 Likes
@rbtdanforth Sandpaper does work, but I’m working with large quantities and solvent adhesion on acrylic, so a 90 degree wedge like what you showed will cause problems if even the slightest bit of excess solvent is applied. It follows tight spaces and would try to adhere to the wood or any other surface it’s connected to. I have a 90 degree vice I’m using, but the size of some of the pieces doesn’t quite work, and all edges being 90 would help with other parts of assembly as well.
@stephen4 I’ll get some pictures up after I get my son to school. Should be within the hour.
Cheers, and thanks for the help.
1 Like
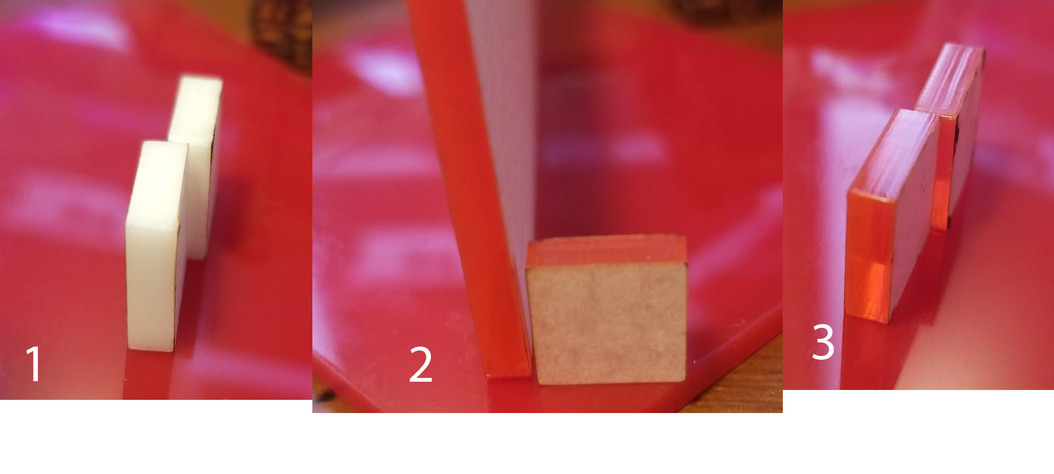
@stephen4 Here are the pics.
In section 1, the white pieces are slightly off from each other. The squares are only 3/8", so anything larger and the angle difference becomes far more noticeable. The piece in front is a Proofgrade cut, and the one in the back is done with a two pass cut using Proofgrade power but at 137% PG speed. This is on a GF Pro as well.
Section 2 shows the angle received from most Proofgrade cuts on most materials, but the example is in the Pink Translucent Acrylic. This cut was done yesterday. The small square is mostly level and was done with a two pass cut at about 138% PG speed.
Section 3 shows the two pass cut in back, and a new sample cut this morning on unedited Proofgrade settings. The angle is not nearly as bad as it was, but it does show very slight 1 or 2 degrees of difference. That’s definitely usable, but the settings hadn’t changed. I’m not sure why the inconsistency, but consistency is what I’m after.
I hope this is helpful.
Cheers
I have not worked with acrylic much but i would be interested in try the angles in wax as it would eliminate even the very thin openings alternatively designing something more complex to accomplish the same goals,. in any case sanding the face lightly would make it 90 degrees from the start.
Right, I’m not opposed to sanding the faces. My problem is quantity. I have more than 150 to make with 5 or 6 edges connected, so I’m trying to make the pieces produced with cleaner, more accurate edges straight out of the forge.
1 Like
I apologize for our delay. Thank you so much for the details. I’m looking into it now. As soon as I have more information I’ll update this thread.
Not a problem, Stephen, thanks for checking in. Currently working with the double pass method and there’s a little testing to do before things work just right, but it’s keeping things rolling.
Cheers!
I see you emailed us and we’re working on it there, so I’m going to close this topic.