Been lurking for awhile, but this is my first project post to put up. I’m always amazed at what all of you are making, it’s great for coming up with new ideas!
I’ve been playing around with Raspberry Pi computers for a few years (I think I have 7 of them now), and wanted to make a modular pi ‘thing’ with screen and speakers. My goal was for everything to be modular, no soldering, and that I could reuse the parts as I iterate design ideas.
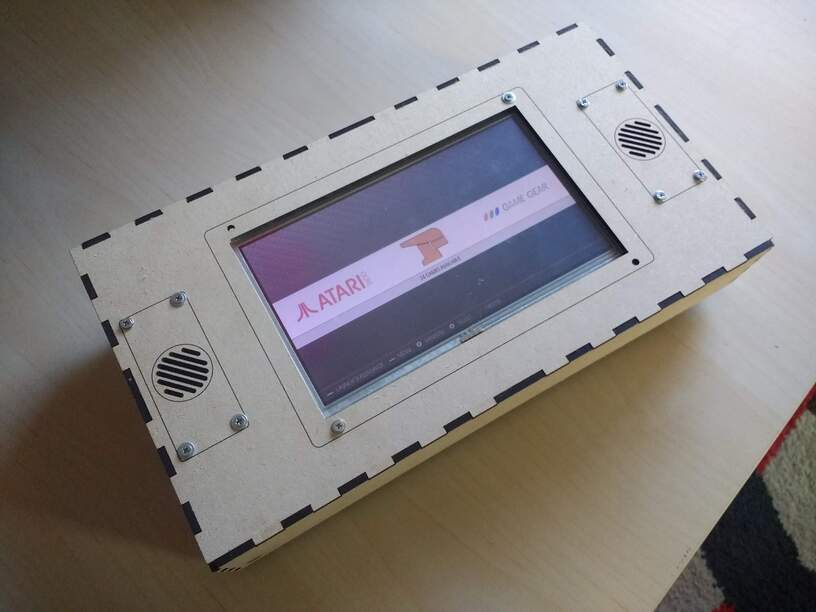
This is prototype number 1! I drew all the pieces in Draftsight, including the tabs. I could have used an online template, but was worried that I’d get complacent and that the box ultimately wouldn’t work. It takes a lot longer to draw them, but was a good exercise to go through.
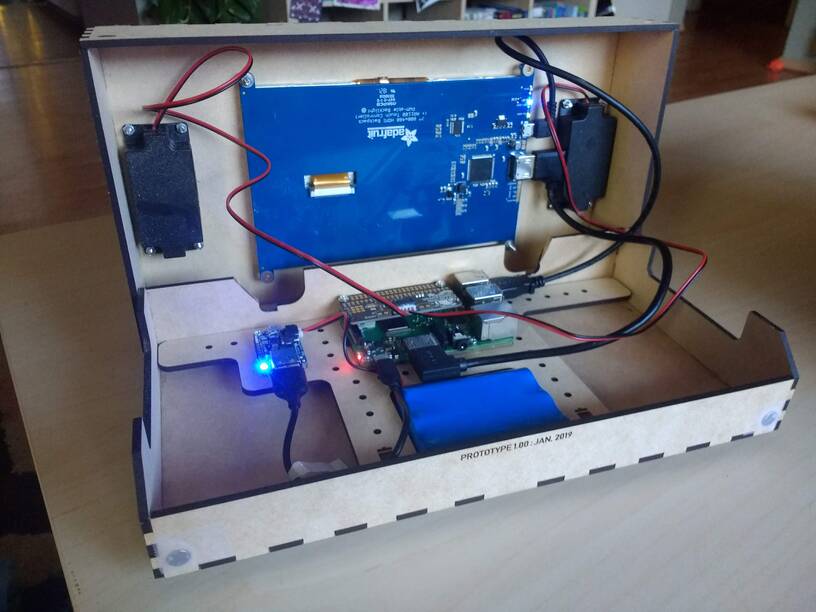
Inside the box is a tray thing that the computer and power boards are bolted to. The extra holes are for cable management, and then the battery sits below in the box. I can lift out the whole board and disconnect all the cables whenever I need to. You can also see two magnets in the front to keep the box shut. In the back I designed two cuts where you could route cables through the back. It was a good idea, but I didn’t make them big enough and the mounting bolt for the screen got in the way. I ended up using a dremel to cut them bigger so everything would fit.
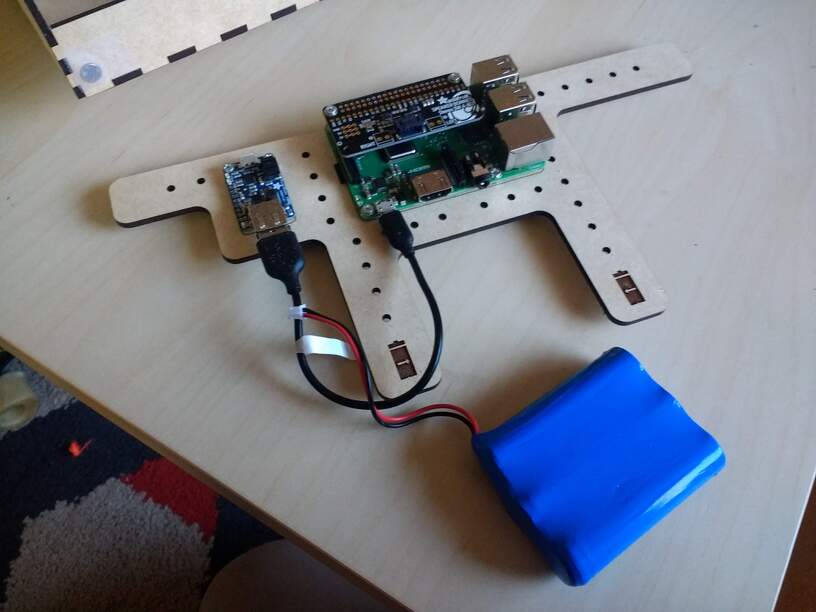
The inner board taken out and cables disconnected.
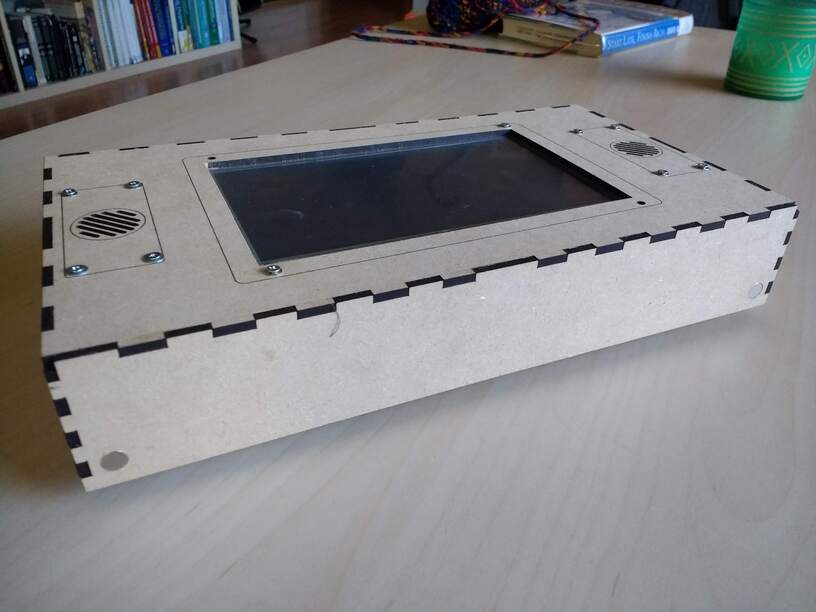
In the front you can see the other 2 magnets that keep the box closed. I put clear tape on the inside to hold them in place, but they friction fit nicely. The hole I cut for the screen was a tiny bit too small, so there was a lot of filing to do to get it to fit.
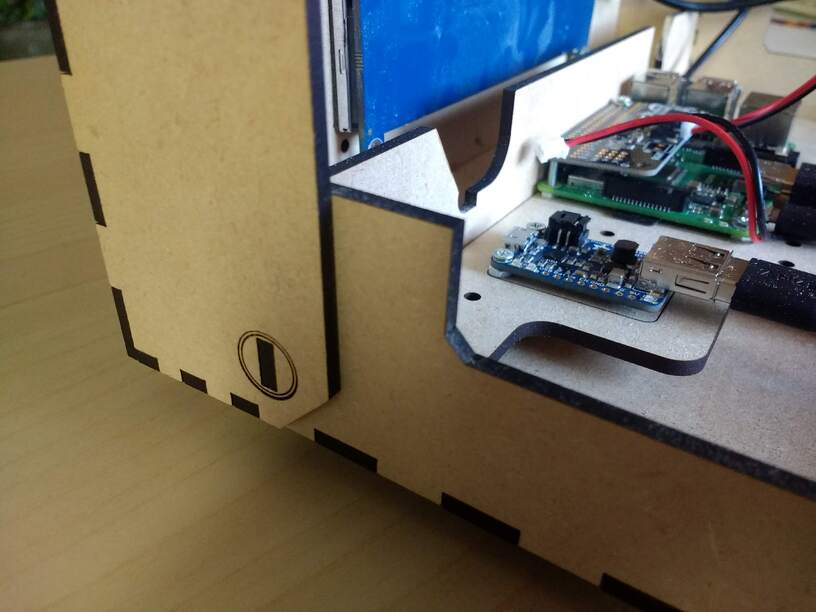
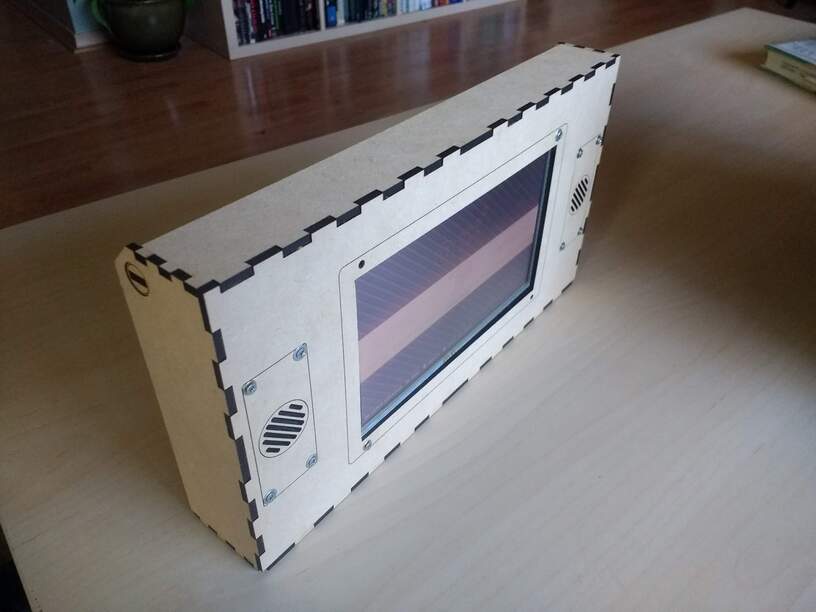
A closeup of the hinge. I got the idea from [Gallery - Boxes.py]. It’s their integrated hinge option. It lays nice and flat, and is pretty easy to build. No glue or anything. You can also see my dremel hatchet job in the back… I ran out of 20mm long bolts, so the screen is only held in place by 2 of them for now.
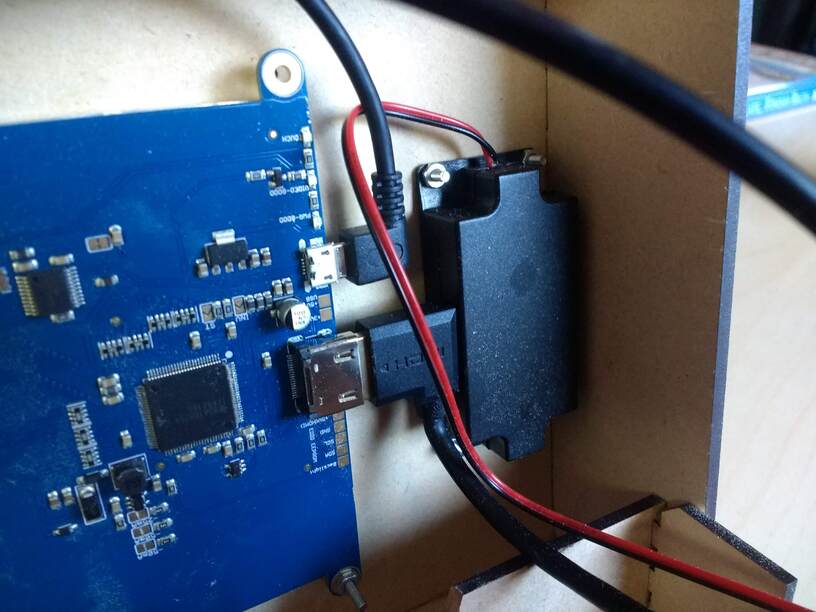
A closeup of the screen connector/speaker. This is too close, you have to install the screen, plug it in, then install the speaker. The 90º HDMI & USB are key though, otherwise the box would be much wider. I ended up making cuts in the side panels because I was worried the speakers would conflict (can bee seen in the image above), but I think future versions won’t need that.
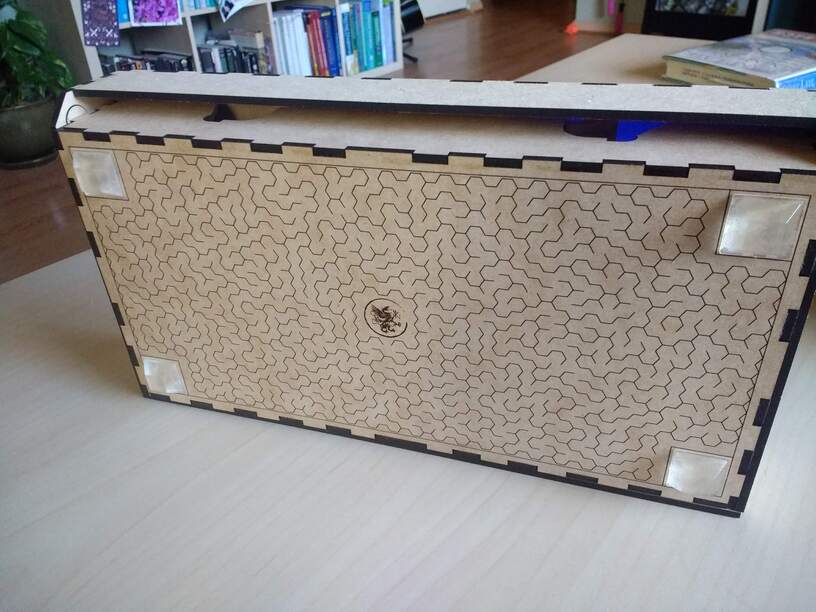
I wanted to do something fun on the back, so I generated a bunch of mazes from http://www.mazegenerator.net/. I looked for one with a pretty circuitous solution, but the solution couldn’t involve any of the corners, because that’s where the feet are glued on. I like the look of it, but it took probably 45 minutes to pull all the masking off.
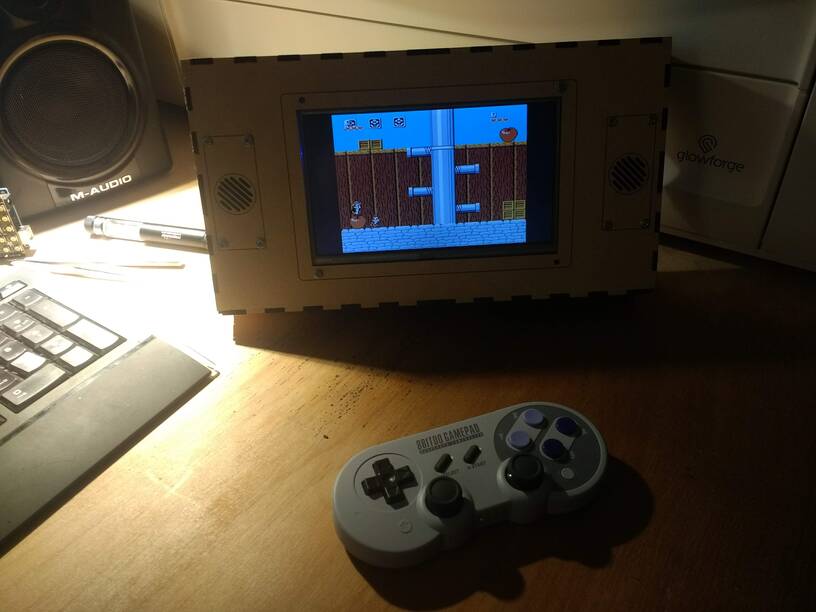
Action shot! I use a bluetooth controller, but you could just as easily run the cabling for a wired one through the back.
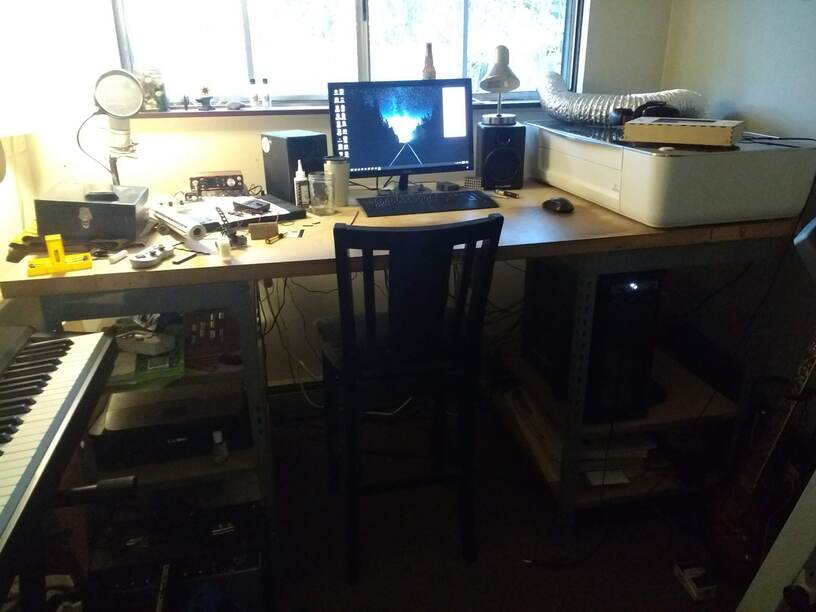
Finally, a shot of my (very messy) work space, glowforge for scale. I built this desk 5 years ago out of a 36"x84" solid core door, with industrial shelving pieces below. It’s standing height, and has all kinds of storage. My GF solution is not ideal (it was bigger than I thought!) with venting out the window, but it works.
For the next iteration, I want to solve a few problems. Specifically, I want to enlarge the holes in the back for cord routing. The current design isn’t easily recharged because the mini-usb port is too close to the back of the box for the cable to plug in. I also need to add a power switch, which (boo) will require some soldering. Ideally, I’d also like a volume knob, but I need to research if this is possible with the speaker board I’m using. I used all proofgrade draftboard for this version, but I think I ultimately want to use either maple or walnut ply.
The CAD files I drew assumed the material was 1/8", which it is, but I think designing to 3mm instead will get better results on the tabs between pieces. I’d like to be able to sand them down, and 1/8" is just a little too big. The magnets to keep the box closed are super powerful, and without some kind of cut in the front it’s tricky to get the thing open. I also might use smaller feet on the bottom, just to keep the whole profile down a bit.
The whole box is about 11" wide, 6 1/4" tall, and 2" high. I think I could shave off a 1/4" on the height, which I might also try next go.
Anyway, thanks for reading this rambling post! It’s been a super fun project, and hopefully in the next design I can fix the issues!