We have a GF Pro that we’ve have had for about a year and a half and have finally gotten around to trying leather. The leather being used is PG Medium Natural Leather, the file being used is an earring file which includes leather for the connection piece and we cannot get a clean cut at all. We are using the settings for PG leather, multiple files have been and we are needing to get a box cutter and cut the pieces out, because if we try to pull them out they would rip and cause stringing pieces on the design. Anyone ever had this problem with cutting PG leather?
Leather, sadly even  leather, is never truly consistent. I find it safest to run the cut with the PG settings and then check to see if the piece comes out cleanly (I grab an inch of masking tape and put it on the top and pull to see if it comes out - as the rest of the material is always pinned down (right? right!)). If it doesn’t come out cleanly I close the lid, and re-run the cut portion bumping the speed up by ~25 points. That 2nd cut will clip the remaining strings, and as long as nothing moves the cut will be in exactly the same place.
(I do that tape thing with every single piece of material, BTW)
5 Likes
Hi @jcanady. I’m sorry to hear that you’ve been running into some trouble cutting through Proofgrade leather recently. There are several things that need to be checked if the laser doesn’t cleanly cut through the material. We’ve discovered that photos don’t always come through well in emails, so I’ve included several links that will take you to reference instructions and photos. Please turn off your Glowforge and check the following:
- The crumb tray is clean and properly installed
- The material is perfectly flat on the crumb tray. For Leather, it can help to try pinning down the material to ensure there is no curve or curl creating uneven height above the print bed.
- All optical components are clean and undamaged
- Design is set to “Cut”
We can also have you try running our test print to gauge the performance of your Glowforge against its designed specifications by doing the following:
-
Print the Gift of Good Measure on Proofgrade material, using Proofgrade settings. (Proofgrade Medium Draftboard works well with this test)
-
When the print finishes, leave the lid closed and wait until the fans stop and the picture updates.
Check the completed print:
- If the Gift of Good Measure fails to cut through, take a photo of the front and back of the print and attach these photos to your reply.
We’ll look forward to hearing back!
Should GFGM test on the leather?
Hello @jcanady, typically for the cut through test we would prefer you to use Proofgrade Draftboard if you have it. If it cuts through the Draftboard cleanly, then we can repeat the test using Proofgrade Leather.
Since you’ll be using up some of your Proofgrade materials for this testing, I’ve sent you a $35 gift card in a separate email, so that you can replace those material afterward.
Please let us know when the test is complete and we’ll review the print logs. Thank you!
Hey @jcanady, its been a little while since we heard from you so I wanted to check in. Were you able to run the Gift of Good Measure test? If so, could you please let us know how it turned out?
I ran the GFGM test and the GF didn’t cut through any part of the print. I used PG Medium Draftboard, I cleaned the GF yesterday, what should be my next step?
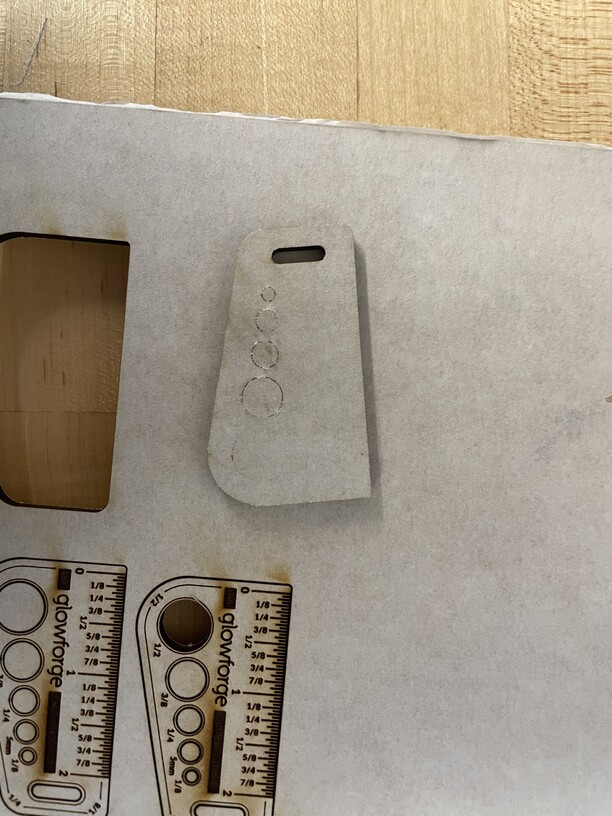
You’re going to need to post the photos here:
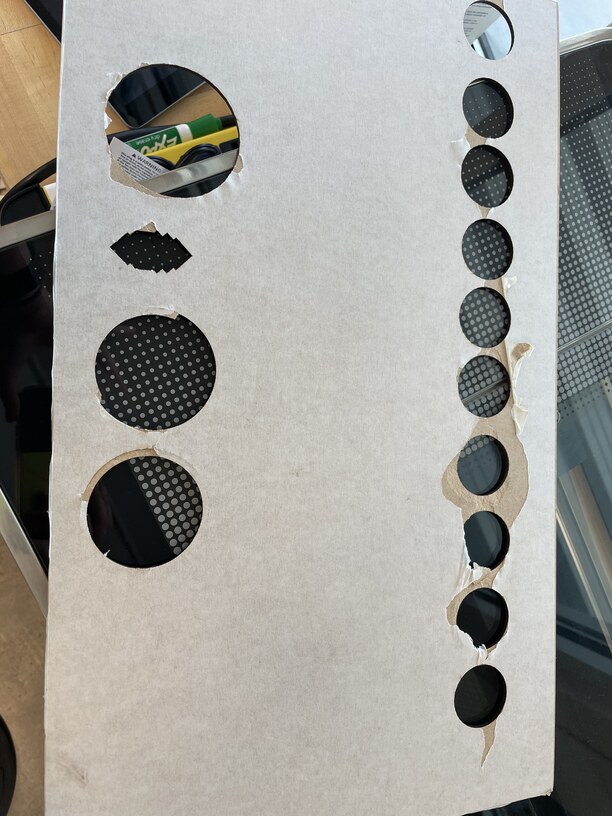
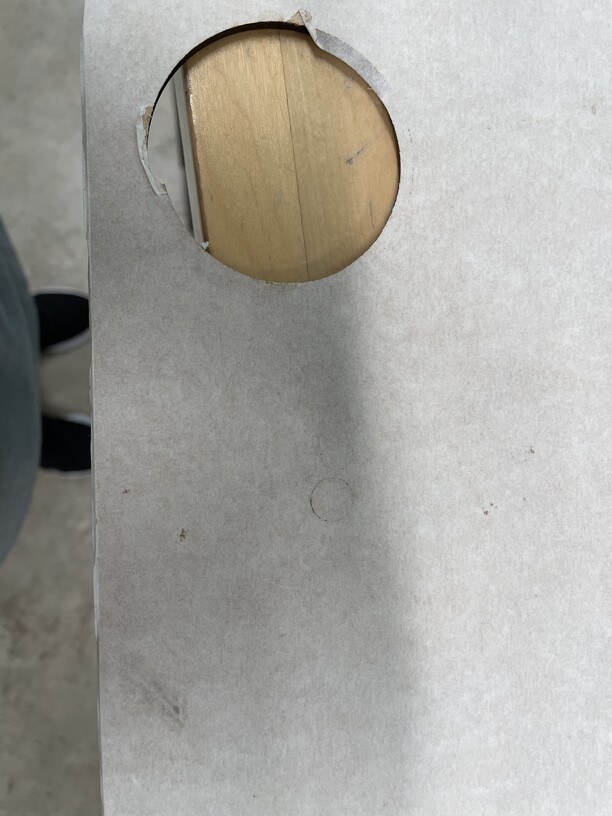
The First Image is the front, and I cannot get any of the “cut” pieces out.
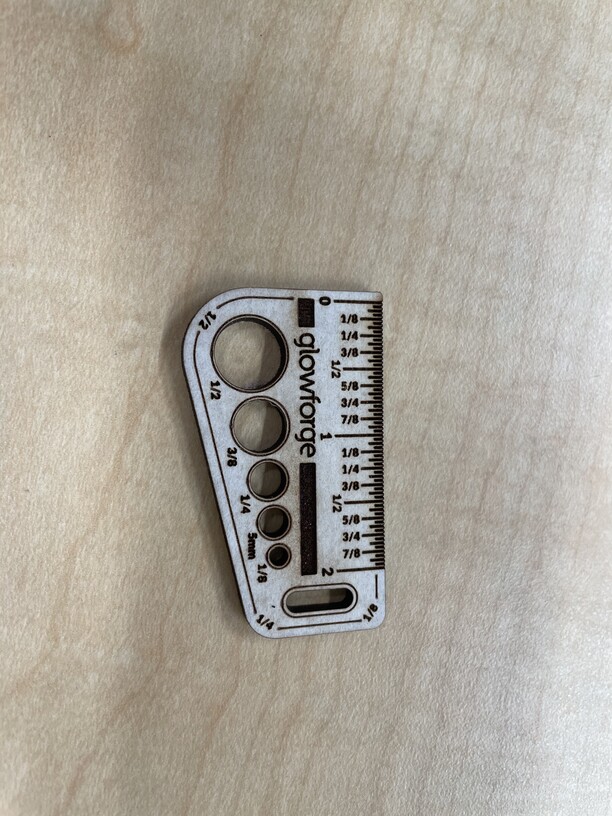
The Second is the back and you can tell that it didn’t cut through
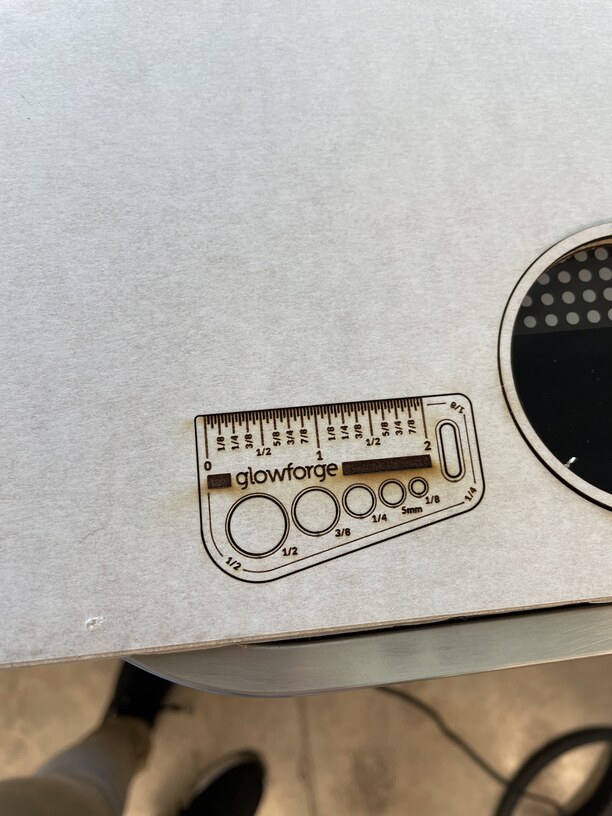
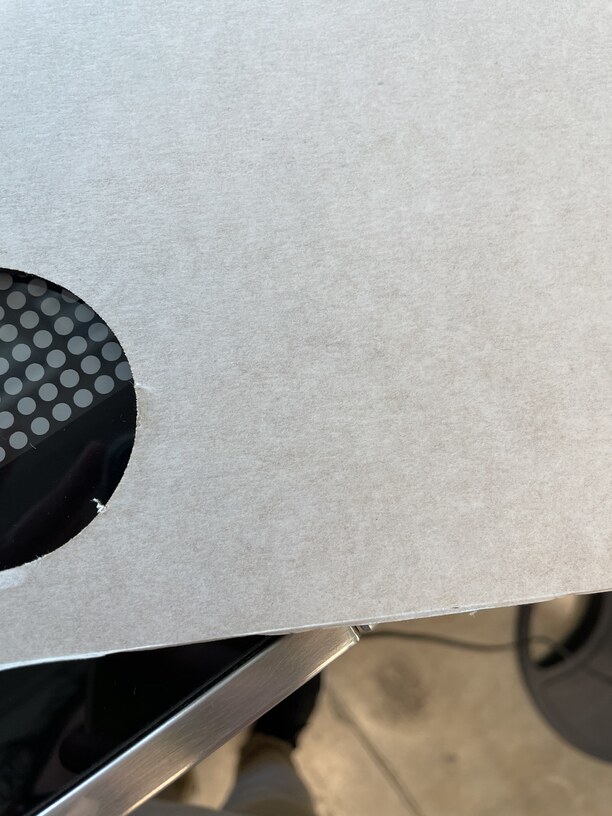
The last image is the whole back of the draftboard and it shows that I have to use excessive force when getting prints out.
1 Like
Hi @jcanady . Thank you for running the Gift of Good Measure print and sending photos of the results. I extracted the log files from your Glowforge to review since the test print failed to make any visible cut lines on the back of the material. I wasn’t able to isolate any specific cause for the print failure, so the next steps would be to get a better inspection of the optical components from your Glowforge. When you have a moment, can you please send us photos of the following?
I would like to check over just a few more things. Could you do the following for me?
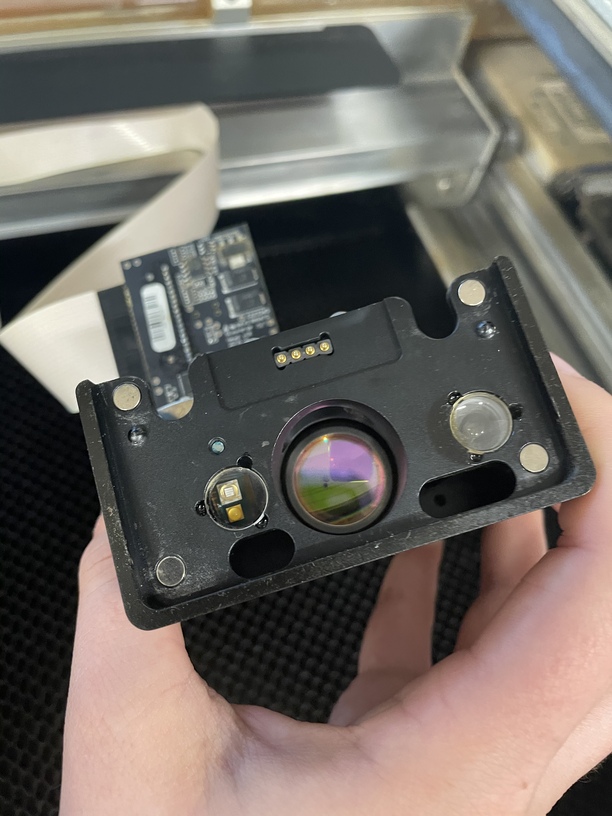
Please send photos of all your cleaned optical components, with special attention to any damage you might find:
- Both windows
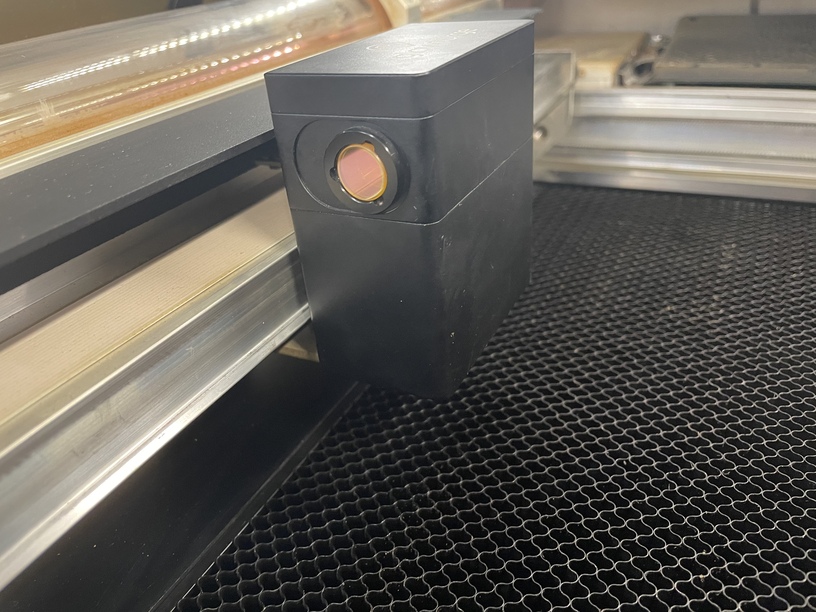
- The printer head window, on the left hand side of the printer head

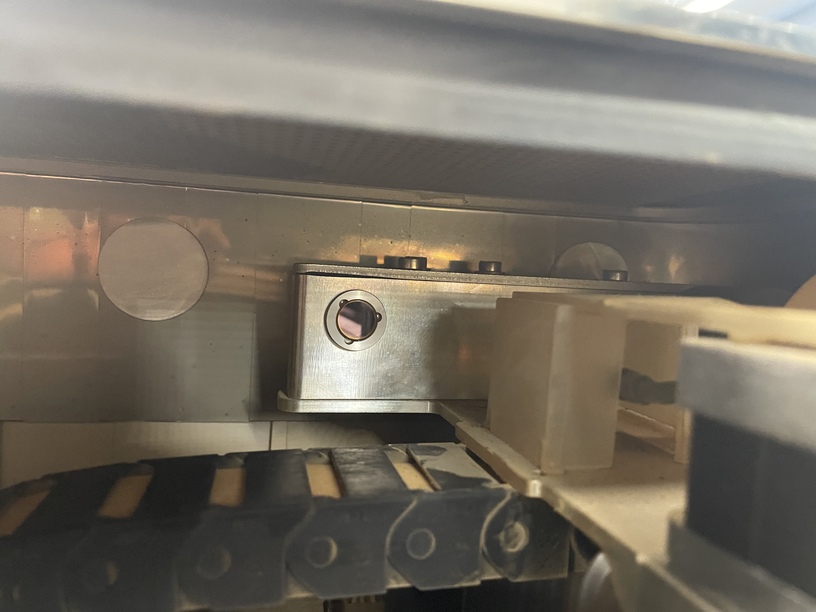
- The laser window on the inside left of the Glowforge

- The printer head window, on the left hand side of the printer head
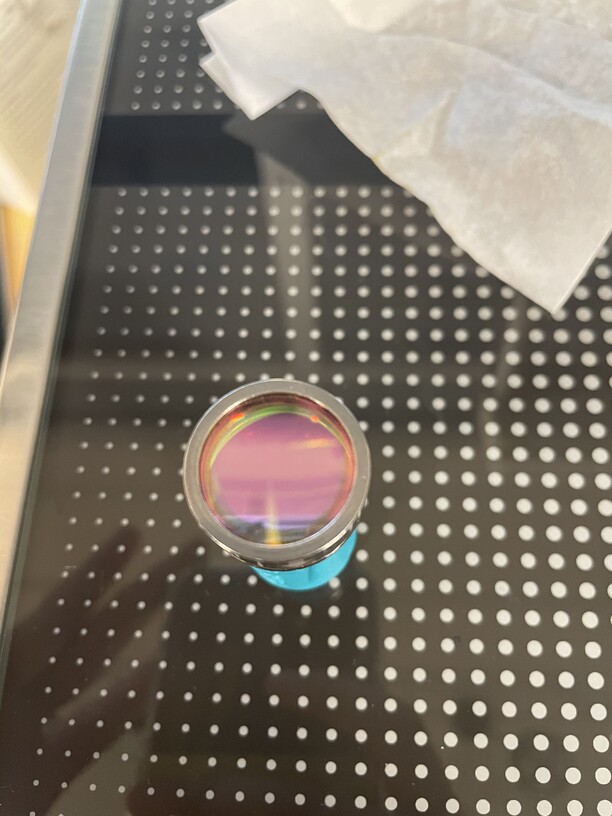
- The printer head lens
- Both sides of the lens, top and bottom

- Both sides of the lens, top and bottom
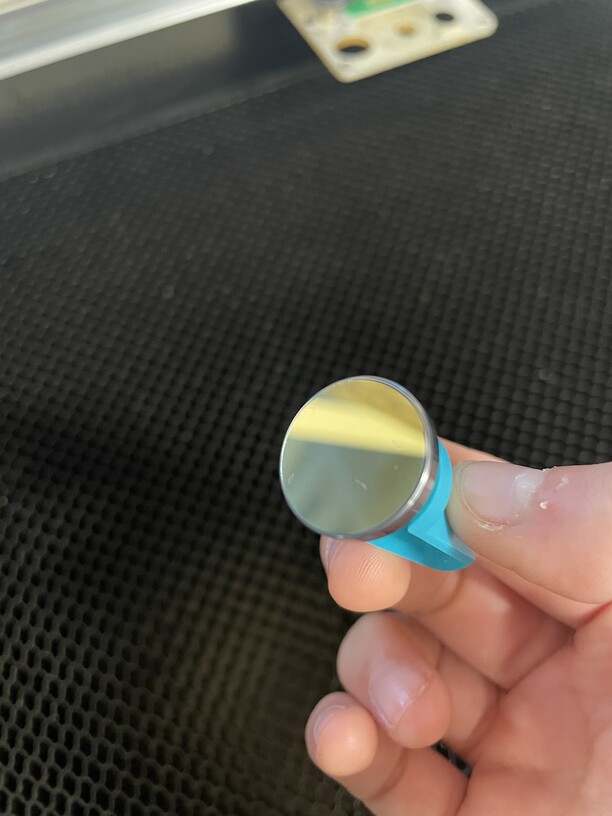
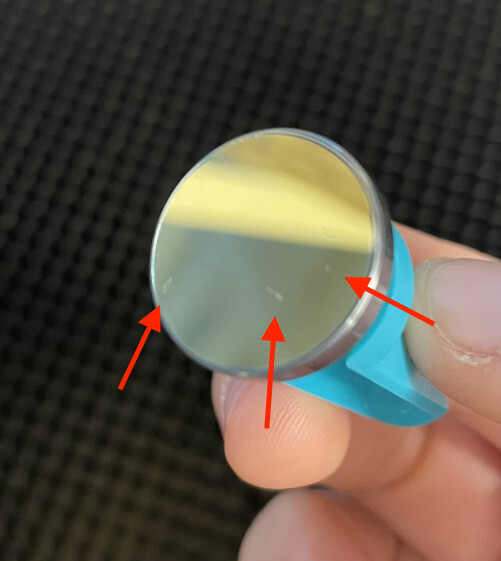
- The mirror inside the printer head

- The bottom of the printer head

Once I receive any photos, I can review them and decide the next best steps to get this resolved. Thank you!

Hello @jcanady,
Thank you for providing the photos of your optics. All of your optics looks really good, but I did notice some marks on the mirror. Its hard to tell from the photo if this is just lint or if these are scratches. If those are scratches, it would be best to go ahead and order a replacement mirror. It can be ordered from our online shop here: Glowforge Printer Head Mirror.
I’ve reviewed the result of the test print you sent. We have a new tool that allows us to remotely adjust the factory tuning of your unit and could help with your cut through trouble. This change may affect your Glowforge unit’s custom print settings. Because of this, I wanted to check in with you before I made this change.
Here’s how it would work:
- I’ll make a change to your configuration to test a new setting, and let you know when it’s been applied.
- You’ll print a Gift of Good Measure to test, along with anything else you’d like to test
- You’ll send me photos of the front and back of the prints.
- We’ll determine our next steps from there.
- We can try a couple of different settings to see if we can improve your Glowforge unit’s performance.
Please let me know when you are ready for me to apply the change and if you have any questions.
You can apply the change ![]()
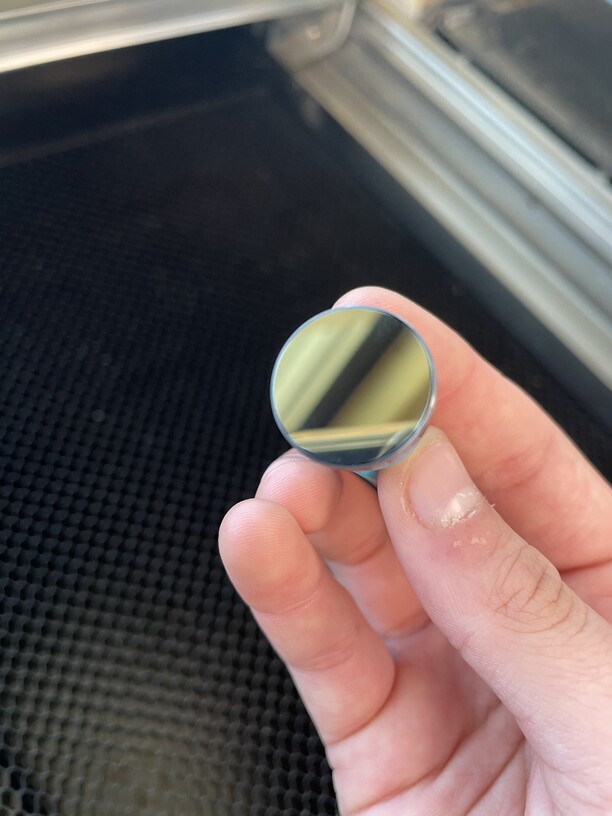
Here is the new photo with the lens clean , must have been lint left over from when I cleaned it
I’m glad to see that your mirror is in good shape!
Thank you for letting me know you would like to proceed with the settings change. I’ve gone ahead made a small change to your Glowforge unit’s configuration.
What changed
Your printer is moving too fast to cut through correctly. I adjusted it to fix that.
What About Settings
Your Proofgrade settings should now work. If not, we can make an additional adjustment.
Please Note: You should be cautious with any custom settings - this might have fixed them, or you might now need to speed them up a little. In either case, be sure to test any custom settings carefully the first time you use them.
Next steps
Your Glowforge is ready for the next print.
The best way for us to tell if your Glowforge needs another adjustment is to print the Gift of Good measure with the default Proofgrade settings on the same piece of material. This will help us to compare the results to the previous test print.
Please send me photos of the front and back of the print. They’ll determine our next steps.
Uploading: 7E86B106-0D31-47A9-9ACD-08DF2E0CAC16.jpeg… Uploading: 28132B75-D2CB-4E4D-B8ED-C6174BB50A79.jpeg…
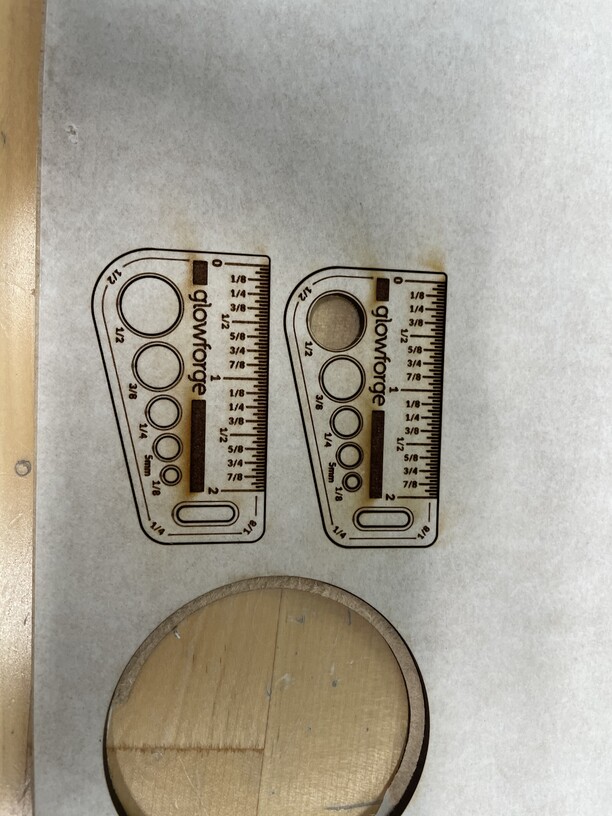
The first photo is of those of them side to side the top one is the newest cut,
Hi @jcanady. Unfortunately, it looks like the photos had some trouble uploading your last response. Would you be able to try attaching them again, or feel free to follow up with us with any email attachment sent to suppport@glowforge.com. We can take a look at the photos and decide on next best steps from there. Thank you!

HI @jcanady I @ . I appreciate you getting those uploaded again, and I was able to review them. I made another adjustment based on the results of the Gift of Good Measure Print. Can you go ahead and try another test print and let us know how it goes? Thanks!
Hi, Brandon.
Just so you’re aware, we are a school, so we are only available to print during school hours.
Next week is spring break, so if you don’t hear from us it’s because school is closed.
We really appreciate your help and look forward to getting our Glowforge back in action.
Thanks,
Jennifer Canady, M.A.
Director, RISE Institute
Research, Innovation, STEM Learning, Entrepreneurship
1111 Forest Park Street | Lakeland, FL 33803 | lcsonline.org
863.688.2771 (Office) | 863.712.3235 cell) | 863.682.5637 (Fax)