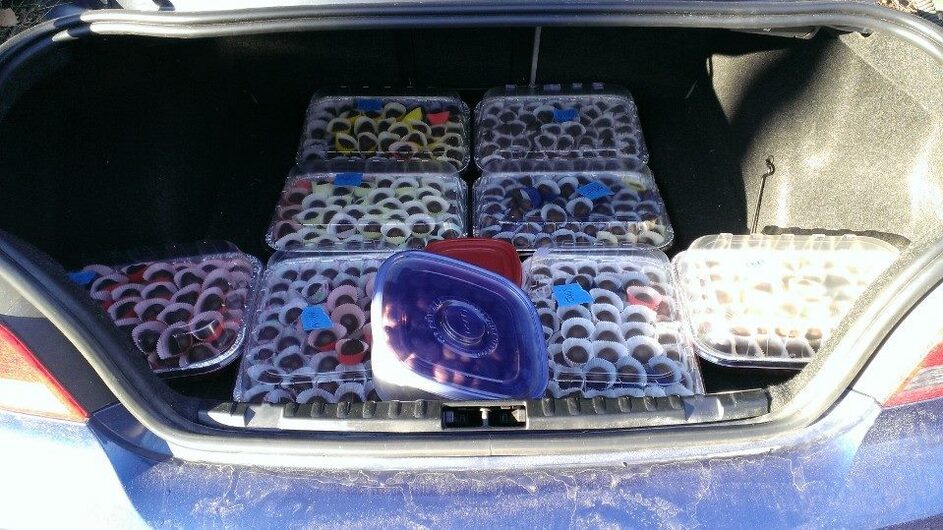
so I make ALLOT of truffles and I bring them to work in large containers and it works eh ok.
another down side is that they are not really fun to use large Tupperware.
so I said hey maybe I can make something more fun when I finally get a laser
I also said maybe try to make it parametric (failed totally) so that say I could change the cavity size or the row size with out having to re draw the entire thing.
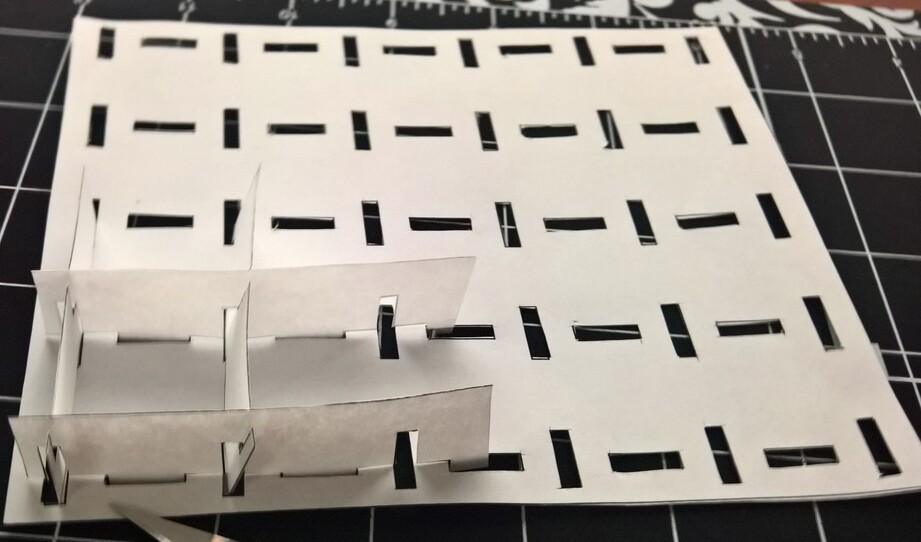
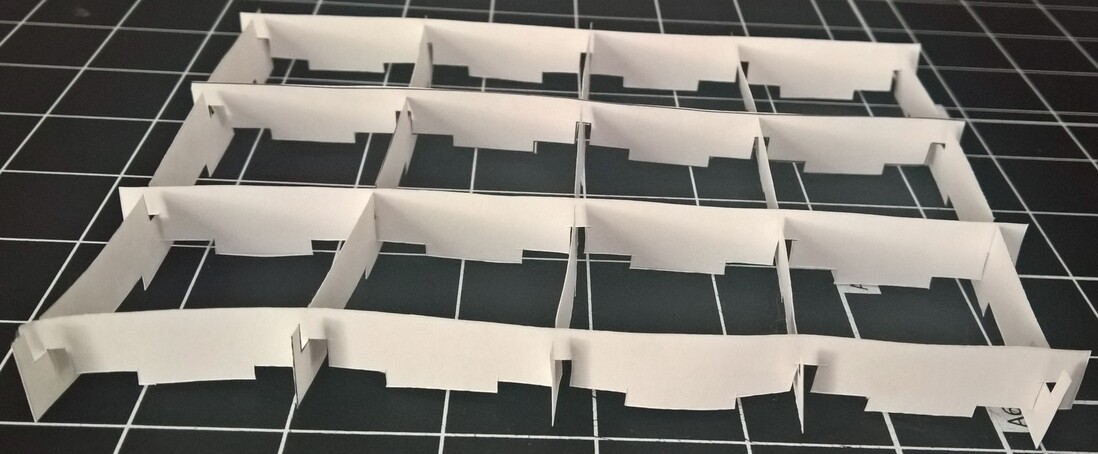
so I made one with a 1x1 printed it in paper WAY to small
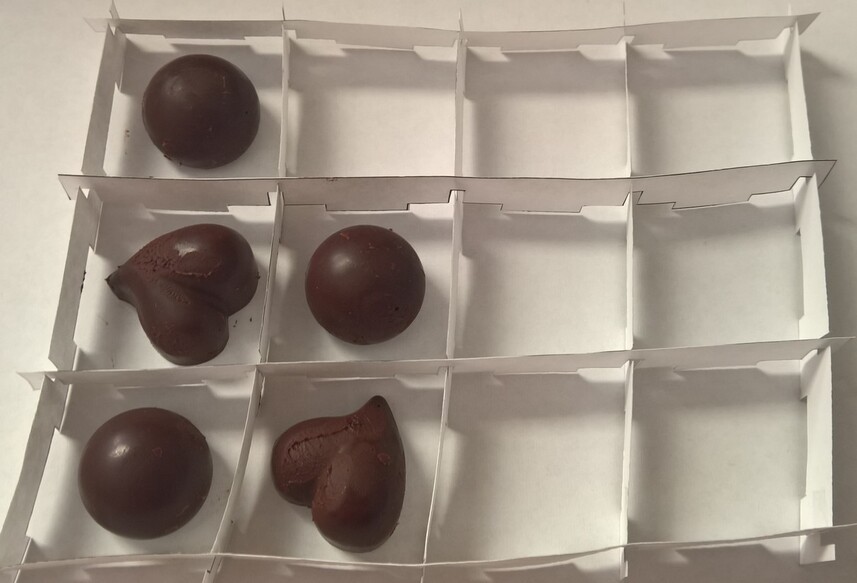
then tried to change the parameters and the drawing exploded so I re drew it with a bigger cell still may not be big enough (some crappy chocolate I quickly molded to get size mockup)
Its my holiday contribution, I work at a large financial company and during the holiday season we have a fairly large pot luck (you can see my large truffle contribution in the show and tell)
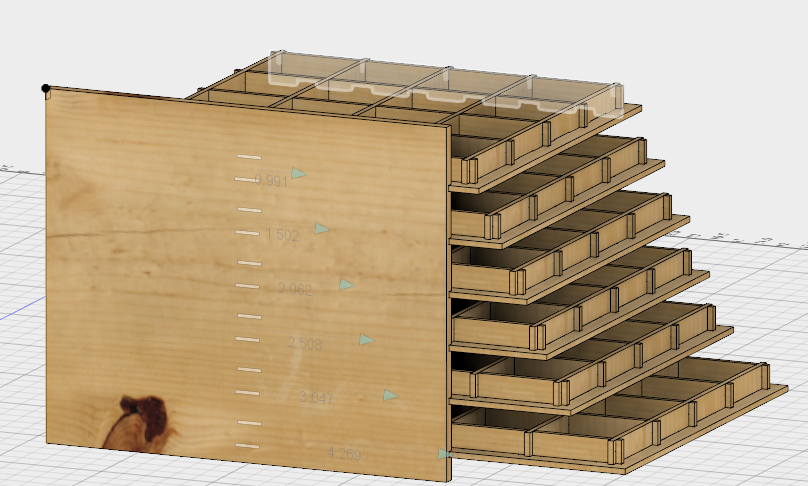
I only make truffles once a year, but I make a considerable amount. I made some measurements last year in anticipation of the glowforge and my planning dimensions are a 1.35" diameter and 1.5" height. When I have time, which isn’t very often, I’ve started planning truffle accessories: mainly trays. I use jelly roll pans after I dip them to let them set, but I wind up being creative in finding space for them (as in precarious balancing acts.) They need to be replaced before tragedy strikes.
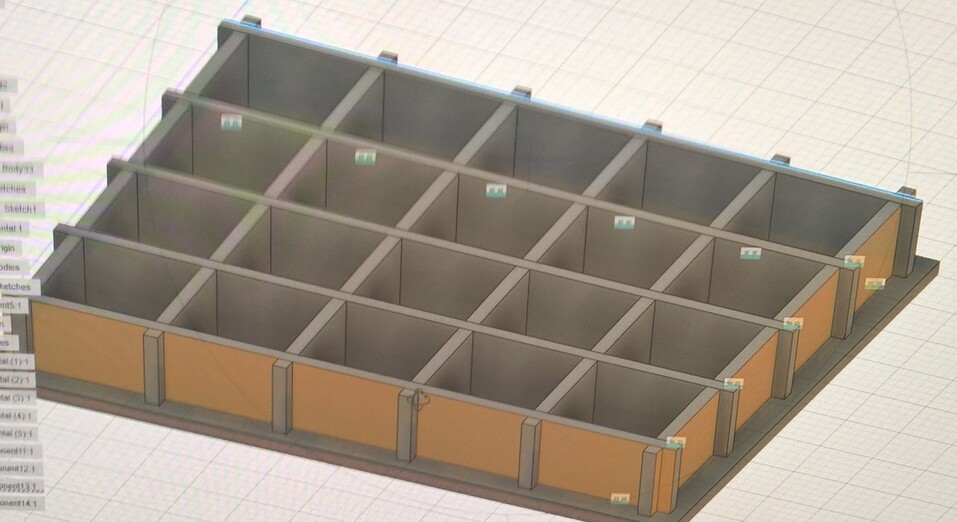
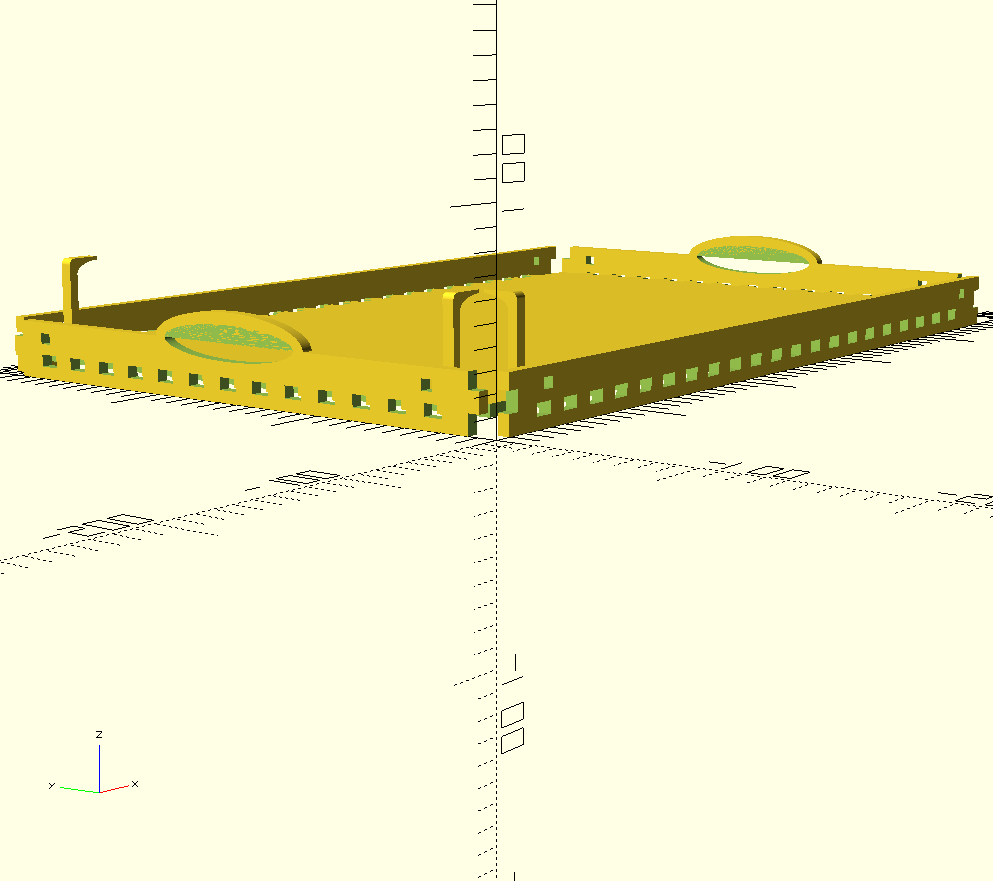
So I have designed my own tray. Its key features are:
A slightly raised bottom.
Corner posts.
This way the trays will stack. The raised bottom means the posts will catch the bottom sidewalls if a tray is bumped and prevent a horrible application of gravity. The open design allows for airflow. The handles are there just because.
In the exploded view below only three of the eight corner posts are placed. Also, wherever you see green - it is air, not material. The green is just the output of OpenSCADs not-exactly-perfect rendering engine.
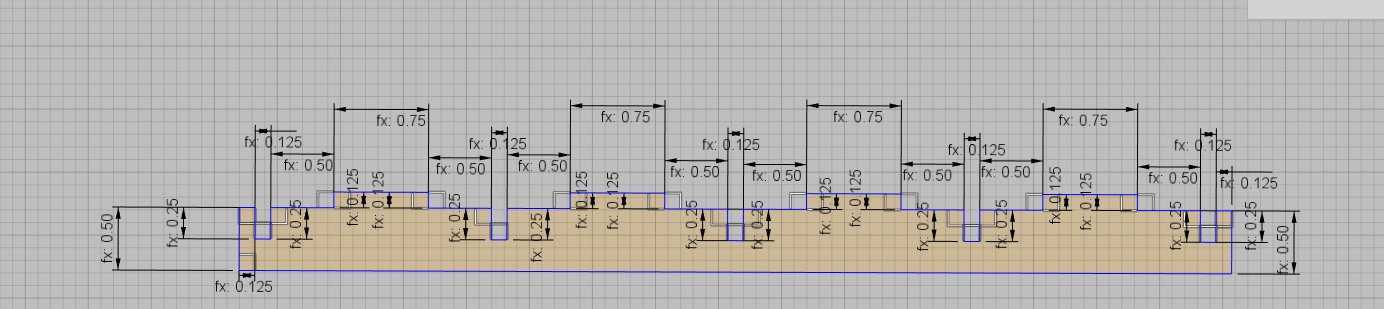
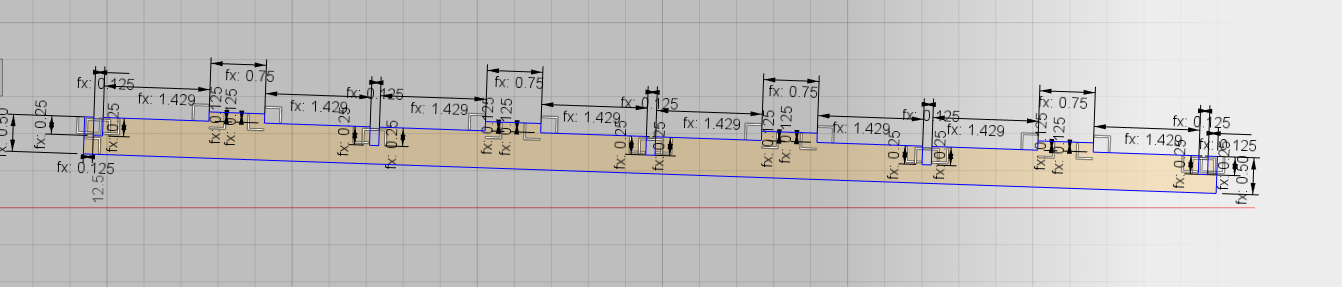
I think (I’m sure in the VERY round about way) found a way to use parameters to alter the cell size as well as material thickness and divider height. its working ‘correctly’ but doesn’t do what I was hoping. initially I was hoping to use the length divided by cell size to set the patter repetition so If I set the length to say 20 inch’s it would auto add the needed cells but nope. maybe for another day when my kungfu is stronger
so what I did was I created a body for each part of the divider and then joined them all together
Wow…thats alot of truffles!!
Send all the truffles to me and I’ll make boxes for you…now if they get lost coming back to you…its probably cause they get lost in the mail…yeah thats it…a great lie…I mean a plausible explaination…lmao
so I re did the sketch again and instead of doing lots of boxes and extruding them all together as one body I drew it line at a time and constrained it all to variables. so it does grow now as it should but it picks up funny angles so I set every corner to 90 so they stay square but now the sketch rotates on the screen after changing a parameter herm
If you’re going to cut this out of acrylic, you’ll want to add relief holes to the corners of those cuts. A small hole at each corner will keep the acrylic from crazing or cracking.
thank you for the reminder however I have not thought of what material yet but was planning on wood
… and we are 6 months+ away from having the tool anyway
One other thing - I’d not make the relief holes parametric. They’ll tend to get too large too fast. A 1/8" dia would likely be fine until you get to very large sized pieces. If you made it parametric you’d get a larger hole than necessary.
We use parametric models for the prosthetic hands and we had to make the knuckle pins & holes non-parametric and then upsize them only at certain thresholds.
Ya I just cant get parametric to work the way I want I keep getting weird things. now when I try to use a pattern to cut the fingers for each wall the patter drifts a couple of degree. ill probably re do everything tomorrow but this is what I have
Here is a tray, as for the walls and such I’m getting tired. and I don’t like that is square makes it look strange thinking maybe I want to do 4 across 3 deep for a dozen per or 6 across and 4 deep for 2 dozen per shelf and I normally make 6 flavors so that would make it 3 shelves instead of 6 with a dozen of each flavor. I think that would make the profile I want wide shallow short. but here is a svg of one of the trays this is 1/8 material
Maybe this is asking too much, but have you considered hexagonal? You might get better use of space. (The openscad would be pretty hairy, but I bet you could write a for loop that would omit/cut out the parts that would otherwise stick up in the middle of the hex. Hmm, now I want to write that…)
agree on space usage but… To so that the dividers would nee to come together at angles so you would have to raster cut a angle in to all the slots and I don’t think that’s realistic and would be more apt for a carve
You’re probably right. I was just going to sneak the slots a bit bigger and devil take the hindmost. What are you thinking of cutting this out of? I wonder if quality corrugated would hold up for more than one use, probably not. So cheap thin ply?
ya not fully sure yet, was thinking 1/8 ply wood if cost effective. I will when I have a laser prototype in cardboard and gauge if its good enough for just single use shipping to someone vs plywood etc…


