Okay, let me ask something here…from your description…did you have the Focus Height set independently for the two sections? (It’s possible to do that and I’ve sometimes done it if I want to get a different effect on an engrave…the machine will pause, the head will refocus, and printing will resume. That is what you are describing, but you have to set that independently.)
For the first half, no, Set Focus was not clicked, instead, the Focus Height was set on 0.25" on all sections (none was on auto focus)
On the second half, no, Set Focus was not clicked, all settings was same. We did delete some sections that were already scored so it didn’t over-score it, but one piece was kept to check for alignment (and it was already shifted from here onwards, appx 1mm)
Regarding your engrave scenario (it is very interesting), did you only set the first part to complete, then you manually reset the Focus Height to run the second part? Or is this something that can be accomplished in one run?
You can do it in one run as long as you use a different color for one batch over another. And by the way, that is what I would recommend doing in your situation to avoid the “Second Half Refocus”.
Make the first batch of text one color (Fill) and the second batch a different color. The one that you want to print first, leave with Black fill. The one you want to print second, fill with Green. If you want to do a third batch, fill it with Red.
That is going to set up 3 separate Engrave operations, they will print in that order, but the machine is not going to pause to refocus. It should stay at the same focus once you hit Print, and run the whole job.
That’s true. I understand the logic behind it now.
And yes, I actually have multi-coloured set up already, but I never thought to use it for multi-level engrave.
In a perfect world, it would be great to do everything in one run, but that’s not always the case. Unfortunately, I was expecting i can just continue from where I left off (ie. to caribis’s point, it should resume at the same area for the same objects) but that isn’t what’s happening right now.
I’ll try the Camera Calibration tonight 
Thank you very much @jules for the help! Once you’ve tried the Camera Recalibrator, could you let us know if you’re still running into trouble with your prints?
1 Like
Not sure what you mean, but it never resumes or continues. It starts the whole job over from the beginning. But it does the job over in the same spots.
1 Like
Camera alignment is spec’d to within 1/4", so you can’t depend on that. As you’ve found, 1mm is typical and works great for layout of designs on material.
That said, the machine will re-print to within 1/1000th", even between power cycles. Focus changes have no effect on laser position, only the image in the UI.
1 Like
EDIT
Found a PEBKAC. Please disregard; i’m going to have to re-run.
Sorry I replied to the overall thread below. Copy pasting my response here so that it flags on your inbox somehow:
So i got to try out the camera calibration and let it run its course.
It got all the way to measuring…
Then i got this:Not sure what interrupted the process…
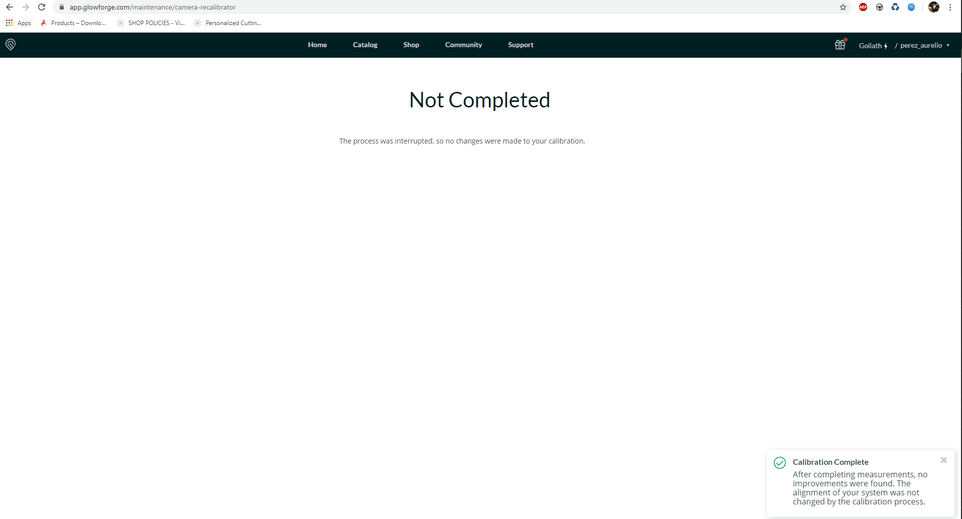
Will you be able to advise what interrupted the process? Both my computer and the GF were left to do their own thing during the entire process. Will the re-calibration be able to resume where it error’d out?
Thanks!
I had this happen several times - it’s generally a WiFi connectivity issue. Even though there’s never been a problem with sending a job or accessing the GFUI, and my wifi shows strong in all meters the calibration requires a solidly strong signal throughout the entire process.
After six failures I connected the GF to my phone’s hotspot and, making sure nothing else was connected to same hotspot, it worked perfectly the first try.
This is my result from the first print after camera calibration:
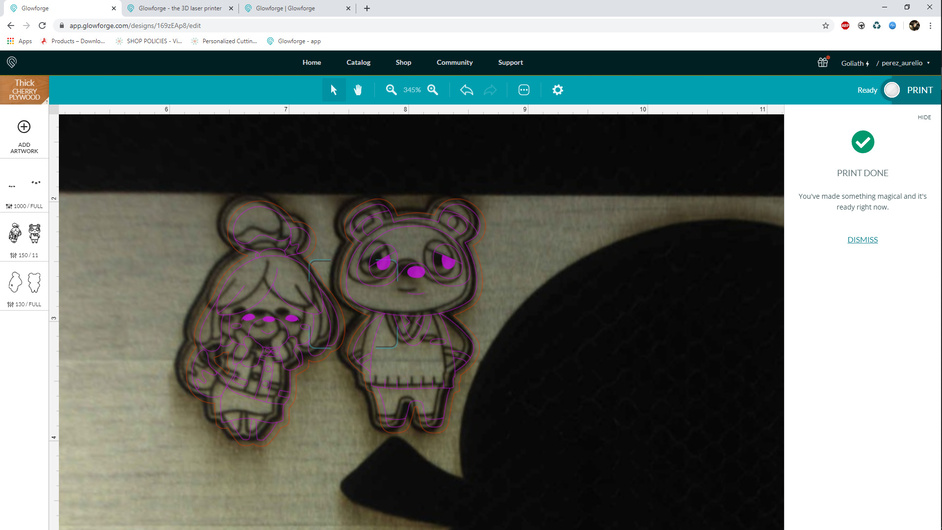
Results appear off between 1 mm and 2 mm. I would say that these cuts were immediately top left of the dead center of the camera.
Any other suggestions to improve alignment?
If you are referring to the pink lines being off, that is just the GFUI. The pink lines after the first print are NEVER representative of where they will print on the second and subsequent prints.
Hi Caribis2 - i just wanted to show the result of the camera calibration. It looks like there was an improvement since the initial thread (although this was not the crux of my issue; i was experiencing almost 0.5 in visual discrepancy at times).
I will post on whether there has been an improvement on a multi-step print (which is where i am looking for solutions for alignment between the steps):
- i will run the first half of the steps (in this case, my engrave)
- confirm it visually looks good, then hit the ‘magic button’ to run the second half, without opening the lid or moving the artwork on the UI
- confirm everything looks good
Will post results later.
1 Like
Glad to see you’re getting an improvement, unfortunately 1-2mm is still considered within spec. I get pretty damn close directly center under the camera start position but 2-3mm near the extremities. Are you using set focus?
And out of curiosity, is there a reason you’re running multi-step jobs separately?
If you upload all your steps/operations as one file/job (separate steps by color in your design program) alignment will be dead on between steps and you’ll save some time, too.
All very good questions, Ekla.
We have been using Set Focus (with and without but results are pretty much the same).
I guess thread is evolving a bit with what we’re experiencing as we’re doing tests and calibration. The biggest issue/topic at hand is that we really hope there’s automated registration to eliminate the need for manual (aka visual) alignment.
This camera calibration did help with that cause. Prior to this, we had to give 0.5" space around the artwork cut lines to make sure we don’t end up cutting off the material. Now its a 1-2mm so at least we save a LOT more material already with this improvement.
There wasn’t a specific need for us to run multi-step jobs separately, it actually stemmed from an issue with the camera being super-off, visually, causing us to stop the print between a step. After assessing it was safe to resume, we resumed on step 2, but the alignment between the steps was off. THEORETICALLY, (as Calibis2 is adamant about) the steps should still be exactly aligned because no settings have changed and at this point we were not visually aligning anything, just hitting print button again.
Because of this misalignment between steps, we deduced that there was an underlying issue.
We will conduct some more testing tonight and, crossing-fingers, it will be solved.
We are burning through material faster than it can engrave, hahaha. Again, just really wishing there was automatic registration to eliminate all the human errors.
1 Like
 it definitely takes some experimenting to get the most out of these machines, and there’s almost as many tips and tricks as users! As others mentioned, Snapmarks were the the closest thing to registration marks and they were just a limited beta in service of getting a different feature working. GF never promised them as a core feature so as much as we’d all like them they won’t tell us anything about further development possibilities until they’re good and ready.
If you really need to check critical alignment you can run a score on a very light power setting that’ll only mark the masking to avoid wasting material. This will at least tell you where the laser will fire.
1 Like
-
Set focus
-
Set task 1 to engrave. Tasks 2 – 3 to ignore
-
Click print

-
Magic button
-
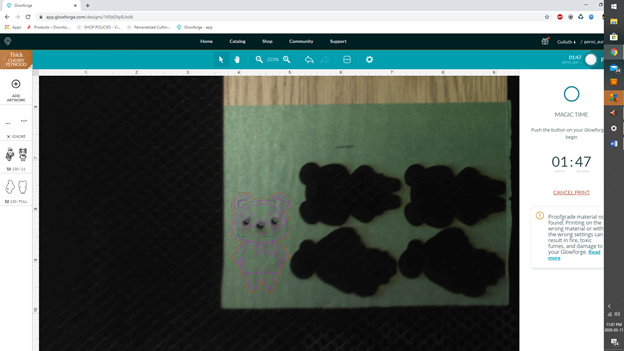
Verify result (wow… CAMERA IS SPOT ON!)
-
Set Task 1 to ignore. Enable Tasks 2 – 3
-
Hit Print. GF did an auto re-focus and it auto-moved the focus crosshair…. Now you’ll see the outlines are misaligned. Fingers-crossed that it doesn’t misalign on actual print since I did not move anything.
-
Magic button
-
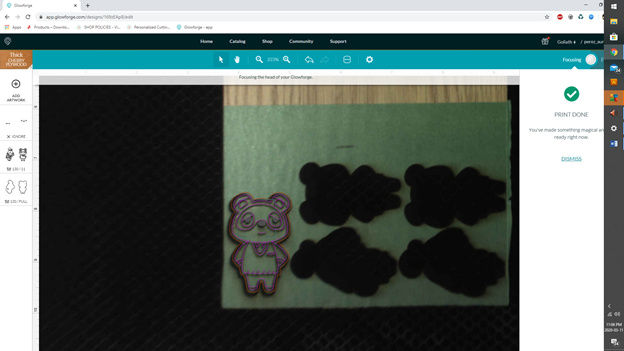
Print is done; UI output looks misaligned.
-
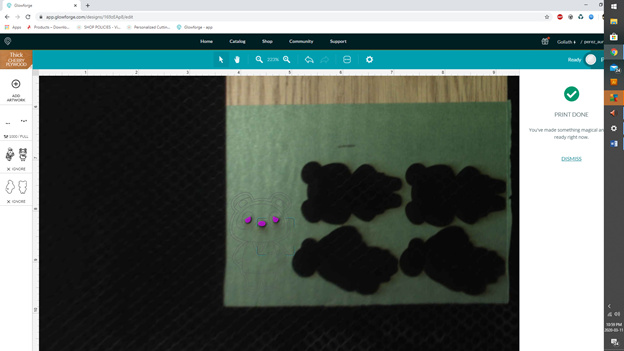
Opened the GF lid and the Actual result is ALIGNED!
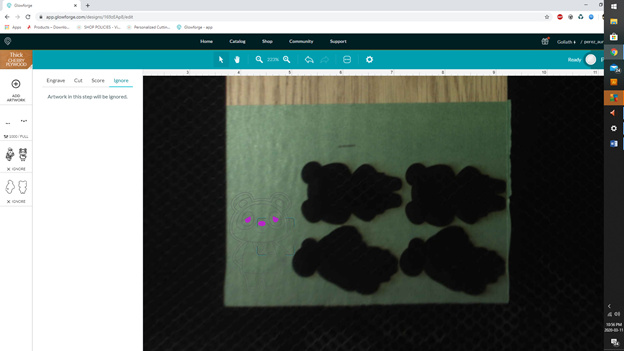
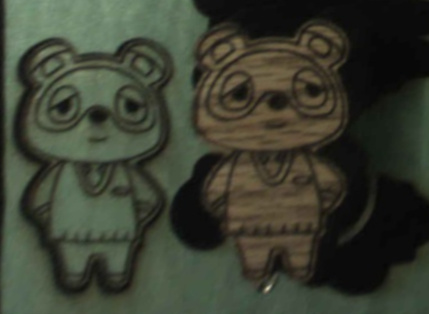
I put one of the undesirable cut pieces, which birthed this thread, for comparison beside this latest test cut. In the original with the misalignment issue (pre-camera calibration), the engrave task was cancelled after completion (which we reproduced in a similar manner) and was resumed with just the scores and cuts, but the end results were shifted.
On the original (right), you will find that the engraved eyes and nose appear shifted to the right.
On the current test result, everything appeared aligned (or if it was misaligned, it is very minimal)
Conclusion*: THANK YOU for the CAMERA CALIBRATION suggestion.
*disclaimer: still can’t wait for an actual registration solution, powers that may be
1 Like
It’s not theory. A machine that is functioning correctly will have nearly absolute repeatability (indiscernible to the naked eye).
99% of the jobs that I have ran, the camera wasn’t even used. Set focus, camera calibration, etc. all have nothing to do with the repeatability of a job, or subsequent steps being aligned to the first step.
4 Likes
I’m glad you have it working.
Thank you, everyone, for all of the awesome help! I am glad your prints are turning out better now. I am going to close this thread. If you have any other questions or if an issue arises please start a new thread or email us at support@glowforge.com.
Happy Printing!