I added some gift tags to my dashboard. I am a premium user, so I got the file for free. I want to duplicate the design, but reversed, so I can add text to the back and cut out the shape. I have tried saving the front by renaming the design, then trying to open it again as a new design, but it only keeps the same design.
I also tried to group everything together, copied, then tried to paste it in a new design file, but that wouldn’t work either.
Lastly, I tried to export the file and saved it as an SVG file, named as “gift tag front,” then changed the design and exported again as “gift tag back.” I then tried to open a new design and upload the SVG files and it says, “This design doesn’t have any printable elements in it.”
What am I doing wrong? How can I save the same design as a front and a back, but alter the back?
Which gift tag design are you speaking of?
You cannot export catalog designs, but you can reverse them and duplicate elements for most within the interface as well as add text.
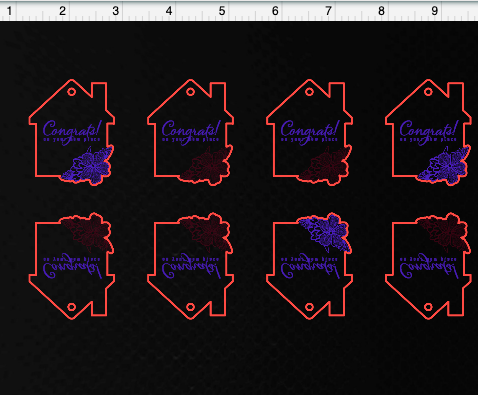
Here is how my two sided keychains came out. Customer’s info is blurred out since I don’t have their permission yet to share photos. I put the Realtor’s name, phone number, website address, and then their tag line on the back side of the keychain, along with their company logo.
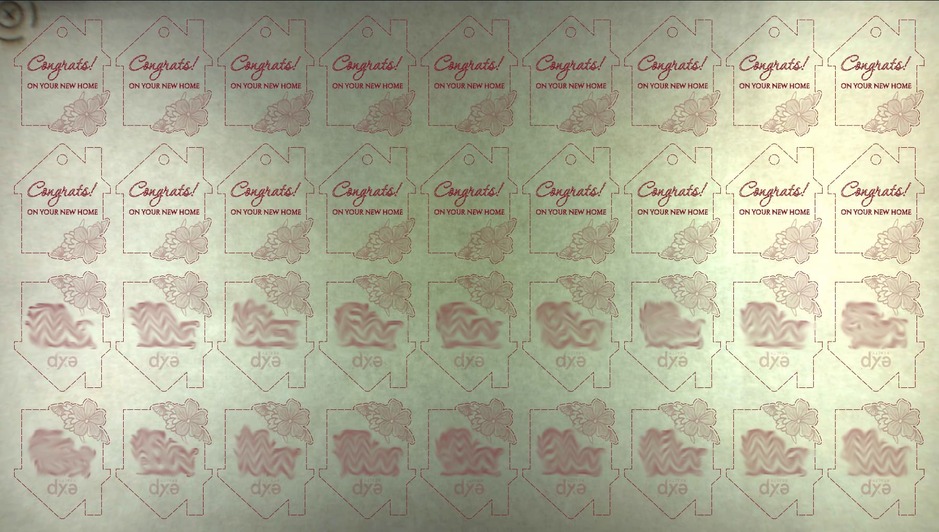
I uploaded and laid out two rows of the front design. I copied and pasted the two rows, then flipped them, so they’d be upside down, removed the original text and replaced it with the Realtor’s info. I left the flower design in the corner. I put the front design on two rows of tags and the backside on the other two rows. Made sure everything was perfectly spaced in the designs. I taped down the draftboard to the tray, so that it would not move at all when I flipped the tags, as explained below.
I ran the first print and cut out all tags with the hole. Used a small square of duct tape to pick the pieces out of the remaining board. keeping it taped down to avoid any shift of the material, which is now a permanent jig. I flipped them over and swapped the sides, so that the ones that were printed in the top two rows were now upside down and flipped to print the back side, and vice versa for the other two rows. I changed the settings for GF to “IGNORE” the house outline and the hole for the keychain, as they were already cut out when I ran the first print. I then ran the same design again to engrave the other side. One important lesson I learned is to not refresh the bed image or reset the focus between sides one and two. Just flip and print.
With the jig leftover from my first print, I can now precut the houses and holes and keep them on hand. Then when I get an order, I can pop the jig into the GF, place the precut tags in the jig, refresh the bed image, lay out the new design, print side one, then flip and swap rows to print side two.