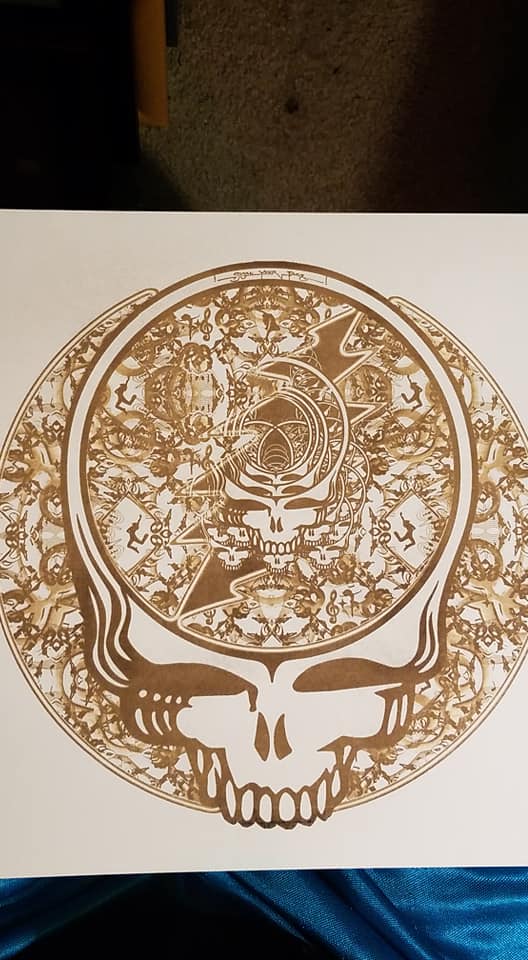
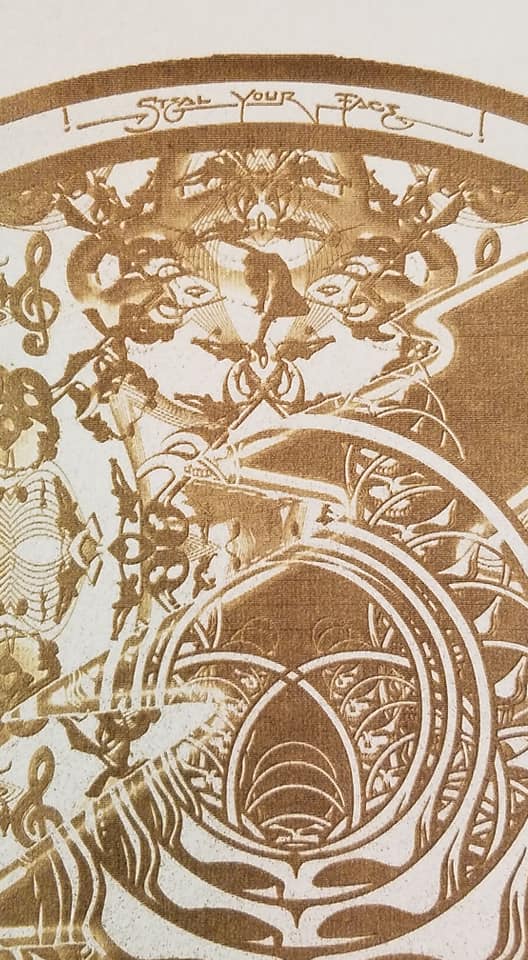
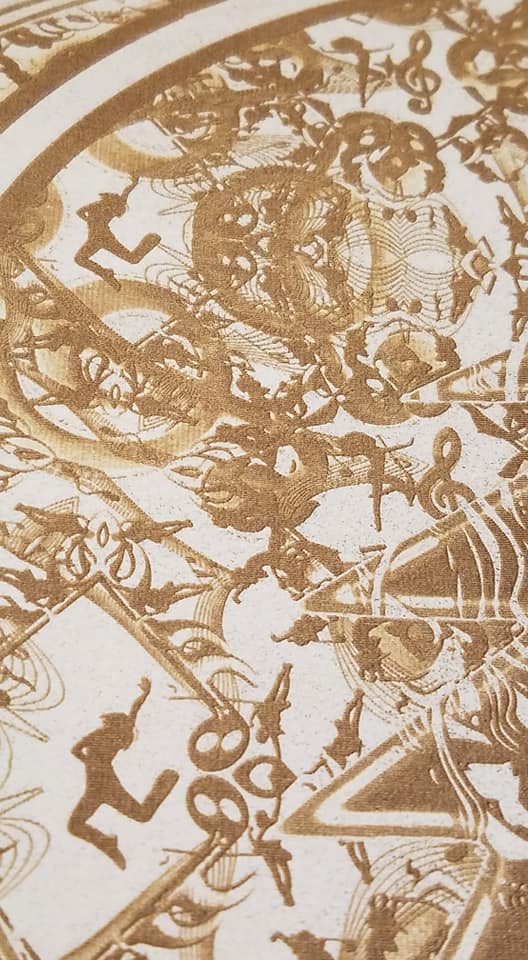
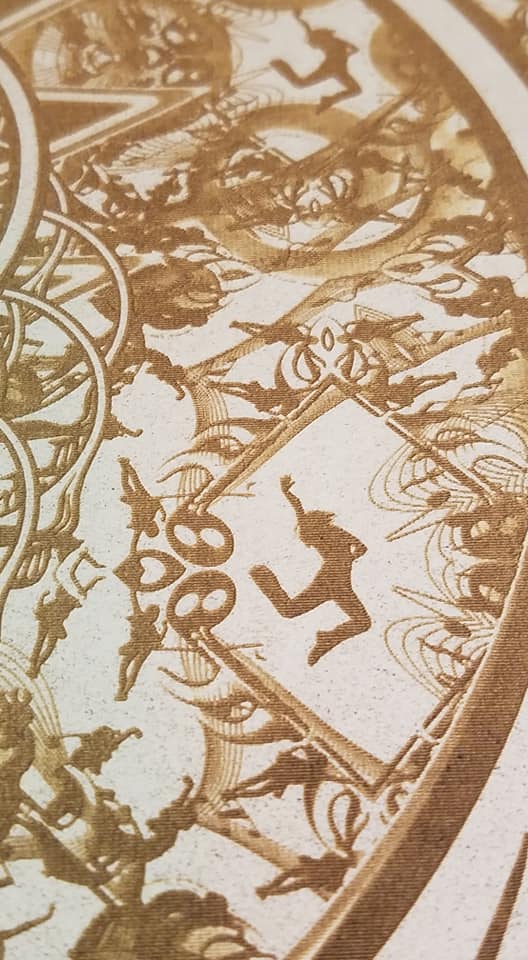
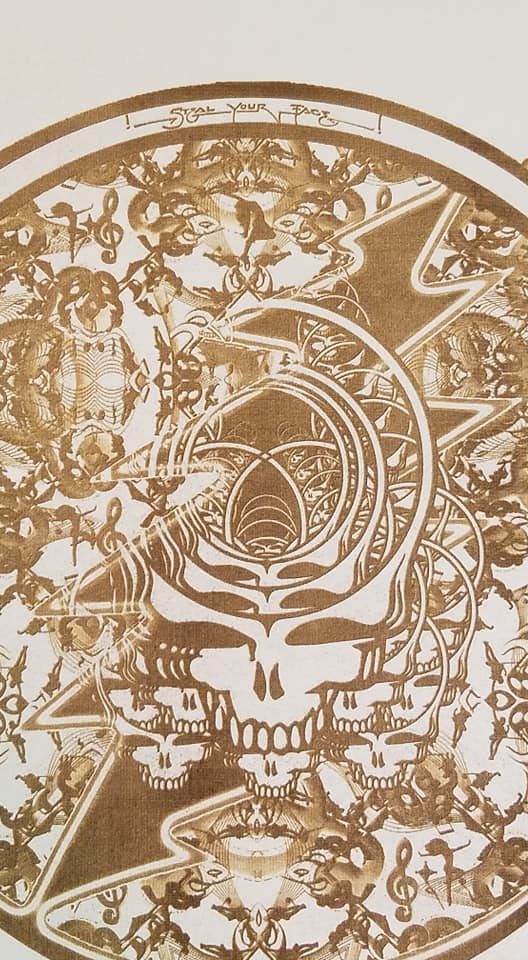
So these are images of final results in testing and working the settings related to getting a great detailed image engraved on paper.
For everyone’s reference the following was used to produce this piece.
The paper is 12x12 - 78 lb. Natural Smooth Card Stock Paper.
The settings I used are as follows:
Speed :500
Precision Power: 15
Grayscale: Vary Power
Lines Per Inch: 195
Passes: 1
Focus Height: 0.012 inches
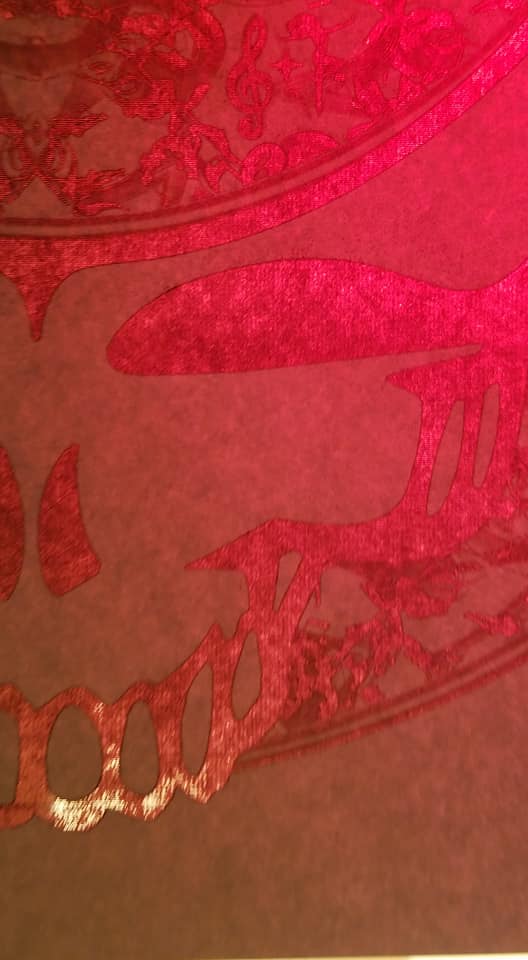
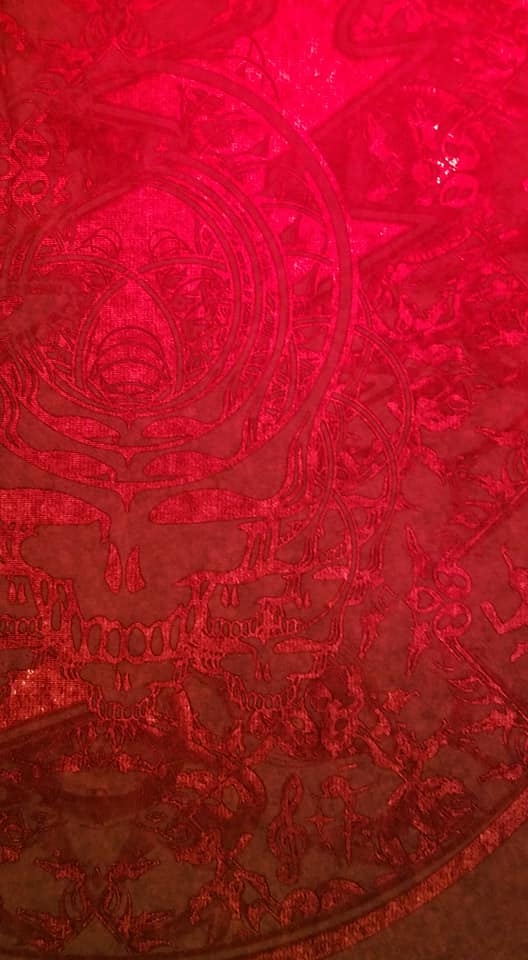
I notice the Focus height was real key, as adjusting up to .013 or .014 or down to .011 or .010 really made differences in the detail and the .012 was just right for this particular image. Other images and paper weights may need to be tweaked from my settings to get the right result. But this is something to start from if you are looking at engraving on paper. A couple images I’ve held it up to a red light to show how thin the engraving got, almost like lace.
It’s great you’ve shared the settings, but settings for non-proofgrade materials can only be posted in “Beyond the manual.” I can move this over there for you, or you can remove the settings. I’d prefer the former! Working with paper is a challenge and I’m sure many others would appreciate them!
I’m sorry, a fairly new member here. Please by all means move this to where its appropriate. This is the only place I’ve been posting images, but first time I posted settings used as well. I would like this to be where people would look for this information. Thanks!
Now I do have a question that some of you users may have an answer for.
When I do this paper engrave I, have to carefully blow off the paper and be very careful to not touch the engraving as it will smudge the image on the paper easily. So does anyone know what would work as a sealant for paper without ruining it? Some type of spray? Would simple hairspray work?
Depends on the longevity you want. Hairspray is likely fine but won’t age well (may yellow or spot).
Fine art quality supplies will last a very long time. I use Kamar varnish spray on water colored primed wood. Without any sealer the watercolor would wash off easily, and the Kamar spray doesn’t change the delicate paint at all.
Best way to figure out what works well for your purposes is always going to be more R+D
I have not had the paper I wanted to use or a good way to keep it fixed down, but I am looking at the new high-speed settings and the very high LPI available and wondering how far you could push those settings.
The high-speed high rez would not be speedy but might show up details one would not believe possible.
I use small round magnets I bought a pack of from Michael’s. I place them at the very edges of the paper, in the corners and the and the centers of the edges. Had no problem with paper movement.
The bigger problem is if you cut too deep and the little pieces go flying about getting into trouble.
It would be interesting to go to 1355 LPI and 4000 speed and perhaps full power (though I would not start there, maybe 30 power instead) The higher the power the greater distance from top to bottom and the more variable the shading.
You can also get a non-yellowing “workable fixative” designed for artwork that may be sufficient to stop the smudging without adding a finish like varnish or polyurethane:
My settings of 15 for the power got my 78 lb paper on the black areas of the design to almost thread bare thinness. I think much more would’ve gone all the way through the paper. The red image (one with the light behind the paper) of the teeth portion show how thin this one came out. You can see the fibers of the paper.
That is at 500 speed. If you kick the speed up to max it will burn a lot less, and if the LPI goes to max it will burn more so then you have to adjust for power. If you have a pro that max speed is 4000 so under that speed you might kick up the power as well, but only testing will tell.
So my question would be would that reduce the print time? By increasing the speed and adjusting the power and LPI to suit, would that speed up the over all print time? Currently my settings doing this image on a 12 x 12 paper takes around 2 hours. And yes I’m using a Pro.
It would likely increase the time actually. Each Line is time so increasing the number of lines increases the time. The changes in speed is a carp shoot. it gets across the design faster but then takes more time to speed up and slow down, so any improvement in how fast it gets done is minimal. The big difference is the look of the result. The higher speed allows the other variables to be hotter so you get more depth of range of shades the more power you can go, and more detail the more LPI you can go.
It just takes a ton of experimenting. That’s why sharing your settings is so valuable/appreciated.
I have been working on an engrave project for a couple of months (not continuously, it’s just a personal project.) I’ve run over a dozen small sections to try and come up with the best, vs. “acceptable”, results.