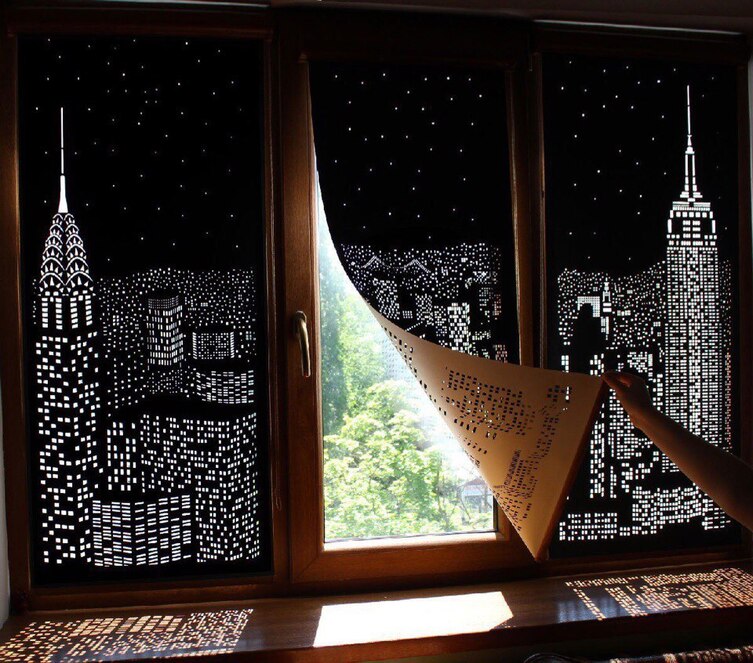
Saw the following posted on Reddit this evening. Now that Summer is on its way, I’m looking for blackout shades for the boys’ bedrooms. Would it be relatively easy to create this using a GlowForge? If so, would it require a Pro in order to accommodate the window height?
ha, i was just looking at this earlier. if you make them out of fabric or leather, there’s also no reason why you couldn’t cut them on the basic, just rolling it up as you go.
But most windows in the US are wider than 20" so they can be used for egress in the event of fire (code requirement). You’d have to do it in slices that are then joined together right?
if you’re both careful and patient, you could do it by rolling and unrolling the medium as you go. it would take forever and one error could ruin the whole thing, though, heh.
Love this effect. I’m not getting a Pro but I’m still planning on trying something like this. As some folks have posted, there has to be a way to do it in sections, just not as easily.
Very cool project, though. If any GlowForge users pull it off, please post pictures!
That’s a neat idea. I was just thinking that overlapping the panels and attaching them with snaps or buttons would eliminate the seams (at least from being backlit) and allow interchangeable sections…
According to this, we would probably be looking at 24" wide windows in the posted example. The height is about 2.5 widths (by pinched finger approximation on the image), so we will choose 24x60 from the standard matrix.
20" width maximum, so you will have to fold over on side to pull this off as a single panel. Fold in only the 4" you absolutely must, and that leaves you with 16" you can engrave in one shot, and 8" in the second shot. Split the difference for even halves and you are folding in 6" each time, to enable engraving of the left or right 12" in each go.
Now, if your material is only 3/16" thick, you can use the passthrough for this and not worry about the other dimension. But I don’t know if 3/16" is adequate for blackout results. So I will assume it isn’t and anyone who does this will have to fold for height as well as width.
To get 60" into the 12" available will take quite a few more segments, and likely many folds. Let’s assume you work in 5" segments, so that removes your front 5" from available work space and leaves you with the back 7" (PRU crew… can you confirm at least 5" of available space behind the honeycomb? Sounds semi-reasonable, but possibly too large)
So, to engrave the top of the curtains you would need to have 10 folds worth of material rolled up in the front end. Absolutely would have to be a roll, since folding 10 times doesn’t exactly work with most materials.
There is exactly 5" from the honeycomb to the rear. But the honeycomb itself is 13" deep yet we’re only going to get an 11.5" cuttable depth so that suggests a margin of 1.5" which if it were equally distributed front to back would leave 3/4" additional room on the honeycomb itself in the rear so a total of 5 3/4" available behind the cut/engrave area.
I’d take out the honeycomb entirely and replace it with a rectangular block of the same width and height, but leave “roll room” fore and aft-- essentially a feed and take-up reel setup familiar to “long-arm” quilters.