Beta Project: Leather Bracelets

After some success working with leather on the earring project and further experiments (Beta Project: Leather Earring Experiments), I decided to continue to see what else I could come up with. So, I designed and created some simple bracelets. :smiley:

I’ve been busy over the past few weeks with a weekend out of town, and then school being out for the girls all Thanksgiving week, and the holiday itself, etc.

But, I do have a number of other beta projects to share very soon following this one. Some are still in the midst of finishing and assembly still…

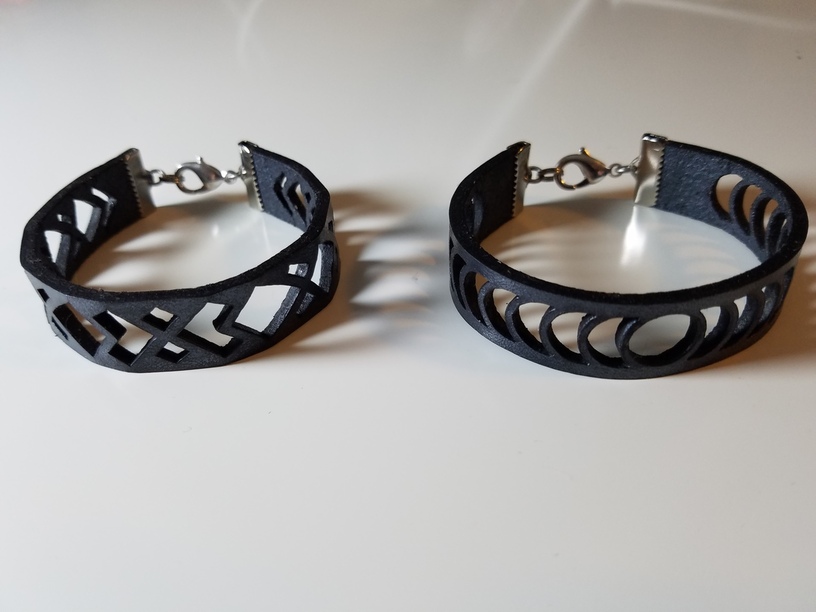
I’m sorry to admit, that I neglected to take pics of the raw cuts, dying, coating, and assembly with these, so please enjoy these finished pieces. :boom: :tada:

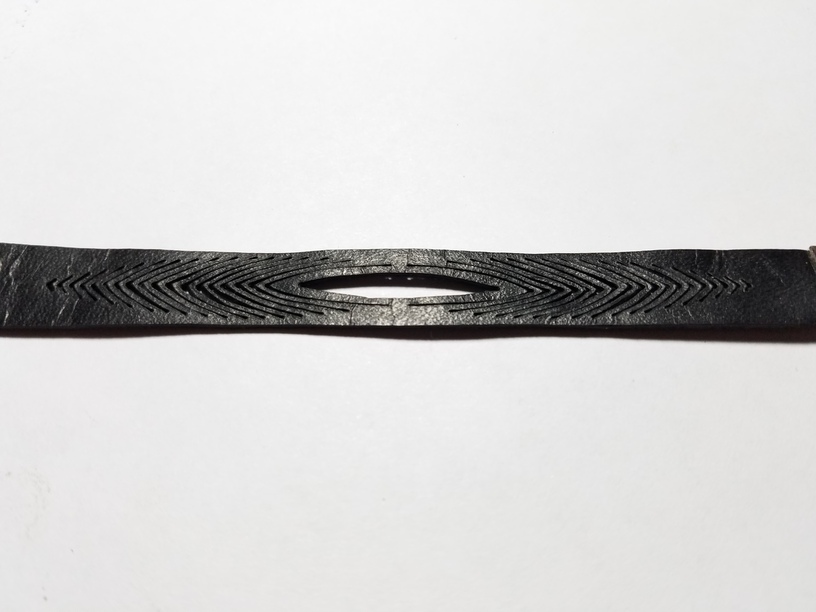
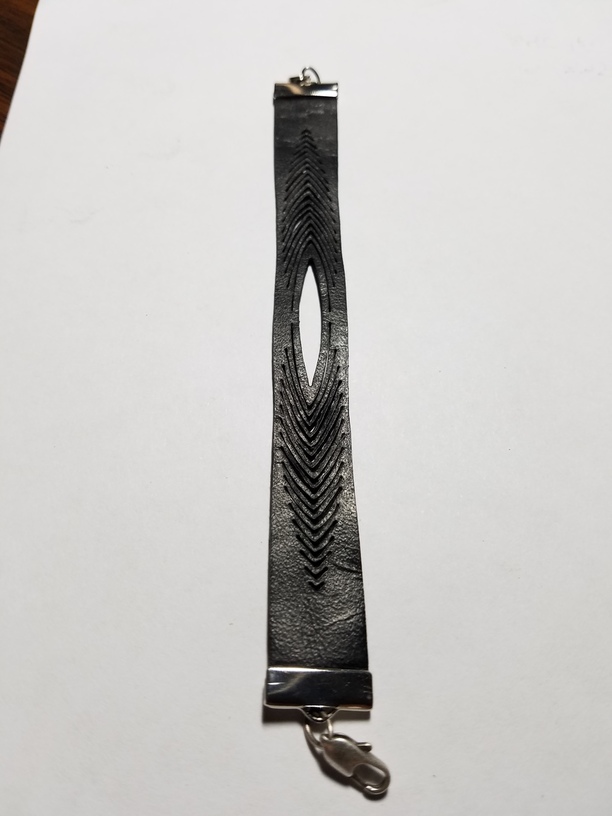
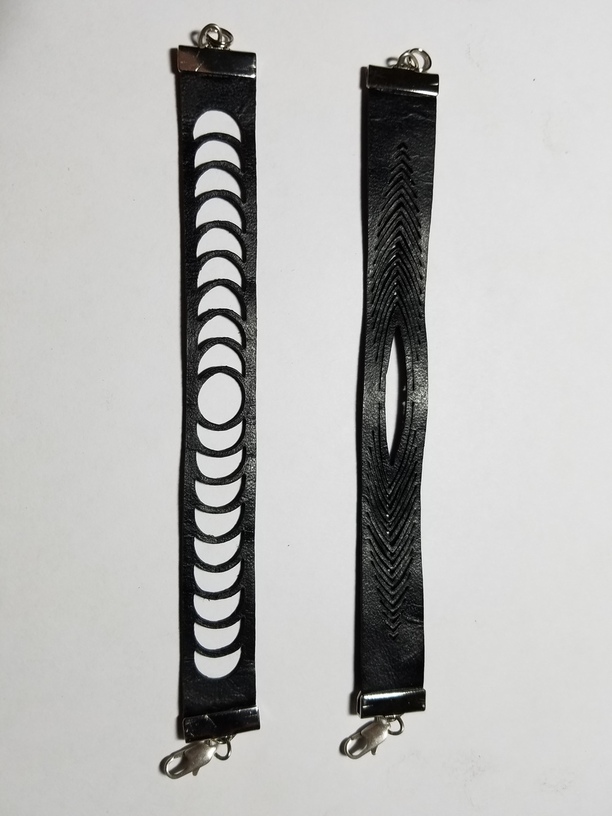
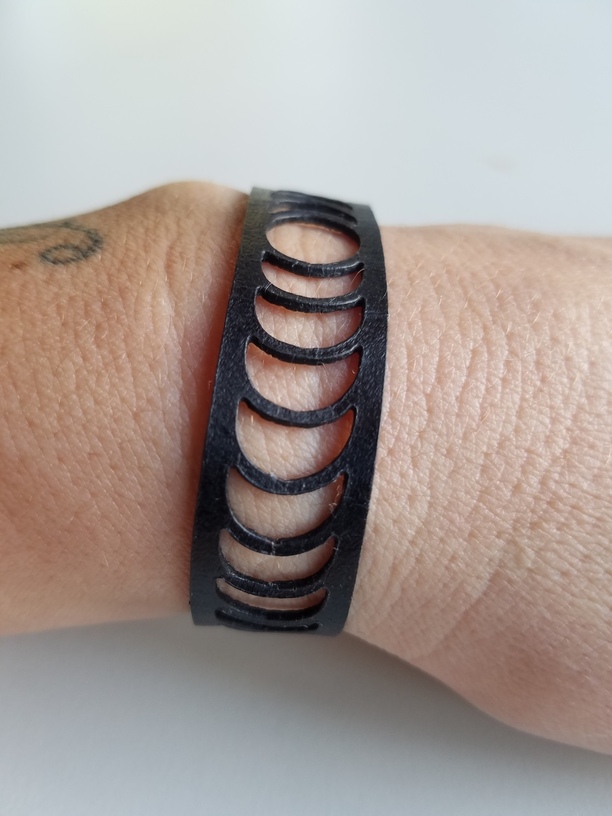
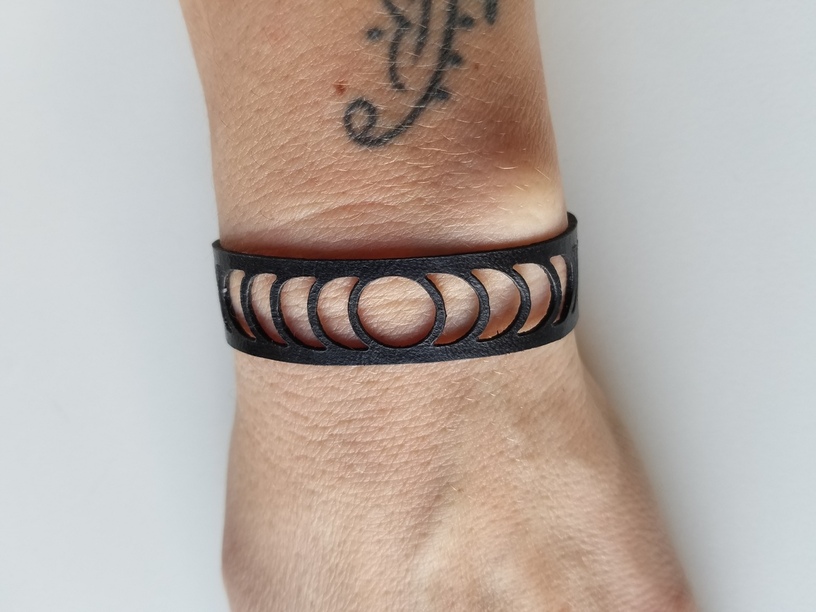
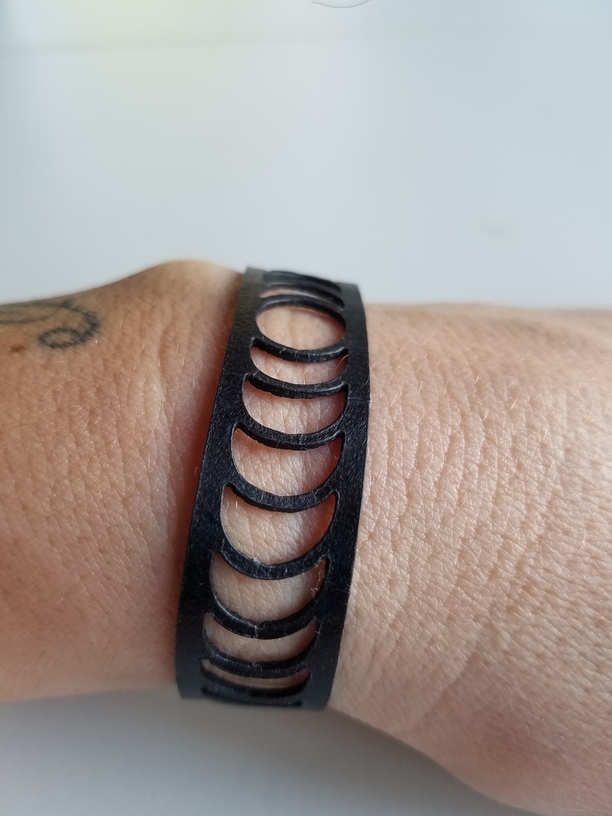
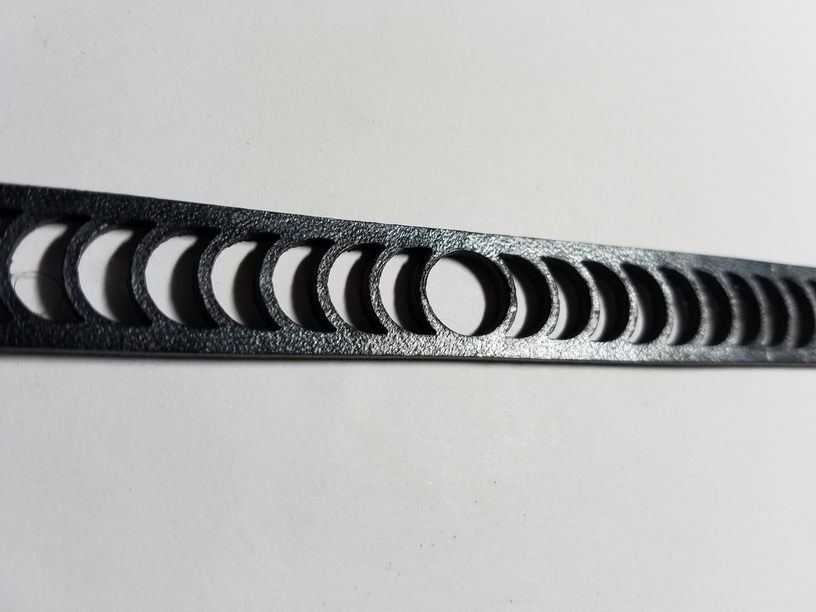
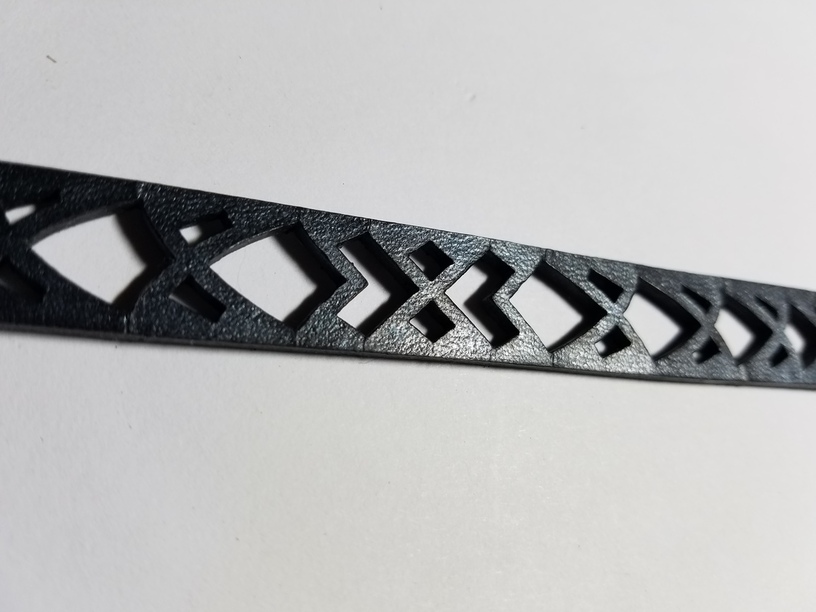
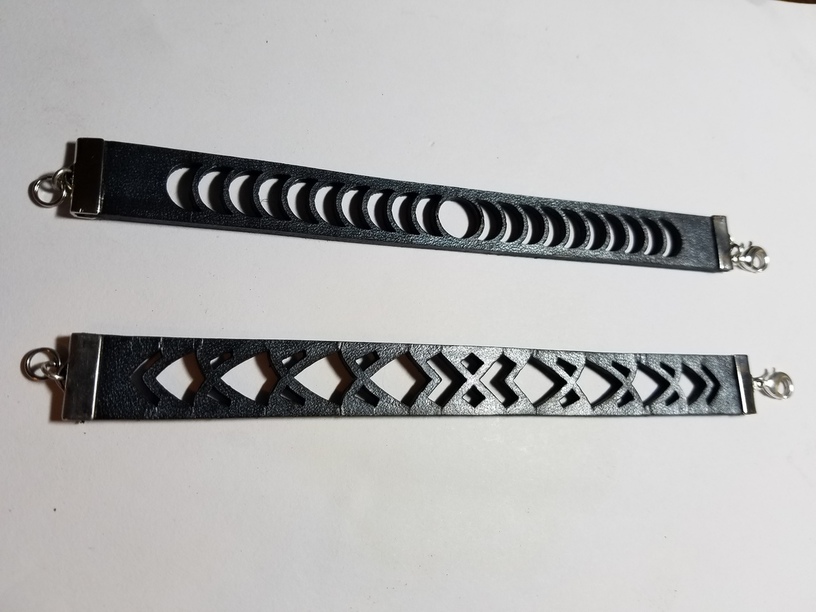
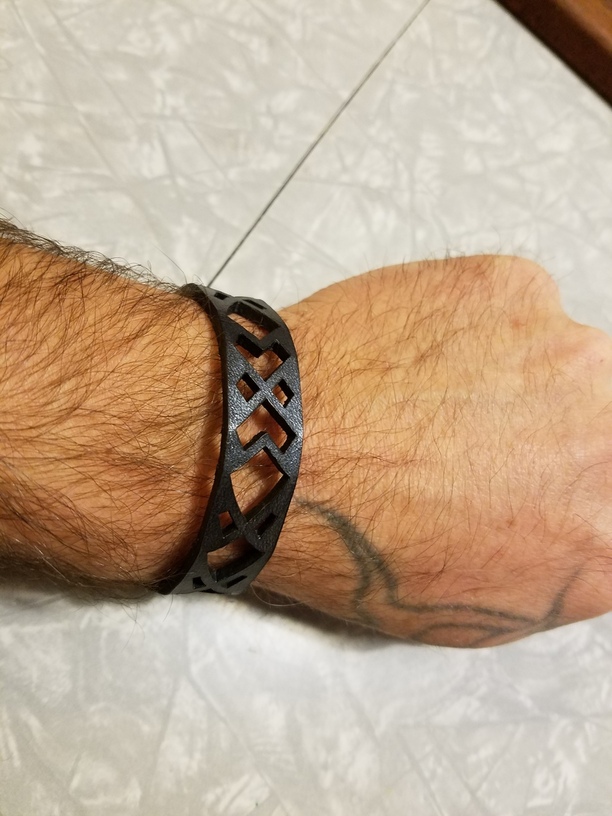
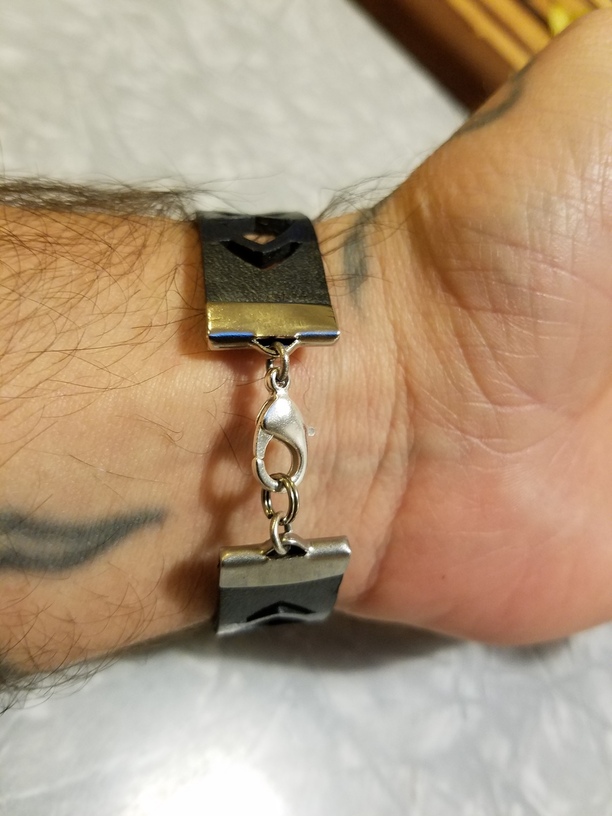
For the first pair I used 2oz leather, cut the designs, dyed black, and finished with protective wax. Bought the hardware at my local bead store, and sized the width to the little clamps. These are both too small for me to wear, and snug for my wife’s wrist, but wearable. The clasps are really difficult to attach by oneself too. But, until I get a hand press for snaps, this is the best I could do for now…


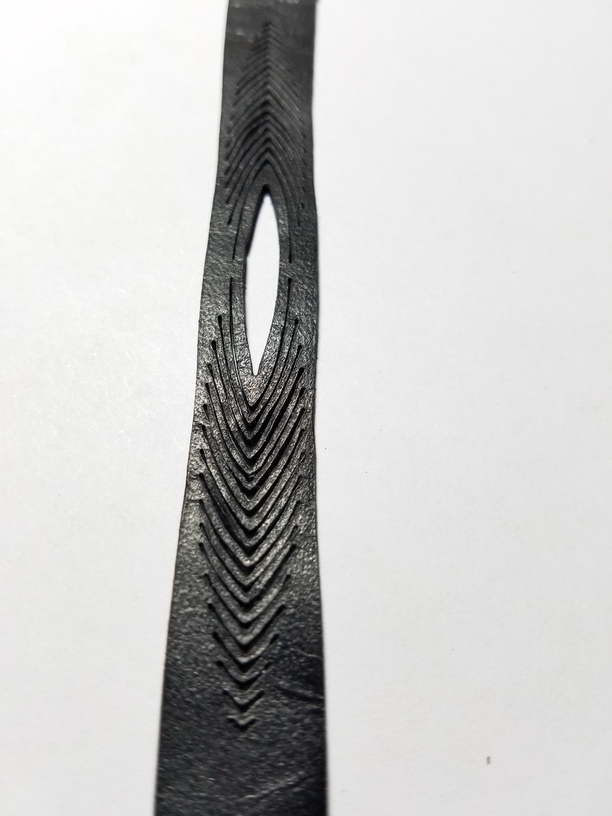
One of these designs is based on the original impetus for the earrings, and the other a basic pattern I made in Illustrator as well.


Here’s some pics of my wife wearing them…


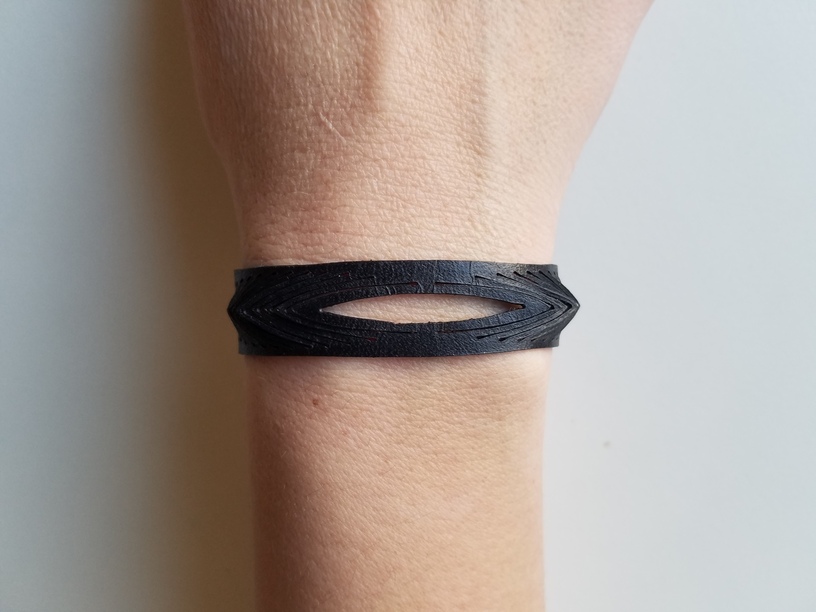
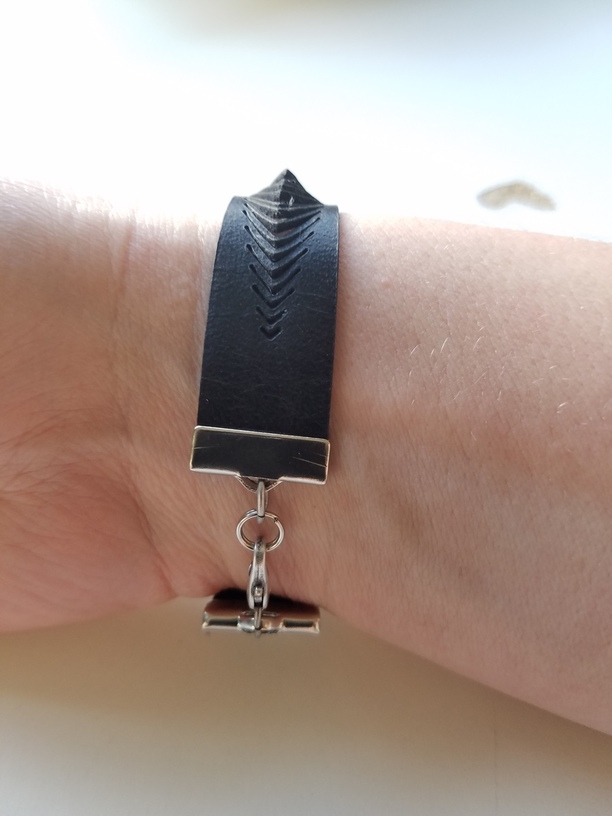
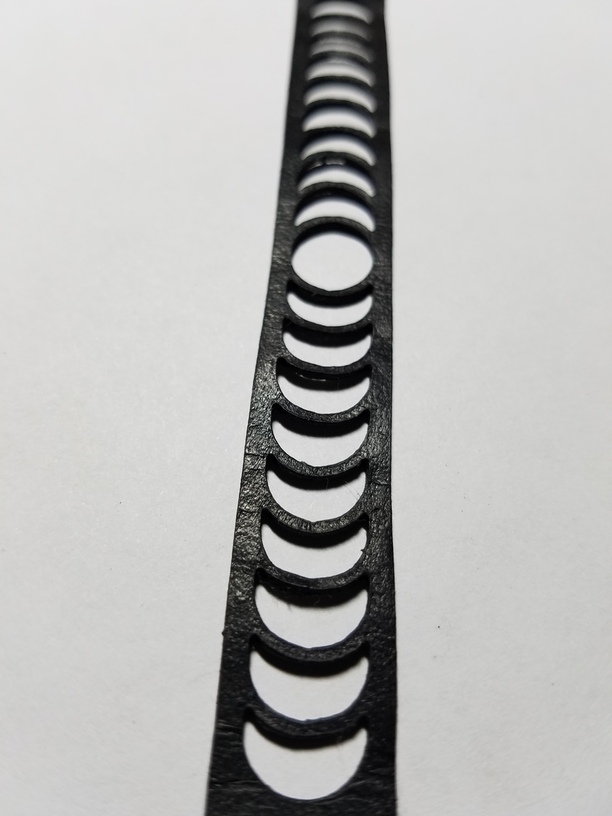
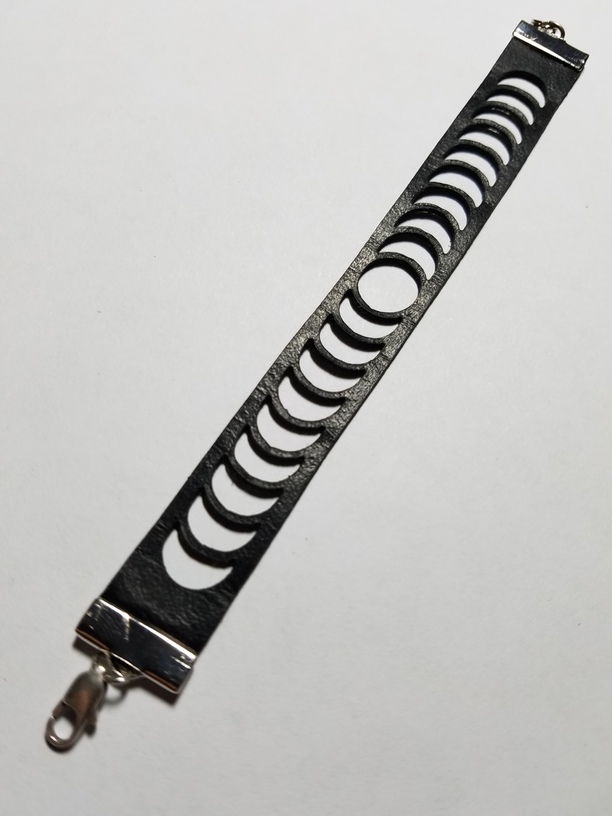
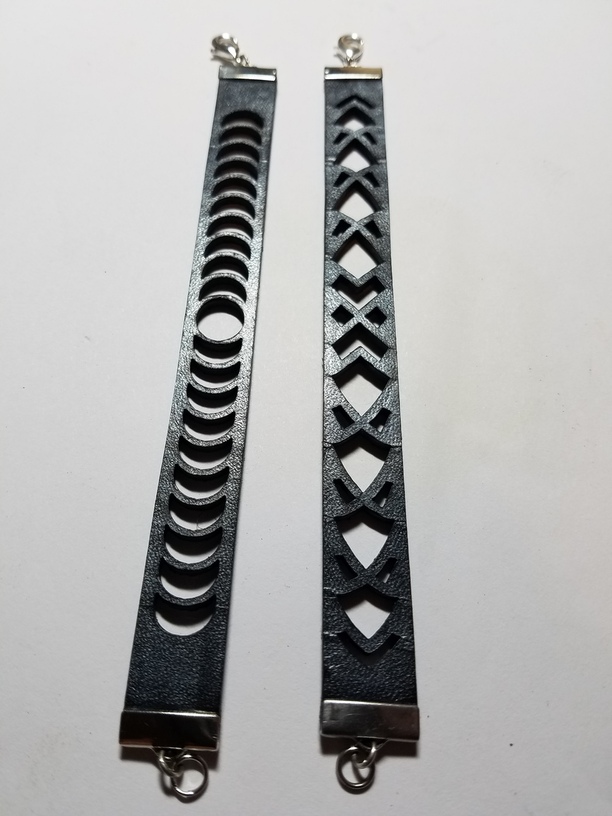
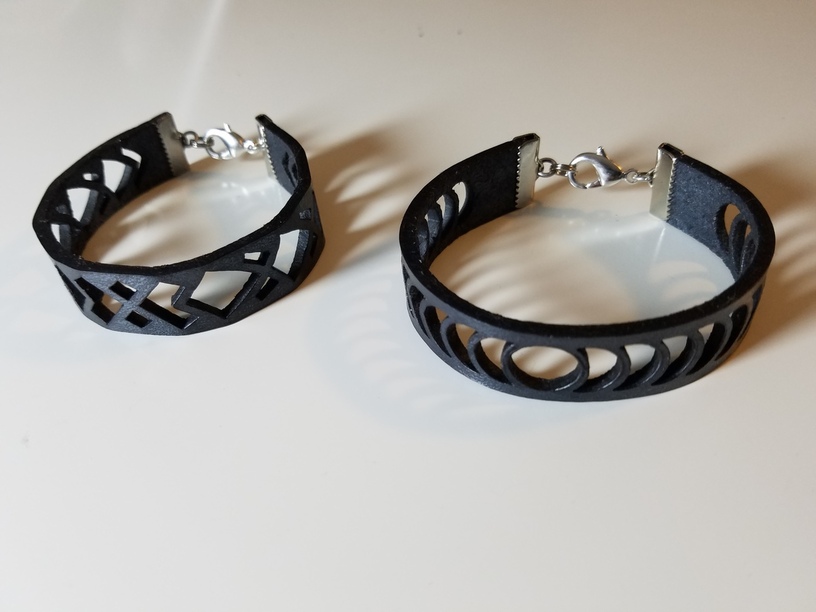
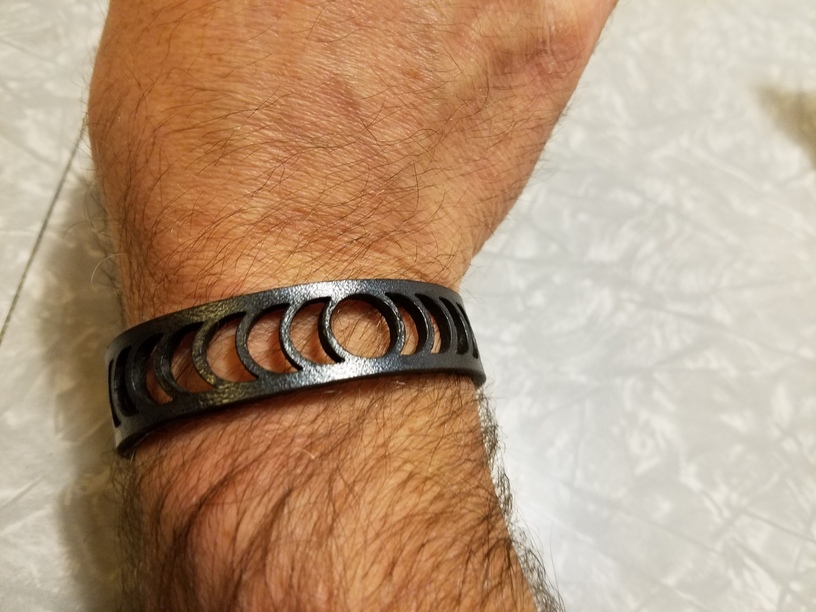
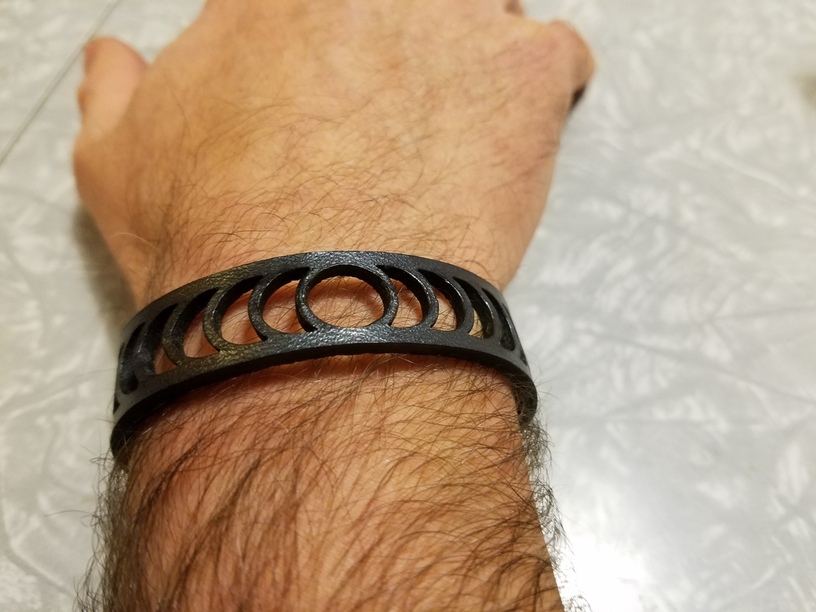
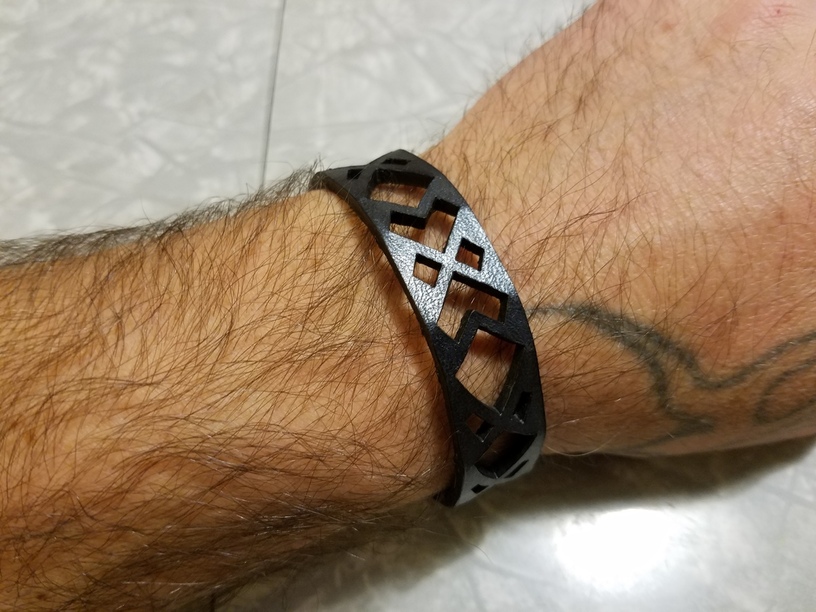
The 2nd pair are cut from 5oz leather, dyed black and mixed with silver (kind of a shiny gun metal look, and they turned out really cool! but kind of hard to capture it in photo), and finished with protective wax, and again assembled using the same hardware as above. :slight_smile:

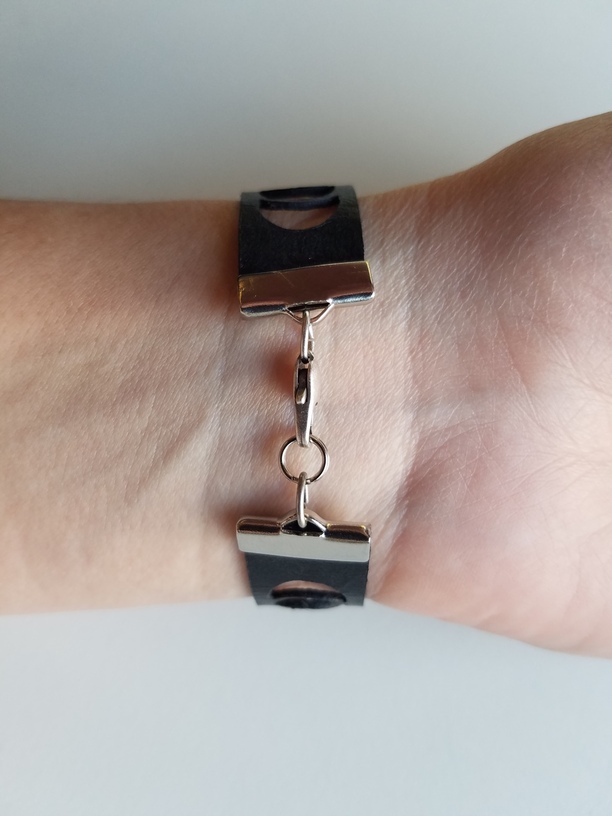
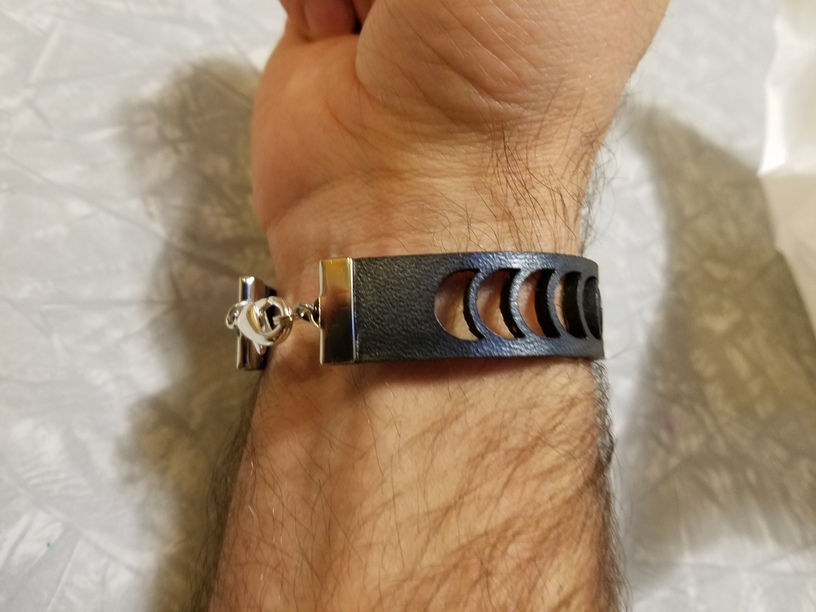
I did also make them bigger to fit my wrists, and they turned out perfect (though again the clasps are practically impossible for me to do on my own! Need snap press…).


And finally, a few shots of em on me…

Thanks for checking out this project! :smile: :glowforge:

  • R
75 Likes

I’m intrigued by how you’re treating the leather… and i like the sparkle
in the second set. :slight_smile:

10 Likes

I use Eco-Flo water stain is all…
Black and now I have silver too. I mixed the silver and black together for the 2nd set. Then I use the carnauba creme to finish it off after the stain dries for a day. I applied the stain with a q tip, and the creme wax with a soft cloth. :slight_smile:

12 Likes

The lift you’re getting from the arrow slicing when it bends is a great outcome… fun technique to keep in mind!

9 Likes

Very nice work and inspiration for leather work. Thanks! Go :glowforge: - Rich

5 Likes

I think that first bracelet is VERY cool. I like how when it is bent around your wrist it forms a more complex 3D shape. Not sure if it was intentional, but a sweet result.

24 Likes

I love these. This kind of stuff is what I’m really looking forward to doing!

2 Likes

Love it! Leather has me really intrigued. Can’t wait to see the other projects you’ve got brewing.

2 Likes

Those are nice! :heart_eyes:

1 Like

These are great. I too like best the first one. The result reminds me of the living hinges I have seen on the forum.

2 Likes

I’m so daft. For a minute I thought the second bracelet was the first bracelet stretched out. Even though the ellipse shape is going the wrong direction to make a stretched out circle.

They’re all really cool, but I think the second one is my favorite. Did the leather smell terrible while you were cutting it?

3 Likes

Thanks for the detailed write up. It’s always great to hear about ones process. All of these are lovely :blush:

2 Likes

All of them are gorgeous :grin: thanks for sharing :slight_smile:

2 Likes

Thanks for sharing these! I’m so eager to Forge some leather that it does my heart good every time I see a new leather post. Yours are particularly a pleasure to look at.

3 Likes

Thanks for the kind words everyone!

1 Like

My Wife Loves them! Those really look great. I am really looking forward to making a lot with leather. Thanks for sharing these. Keep up the great work!

Beautifully done @Ryan.M!!

May I submit instead of a snap press you consider an arbor press? With a little modding I find mine indispensable (and much quieter!) for all my leather punching, stamping, fixture setting needs. Super affordable at Harbor Freight https://www.harborfreight.com/1-ton-arbor-press-3552.html?utm_referrer=direct%2Fnot%20provided&utm_referrer=https%3A%2F%2Fwww.google.com%2F

1 Like

Interesting. I still haven’t bought the gold star one I am considering. Does this use sized dies and accessories for the hardware? Tell me how you use it?
And thanks for the recommendation :slight_smile:

Certainly! :smiley: The arbor press is basically a heavy duty “smasher of things”. There’s a variety of mod choices out there, I went with one of the most basic. Drill a vertical hole in the bottom of the ram slightly larger than my tool/setter handles then drill another perpendicular hole near the bottom for a set screw.

Then set your setter kit anvil or other side of whichever die on the bottom rotating plate and set/smash away. If you’re stamping just rotate the bottom plate to be solid under the ram. Some people opt to drill more holes in the rotating plate, I just use tape since I have a variety of tools. Sometimes I take out the rotating plate and swap in a square of 1/4" steel plate to give me a little more travel in the ram. You can bolt or C-clamp the whole thing down to your workbench.

The entire rig (not counting the setters/dies of course) cost less than $50 and is usable for every tool I have in my arsenal. I’ve even used it for cutting dies (leather cookie cutters). You’ve probably found that bench mount specialized snap setter machines cost upwards of $200 and take expensive die sets. With the arbor press you can use your cheap hand setting kits instead.

Here’s a couple videos other folks have made about modding and using:

13 Likes