 Don’t think the thought hasn’t occurred to me…hubs might be getting a planer he had no idea he wanted for Christmas.
8 Likes
I love my planer. My jointer is good too, but it’s too small.
1 Like
Ran a couple more tests yesterday on another 3D file I scrounged…didn’t make any modifications to this one other than to split it into color ranges to do a slow cook on the top one, and ran a straight up 3D Engrave on the bottom one for a control, using the default settings.
This is what they turned out looking like…this is on 1/8" maple PG hardwood, and it’s masked. You can definitely see a difference in the slowly developed one versus the one pass tile on the masking - there’s a lot less char and the shading on the masking is much better.
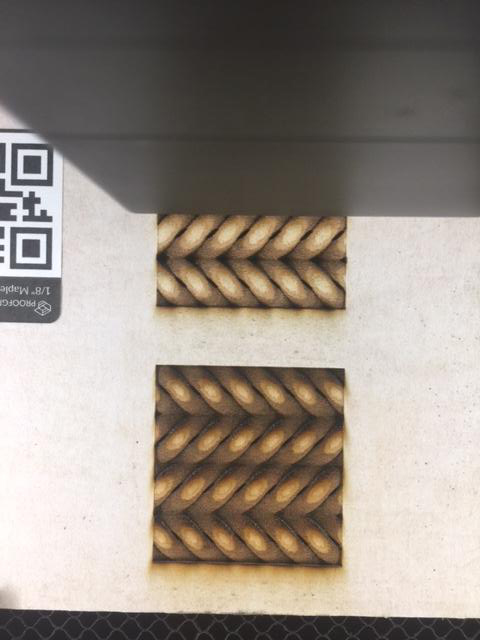
But…once the masking was removed there was a lot less difference in the shaping than I expected, so given that the top one took ten fast defocused passes to achieve, and the bottom one took one, I might just limit the process to 2 or 3 passes and it will probably come out pretty close. And I’d remove any masking so I could actually get the benefit of the shading on the wood instead of the mask. (Live and learn.) 
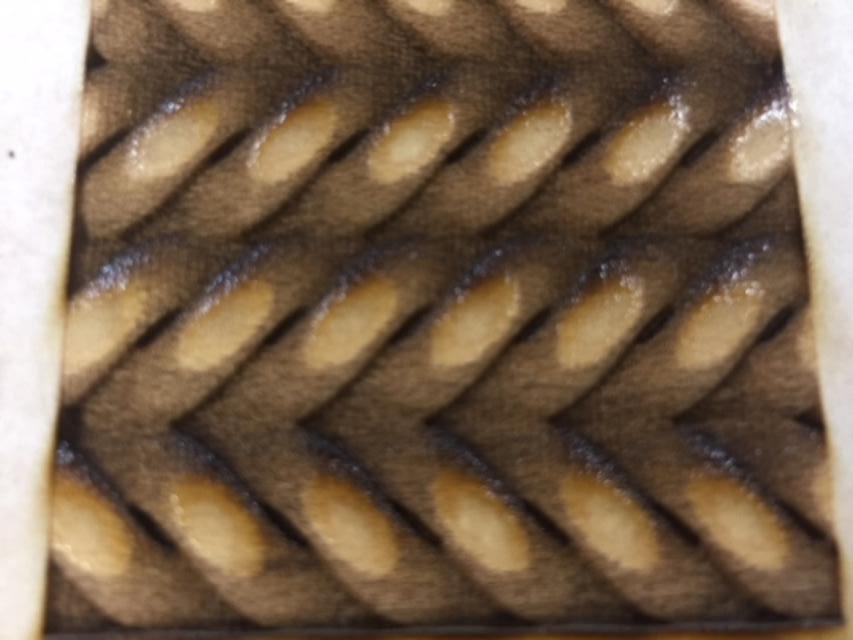
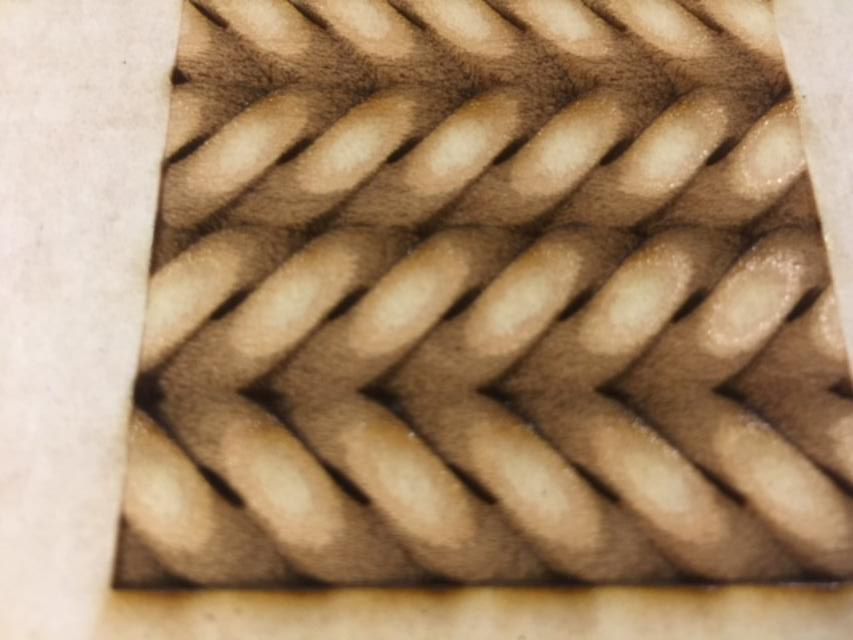
Closeups:
One pass:
Ten passes:
Is it worth the extra time?..Probably only without the masking. 
9 Likes
In dealing with that same issue I looked at how much engraving it took to go through the mask and where it asks for a minimum number I have found it to be between 10 & 15 but not narrowed down further as yet. There is a point when the mask is removed but not the adhesive that pretty much makes a mess…
Step number two is a good scrubbing with hand cleaner that gets rid of all the tar and gunk.
Step three has been a good scrubbing with bleach but while doing so in the bathroom I noticed that the toilet bowl cleaner had good properties partly by being thick like the hand cleaner. So that is at least an intermediate step
After the bleach is washed off and the piece is towel dried I wash it again in hand cleaner mostly to quickly displace the remaining water. It the piece is warped I flatten it between pieces of plywood and put it over the ac fan dumping all the! Heat outside that dries it quickly.
4 Likes
Yep, sneaking up on it works. Nice comparison shots.
On hardwoods Ive found no advantage of doing a lot of light passes, as I have to clean it afterwards anyways. I usually just run it full power 500 speed
I think I prefer it the slow way if i have time. (And since I usually just run it and work on something else, it’s not a problem.)
I’m not selling them though, so for that, I’d stick with the one shot.
Ebay is a good resource for 1/4" maple and other exotic woods! There are a couple vendors selling it.
1 Like
I’m gonna do my learning on the cheaper woods, and once i know what I’m doing, I’ll graduate to the good stuff.
I think you misunderstood. I wasn’t saying maple was an exotic wood. I was just saying other exotic woods but not implying maple as one of those. I’m quite familiar with a wide gamut of various woods.
1 Like
You can buy plywood on Amazon. The shop I use sells a few different thicknesses and number of sheets. Only problem I’ve had is some of them can come in a bit warped.
How do you learn this, or to design files for this? I really want to learn.
1 Like
somehow i’m just seeing this – it’s beautiful!
You can find youtubes galore from gimp to cad, inkscape, or if you like a challenge Blender which is more scary than difficult as you would be using a tiny fraction of what it can do. There are a number of commercial software’s that are easier to start and get something but usually really good skill is not less work but now you are tied to that software.
Inkscape and gimp would be the most straight forward as the only cost is the work of learning them, getting a nice spiral in cad or Blender is easy but translating that to a working gray scale height map not so much where getting a grayscale in Inkscape or gimp is easy but the spring spiral not so much.