I speculate that a large number of the calibration problems people are reporting are actually WiFi issues, and I wish the Glowforge had a clear indication that it’s having connectivity problems vs. anything else. I think they ought to reserve a special button color/flashing pattern just to indicate “I can’t get a reliably connection”, which would be a big help troubleshooting.
I strongly second that!
Extreme frustration.
Trying to figure out how to create a file that will CUT the red and ENGRAVE the black. That’s how it seems to work but I can’t make ONE file that will do it, I end up trying like heck to line up two different files, one to cut and one to engrave.
If someone could help me with that simple task it would be totally rad.
because my other laser has a 12 x 16 bed, all of my files are ALREADY designed to go the full 12 inches (lol) so I would rather not have to redesign everything… I guess I seriously missed that 2 years ago when I signed up for GF in the first 3 weeks of the crowdfund. Thought the big bed meant big use area.
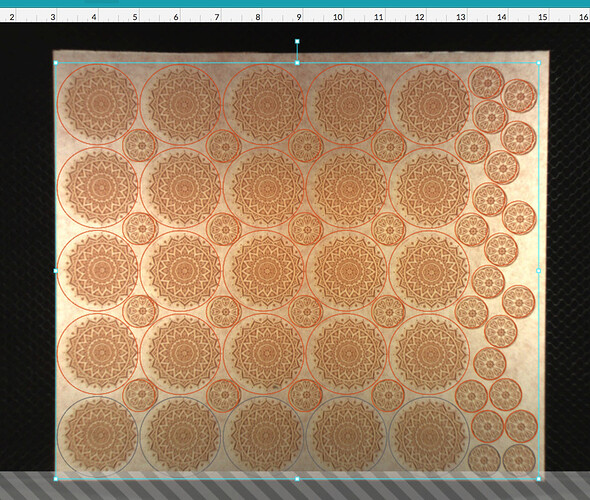
Couldn’t get the GF to do the file with cut and engrave… So I thought hey, I can use my universal for the engraving, then line up the cut on my GF because of the camera… instead, what I got was this weird thing where the camera really doesn’t line up to whats actually there… this is the SAME file and everything SHOULD line up… but the cutting marks don’t actually line up around the engraved graphic, even though they really do fit and everything in real life is sized properly. So what’s up with that? I have no idea because the camera isn’t seeing “flat” it seems to have a distorted view.
no return policy at all 
I only know how to use Inkscape, but I know Illustrator and the other vector editors have similar functions.
In the example below I created three identical rectangles with a 5mm stroke width. The first two the glowforge will cut (or score) right down the center. The third it will engrave. The first one is just a rectangle. On the second one I went to Path -> Object to Path. This created nodes. The third one I went Path -> Object to Path and then I went Path -> Stroke to Path. That created one set of nodes on the outside of it and one on the inside.
If this file was sent to the glowforge it would want to engrave the bottom one first and then cut the top two (in an order known only to itself.) That they’re the same color doesn’t matter. You can use red to identify a set of engrave settings and red to identify a set of cut/score settings. What you can’t do, is the same color for two different set of cut/score settings of two different sets of engrave settings.
The same concept applies to text. Any file that is uploaded as an image (.png, .bmp, etc…) will be engraved automatically.
The height entered for the material is critical. Just being off a little will make it off a lot. Also, even when the height entered in the GFUI is perfect, it can still be off (but it will always be off if incorrectly calculated/entered.) Currently glowforge’s spec is it can be off up to 0.25". Mine is usually pretty perfect, but others aren’t so lucky. It has been consistently getting better, but sometimes they’ll take three steps forward and then two steps back. Very frustrating, only more so if you’re running a business.
Please post the file that’s giving you trouble to Problems & Support - this sounds like something we can fix quickly for you!
Oh that’s got to be frustrating!
My old designs were all for a laser-cutter at the library that was 12x24. But the library told me not to cut too close to the edge, so really it was 11.5 x 23.5.
I had to adjust most of them for the shorter width anyways. There is only one that I was not able to adjust quickly.
My new designs all take the 11x19.5" into consideration.
Are you able to post an example of what you are trying to do?
If I want to cut AND engrave the same path, I would duplicate it in inkscape and place them exactly one of top of the other. I’d give one a yellow outline and no fill, and I 'd give the other no outline and a black fill.
In the UI, these will show up as 2 different steps. I would make sure to do the engrave before the cut, in case the pieces move slightly when they are cut.
I don’t know if that’s what you are trying to do. I’m guessing at your intent.
So in Illustrator, I have black for engraving… usually I bring in a PNG and trace it into fills for that.
For engraving, I have strokes only, set to .25 points, (THIN) and RGB 255.
Then if I’m attempting to engrave and cut in the same file, I would save this as an svg.
and it doesn’t work. Either I can’t upload it (file too big) or it comes in weird.
so that… it’s 1/8 proofgrade acrylic, so that’s what I picked… still doesn’t see it right I guess.
that is my intent. I’m doing the same thing you describe, just in Illustrator… setting up black fills for engraving and red strokes for cutting, and it doesn’t come in right.
Thanks all for your attempts to assist. I’ve got another thread trying to pinpoint the graphic upload issues I’m having. So I’ll leave this one alone.

