Huh that seems counter intuitive until you factor both up and down. I keep picturing the Bowling balls and thinking the longer cords have a slower swing. But with the top you have that would cancel that out.
1 Like
Well, my calculations were off again (I will have to look into that). The holes for the bearings were to small, so I had to sand the frames to get them to fit. But, they are in and the gears have been swapped to the new frame.
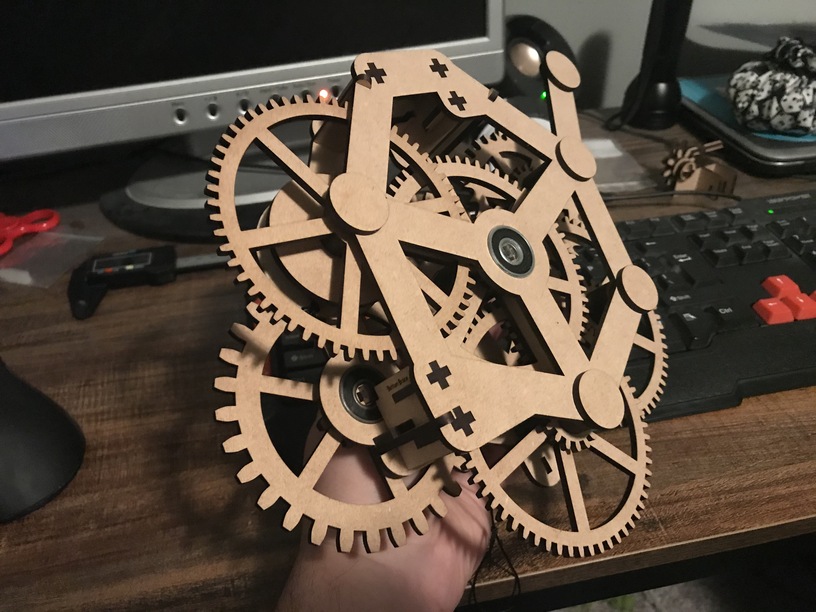
You can only see them from the back.

The bearing for the hour-gear seems to make that area too thick. It makes the time hard to set on the clock, and I may need to tweak the clock-face a bit (it doesn’t seem to sit flush anymore.)
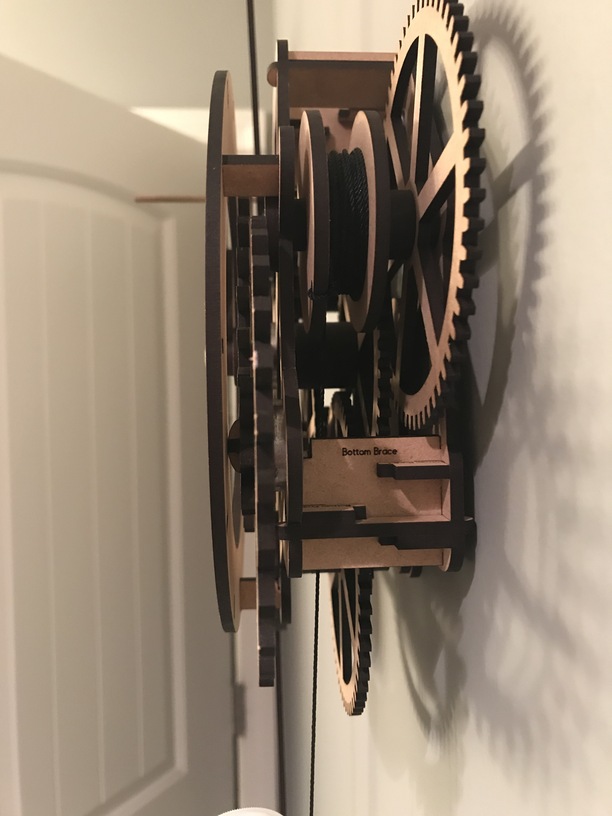
Not sure if you can really see it in the photo, but the axle-cap for the hour-gear is now resting on the back of the face, and the bottom brace for the face is not all the way in…
5 Likes
The new frame ran for about 10 hours on its first run, but it was stopped when I checked on it in the morning. Everything looks pretty solid. Not sure why it stopped this time, but I just touched it and it started ticking again. (Next time I will have to examine it without touching it…)
Today, I hope to reduce the weight by half to see if it is still enough torque to keep the clock running. If it is, I can add the pulley and double the run-time.
2 Likes
I was reviewing Brian Law’s book again. When discussing the Compound Pendulum he uses this diagram:
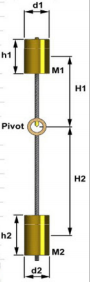
M1 and M2 are the mass of the pendulum weights.
H1 and H2 are the lengths of the pendulums (from the center of mass).
Generally speaking, he gives the following rules:
- To increase the Period: Reduce H2 (bottom length) Increase H1 (top length)
- To decrease the Period: Increase H2 (bottom length) Decrease H1 (top length)
- Keep H1 (top length) smaller than H2 (bottom length)
- Keep M1 (top weight) smaller or equal to M2 (bottom weight)
Looking at my pendulum:
I thought, “Hey, why is my H2 shorter than my H1? How is that working?!?”
Then I looked at all that excess pendulum under my weight. That adds to the weight and makes my H1 actually lower than the weight height. So if I didn’t have all that excess, the weight would need to be lower to reach the right balance.
I love all this science! I cannot wait for others to try this!
9 Likes
I would guess that the reality is the distance from pivot to center of rotation would be the key issue. The center of rotation in the Earth / Moon system is near the point on earth nearest the moon and the point furthest from the moon swings more so the centrifugal “force” is higher at that point, hence the two tides. Your pendulums are like that, so taken as a whole you could have a dozen weights scattered about but the center of the weight distance to center of rotation would still rule.
1 Like
Exactly! That is why my weight would “appear” lower on the pendulum if the excess shaft was not there. The center would not change, just where the weight was to distribute the balance needed.
1 Like
If anyone is interested in trying this out:
Glowforge Clock v1.4.4.zip (490.5 KB)


Requires:
- 2 sheets of Medium Proofgrade Materials (1/8" think)
- 4 brass rods (1/8" diameter) length 1.625"
- 1 brass rod (1/8" diameter) length 1.875"
- 3 bearings (22mm/8mm/7mm) and stand paper (to fit the bearings in the frame)
- A weight (about 2.5 pounds) and cord
- Glue (to attach the stops on the front and the back of the frames)
Optional:
- Dry Lubricant (e.g. beeswax, graphite)
- Medium Acrylic (for the escapement)
- Small Hammer (for the gear assembly pins and pendulum weight pins)
15 Likes
I will list links to other pieces I bought (non-affiliated):
I am not saying these are what you need, this is just what I tried when I was playing around with this.
(I haven’t received the bearings yet. But the ones I harvested from the broken fidget-spinner were not the best, so I plan to replace them.)
For the weight I am still using a 1 liter bottle filled with water. It weighed 2.6 pounds when I weighed it.
I originally bought these for the weight, but I haven’t made anything to hold them yet.
10 Likes
The clock is running really well and minor adjustments to the pendulum are allowing me to really fine tune the timing.
It is still stopping every now and then, but if I barely touch it it starts again. I think it is one of the old bearings. So, I will learn more when the new ones arrive and I swap them out.
4 Likes
that is so cool…
you should be proud of your success!!!
3 Likes
Now that I have the clock working. I might see if can make another version that uses less extra purchases, and see how close I can get to a  only version (not sure this is possible, but I might try).
4 Likes
Congratulations @bill.m.davis!
I see that faithful to your style you are releasing this as a puzzle without instructions as you did with the marble run.
This should be interesting…
3 Likes
This has a lot more instructions included than my first marble run did. Each gear axle is labeled and given an order for assembly! The hardest part is the main axle (middle, minute axle), it needs to slide in from the top after it is attached to the front frame.
I will throw together some general instructions as I have time!
4 Likes
I got the new bearings installed, but if anything things got worse…
I tried to install them without taking the whole clock apart, and I am not sure if that caused a problem or not.
I might still need different bearings, I don’t know. These are “skateboard” bearings, I think. My dad was telling me about “slot-car” bearings that sounded smaller, but they might be too small.
Are there different bearings for slow speeds versus high speeds? These are high speed bearings, but I am not sure if they have more resistance at lower speeds?
I think my next steps will be looking into some “Dry Moly” spray for the gears. Trying to rub in the graphite powder would be to much work. I am also contemplating cutting all the gears out of acrylic.
2 Likes
At the end of his book Brian Law talks about bearings, has a link to the people he gets his from. You might reference that and look for someone here in the US that you could get them from.
1 Like
Thanks, I don’t think I looked at that part. I will check it out!
Edit: Yep, I missed this part, “The type and viscosity of the lubrication in the “as shipped” bearing is highly significant and represents a considerable drag inside the bearing. I recommend that the grease or oil be soaked out with white spirit.”
I think that is exactly what I ran into. I think the lubrication on the bearings is causing drag.
3 Likes
There are skate bearings and there are skate bearings.
I think the fidget spinner crowd has honed in on the most “frictionless”…
You definitely want unlubricated versions.
2 Likes
Yep… I think I got lubricated ones… I bet that is my problem.
But, I am also thinking the friction may not be where I placed the bearings. I might try without bearings again when I add lubrication to the gears or cut them out of acrylic.
1 Like
You can soak and rinse lubed bearings in a solvent. That’s how we clean old grease out of used ones before re-packing. Brake cleaner in a spray can is fantastic…
2 Likes
I might look into that if I find the bearings help more than I realize.
Currently the bearing are making assembly a bit more painful. I am thinking about not using them, especially since the new ones are not working out…
2 Likes