@evansd2 Silly question, but when you say BB plywood are you referring to the grade or is that short for Baltic Birch?
Thanks.
@evansd2 Silly question, but when you say BB plywood are you referring to the grade or is that short for Baltic Birch?
Thanks.
Baltic.
I prefer B/B grade Baltic birch, but B/BB is more common. B/B has no patches on either side.
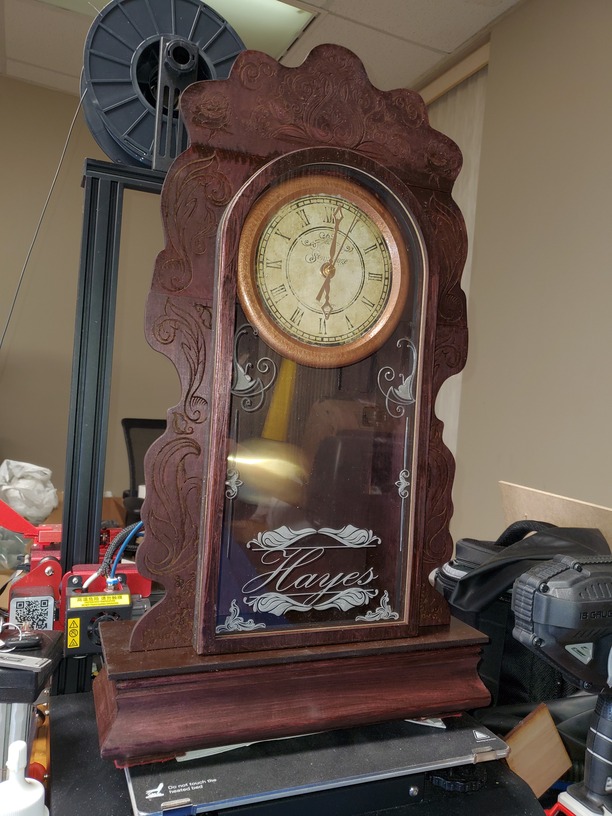
I just used a normal stain I found at home depot when I was there to get some of their birch ply for my clock… I did the same thing @ElsieH did though. I didn’t sand before or after staining as I was going for an old-timey look. I just slapped stain on it and let it dry. The darker line near the top was me being an idiot and not at least sanding the gorilla wood glue off the face of the wood, so it sort of stands out on that seam.
Added to my list. Very bright indeed.
The arts supply store Dick Blick carries the Plaid dyes (also online):
https://www.dickblick.com/products/plaid-folkart-ultra-dye/
I would also recommend a sealer coat (pre-stain conditioner) or a thinned coat of shellac before staining. It keeps things from getting blotchy.
These dyes are beautiful, but looking at the Plaid website, they appear to be discontinuing this product. 
I have used Keda dyes that I purchased from Amazon:
Keda Wood Dye
The dyes work best in alcohol. I made solutions of the blue and yellow dyes and then made small aliquots of different dye ratios. These were then brushed onto birch plywood 1"x2" rectangles and allowed to penetrate for several minutes while keeping moist. Then the excess was wiped off. After drying I used a color match app to see which one of the samples was closest to the blue-green in Clan Forbes tartan. Since this was a mixture of dyes and the wood has different absorption rates for the different colors (i.e. chromatography) the result was not a homogeneous color but somewhat mottled at a small scale where some areas were blue-er and some greener. It gave me the effect that I was looking for. Since the dye was dissolved in alcohol, the grain did not raise much after drying and after light sanding, I used a water base crystal clear poly urethane finish. I then laser cut the box design into the dyed and finished panel. I think that the result was pretty good.
I don’t believe that’s the case. One of the colors they’d been out for a couple of months just came back into stock. Most of the 8oz colors have been on sale for awhile.
Great! Thought the large ones all showed under close out. Will get some ordered.
Beautiful pumpkins 
There is this remarkable designer from an island somewhere that designed this, and my kids loved them!
I came back to this thread trying to figure out how you determine if a store bought stain is “laser safe”. Then I re-read this and realized that I have a stinking black walnut tree in my front yard (well, it’s my neighbor’s tree, and the only reason it is still there is because it is not actually on my property). Anyway, this reminded me of the time a few years ago when someone asked if they could collect all the stinking giant black walnuts that tree drops all over my driveway (answer: yes PLEASE) so that they could make stain. Now my question is, how do you do that? I certainly know it’s possible from all the black spots all over my driveway from where they fall. So, any tips on DIY stain production? And if you do make your own, I’m assuming that is fine to stain before lasering as long as it is good and dry?
YouTube has lots of videos on how to make Erwin from black walnuts. Not sure about laser ability but I can’t see why it would cause a problem.
Thanks, I’ll see what I can find. Of course this occurs to me after (I think) the walnuts are all down
I’ve been using black walnut stain for years on gun stocks. For those, I gather the outer sheaths of the walnuts and put them in a burlap sack, then soak them in mineral spirits for weeks, sometimes. For what I use here, I break them up into smaller pieces, stuff them in an old sock, tie it off and stuff them down in a jar. Then I cover the whole thing in 90% rubbing alcohol and leave it there for a week or so.
I do the same with coffee grounds and tea bags.
Never had any problems staining before lasering, but, yes, you certainly want to make sure they are completely dry first.
Do you have a trick for getting them off? I’ve tried a few times but only succeeded in making a big mess.
If you try when they’re green, you’ll probably end up just saying a lot of expletives and having stained fingers. Once they dry some and turn black, take a hammer to them and just bust’em up.
** The old-timers where I grew up would take the green ones, put in a burlap, or “croaker” sack, tie a rope to it and throw it in a pond. Before long, fish would start coming to the surface to gulp air, and they would scoop them up with a net. Soooo, don’t drop any in your goldfish tank…
This explains perfectly why I’ve never had any luck with it before then (and I was at the time just trying to get to the nut to see if it looked like a walnut)
Oh well, doesn’t matter, I just went and looked, and they are all gone, as I suspected. I figured as much, because I don’t think I have run over any in the driveway for a few weeks. Next fall, I guess ![]()
Here are some more color options for you… ![]()

@geek2nurse, Well, dagnabbit, now I gotta go hit the produce section…