Cut out an engraved shape using Inkscape

I use this technique all the time, it’s a fast and easy and almost foolproof way to do a kerf-corrected cut of an odd shape.

  1. Have a vector shape that needs to be cut out.

  1. Copy (control-c) the shape.

  2. Break the shape apart (Control-shift-K). It’ll fill the pieces and look like it’s busted. Don’t worry, push ahead.

  1. Union (control-shift-plus). Now it’s one giant black shape.

  1. Ditch the fill and add a stroke.

  1. Set the stroke width to be your desired kerf correction. I chose 0.007" here.

  1. Stroke to path (control-alt-c). I’m showing the nodes here just to illustrate that it’s a filled shape now.

  1. Break apart (Control-shift-K)

  1. Union (control-shift-plus)

  1. Set stroke, ditch fill

  1. Paste in place (Control-alt-v)

And you’re done. Yes, there are lots of ways to do this, but I doubt any are faster. I routinely do this with almost no mouse interaction, it’s very effective and efficient.

The short version:
Control a, control c, control-shift-k, control shift plus, mouse for path and stroke, control-alt-c, control-shift-k, control shift plus, mouse stroke and fill, control-alt-v. I just timed it, and the entire thing took 29 seconds.

31 Likes

Good tut! You ought to put that in the Tips and Tricks section to make it easier for people to find.

4 Likes

Just to be clear, those are the steps one would use to cut an item to lay into a hole that was cut with the original design for an inlay?
It looks like your original part was .492 and the new one is .499 - so it’s bigger - but the laser will ablate away the additional .007 so it should be a perfect match…or am I missing something major (just starting to think about truly tackling correct kerf correction!)

**Wait - seeing the post you linked this too - this is how you cut out a shape without ablating away any of your engraved design toward the edge!

2 Likes

Exactly. It lets you preserve the entire engraved area, or very close to it. If you overdo the kerf adjustment you’ll end up with a fringe on unengraved material on the outside, so test and experiment.

In some cases, the kerf adjustment isn’t necessary, but it’s pretty easy to do so why not? In this scale (half inch mandalas), it is definitely noticeable, at larger scales maybe not as much.

3 Likes

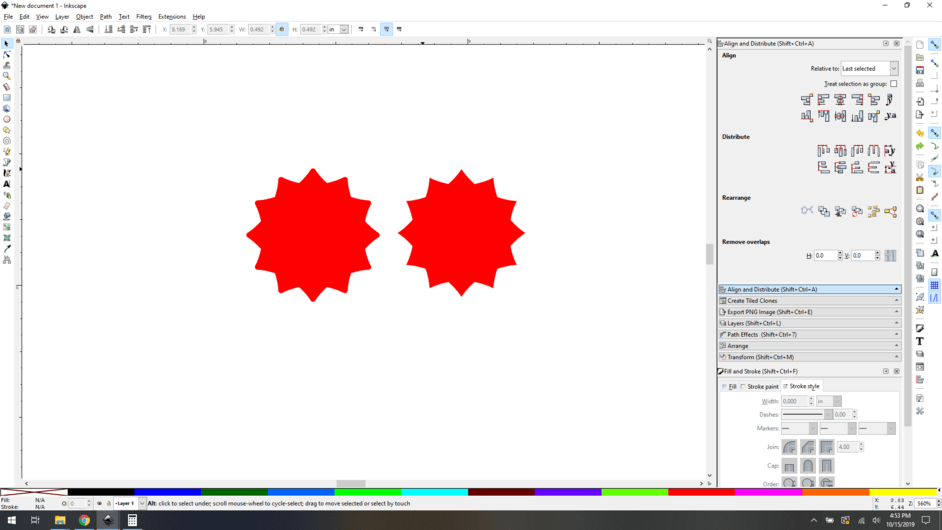
Interestingly, it’s also the method you’d use to make a part suitable for inlay, like you said. To do that, just take step 9 and replace it with:

  1. Grab the inner shape from your broken-apart outline. Set the inner shape aside, it will be used as a pocket in your larger piece. (it’s the slightly smaller one on the right)

To further illustrate the concept, I made the smaller piece blue here:

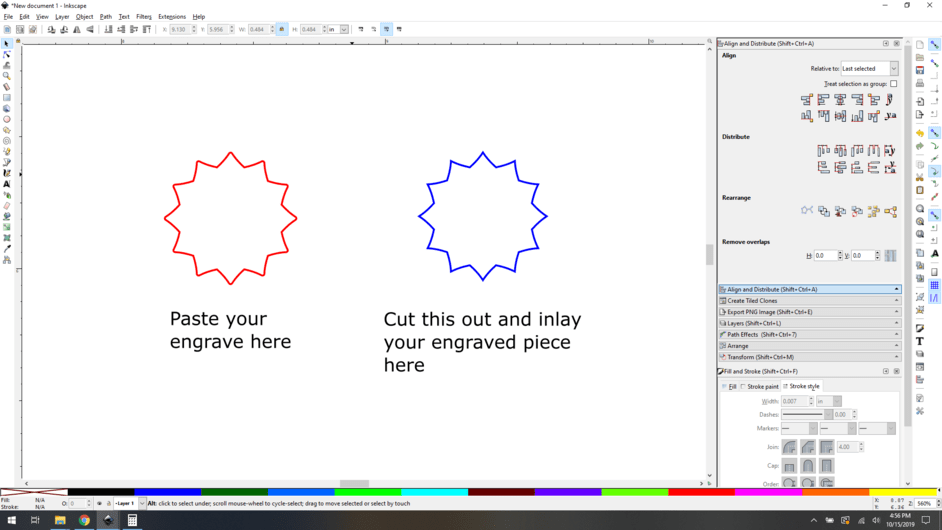
The rest of the process remains unchanged.

12 Likes

Thanks so much for these steps. I knew some of this, but not nicely explained. Just did a pair of earrings with blue acrylic inlay and got it to work, but it was more intuitive luck, then exact precision.

2 Likes

Thank you for explaining this in such a way that I understand it.

3 Likes

Thanks so much for the detailed instructions! This will definitely be helpful. : )

2 Likes

Excellent tutorial!

1 Like

Definition: meticulous!

1 Like

newbie question: I am just learning Inkscape and my first thought would have been playing with Path Offset to accomplish the above based on readings so far. Would that not work in this case (maybe because there inst a unified outside path?) or yes it could but this is faster/better?

Yeah it can work. Offsetting and I didn’t get along early on, so I started optimizing toward this. This is where my inkscape newbieness comes through, because I think you’d still need to do the break apart/union trick to get a solid shape before offsetting. Someone who is an offsetting genius can correct me here, I feel like maybe @rbtdanforth may use offsets?

Anyway, when I did offset I would get really weird node artifacts. In fact, any time you do booleans and stroke to path and whatnot you can impart errors, so you do need to use your judgement. There may exist cases where offsetting is better than stroke to path, but in general this method works pretty reliably for me – especially since going in and manually fiddling with offset distance in prefs is not as quick as changing path thickness.

It’s tough chasing thousandths, especially when doing stuff like this to very complex paths.

1 Like

I was using offsets because I did not understand what Stroke to path did however I find it still has issues as it goes on either side of the original line. thus I find that I keep the outer one and dump the inner. Still with complex shapes and especially those created with trace, there is a Lot of clean up needed, with sometimes hundreds of new bits that need chasing down. I usually group the line I intend to use and then do the break apart. That way everything is kept in the group, and if everything is hidden first you can hide the line or lines you want to keep and delete the rest. A different mess than offset and more precise but still a project.

1 Like

This is not true when you’re not making a completely inlaid shape. Then you reverse it, keep the inner path for the pocket and the outer path for the shape to be inlaid, as illustrated here:

1 Like

I usually am not doing the inlay, but doing the inlay is why I included the “lines” bit.

1 Like

This topic was automatically closed 32 days after the last reply. New replies are no longer allowed.