Those are beautiful.
2 Likes
I declare scatterbrains the winner of this challenge. The local theme appeals to me. Thanks for all the entries and ideas, people. I am building the bottom half of the kayak now and hope the glowforge comes sooner than later so I can put my design into the top half before it is assembled.
Scatterbrains, pm me with your address detail and what type of prize you would like and I will get it in the mail to you.
Thanks
Trent
5 Likes
 So honored! Thanks! (First “squee” I’ve ever used)
3 Likes
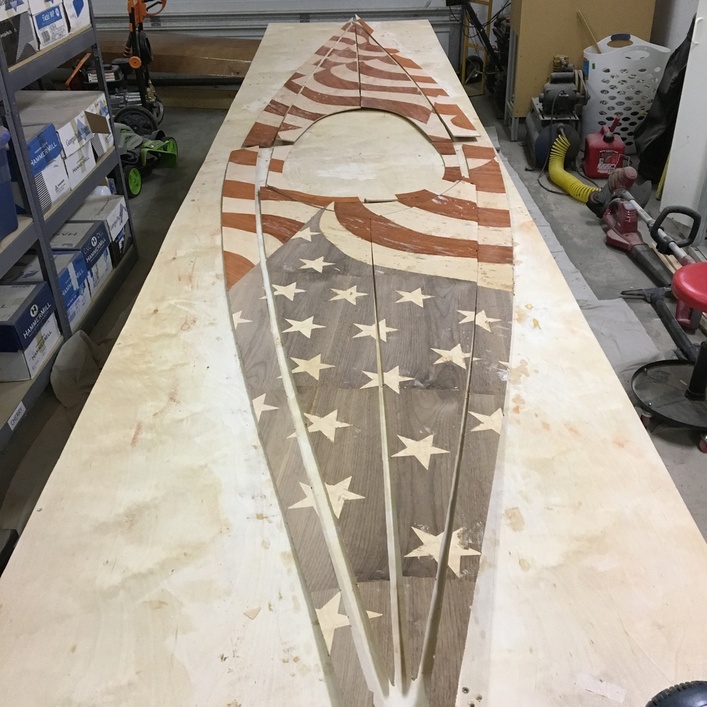
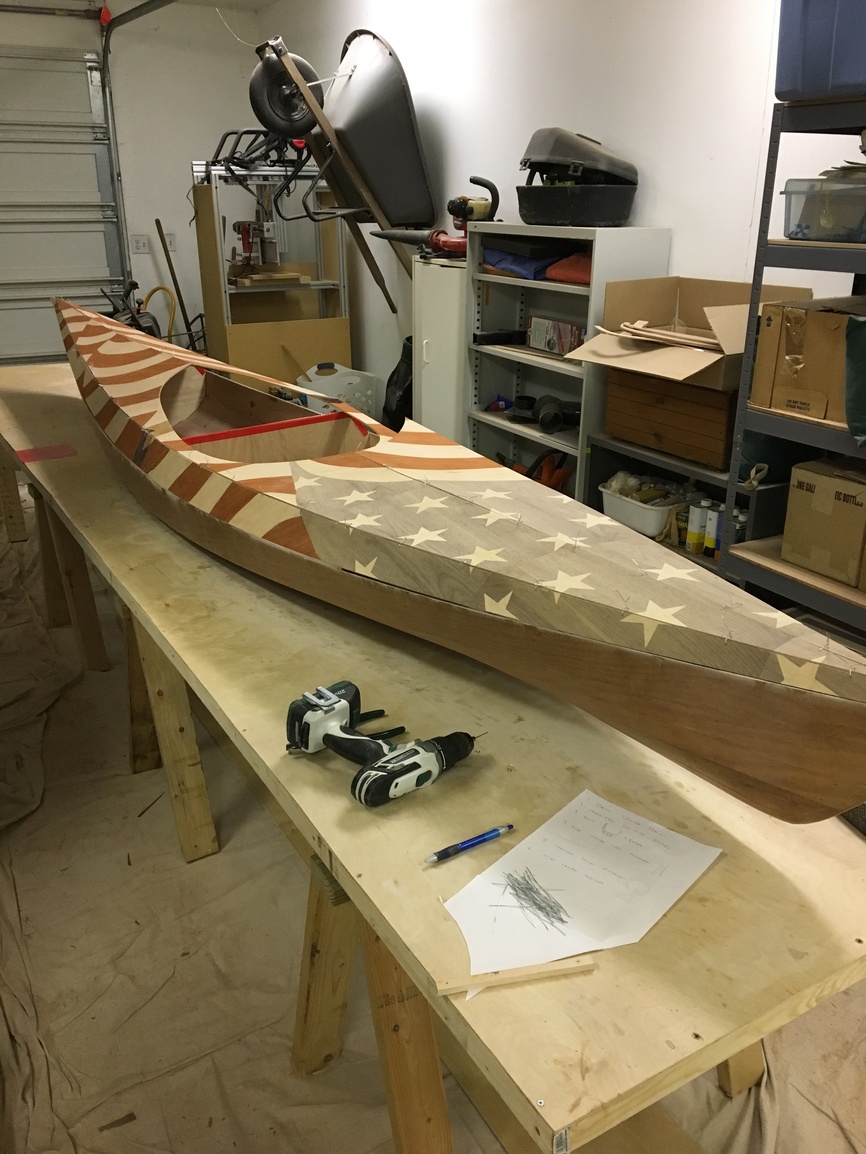
Just an update here. I could not wait on the Glowforge as I want to get the kayak on the water this spring. I had to go back to my Xacto knife method which limits some of the detail that I had in mind. I decided upon a stars and stripes theme. Here is a picture of the top pieces of the kayak with the veneer glued on. I still have to sand each piece and assemble it. I can show lots of progress pictures if anyone is interested.
36 Likes
Show away!
4 Likes
That part looks awesome already! 
2 Likes
It would be nice to see your production steps and assembly images.
What was the widest piece dimensions?
3 Likes
yeah i’d love to see more about the process; this is so far out of my wheelhouse in terms of knowledge. great job so far tho.
1 Like
Ok, this discussion is really 2 parts.
- how to do marquetry (wood veneer)
- how to apply the marquetry to a functional item ( in this case a kayak)
In my opinion, marquetry, stained glass, inlay, etc are all functional similar. You created a design, sort through you materials looking for the appropriate colors, patterns, etc that you think will give you the desired result.
In this case, I had the kayak so I know how big the overall design needed to be.
I inserted the top down photo of the boat into my CAD program. http://www.pygmyboats.com. I use Draftsight because it is free. It’s an Autocad clone.
After that I scale the photo up to the proper size, then simply draw the design over the top of the photo. Because I don’t have a large plotter, I grid out the pattern and tape all the pieces of paper together to get a full size pattern.
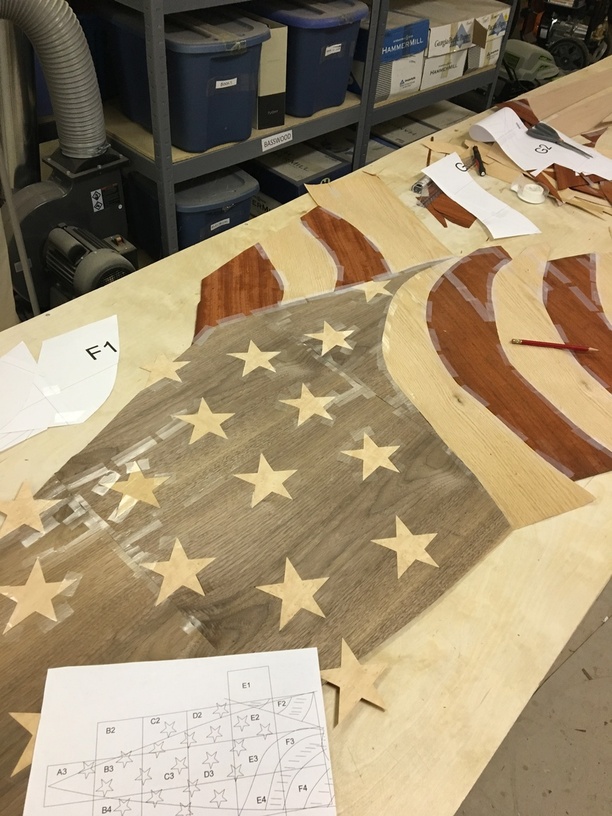
This photo shows a small section of the design I used for reference
18 Likes
Wood veneer is readily available from many outlets. I happened to have all these pieces left over from some other jobs. The material I used is about.026" thick.
It can be cut with a knife, fret saw, laser , Cricut, or other options that I have never tried. Because I don’t have my Glowforge yet, I went with an Xacto knife. The walnut cuts like butter, the birdseye maple and Mahogany not too bad, the Oak cuts terrible and chips out easily. So you notice that I did not create any real detailed parts out of Oak.
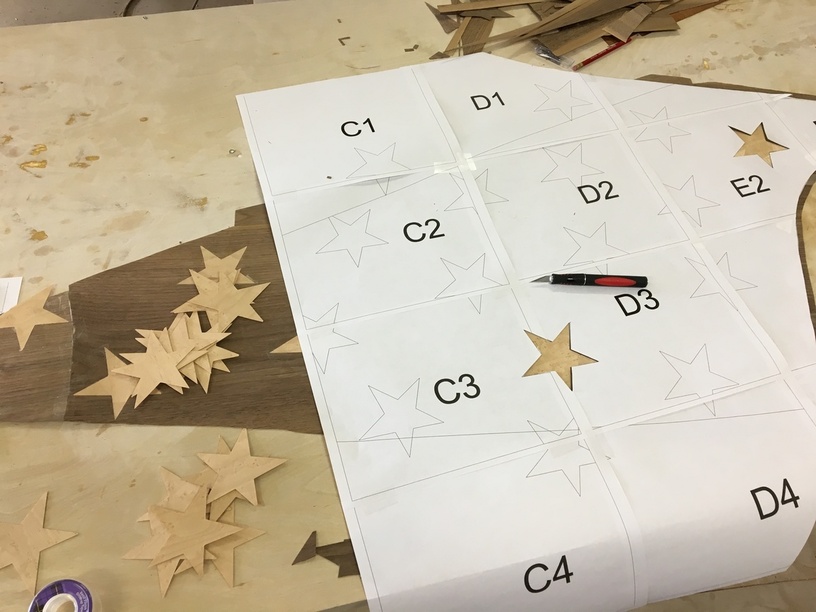
knife work
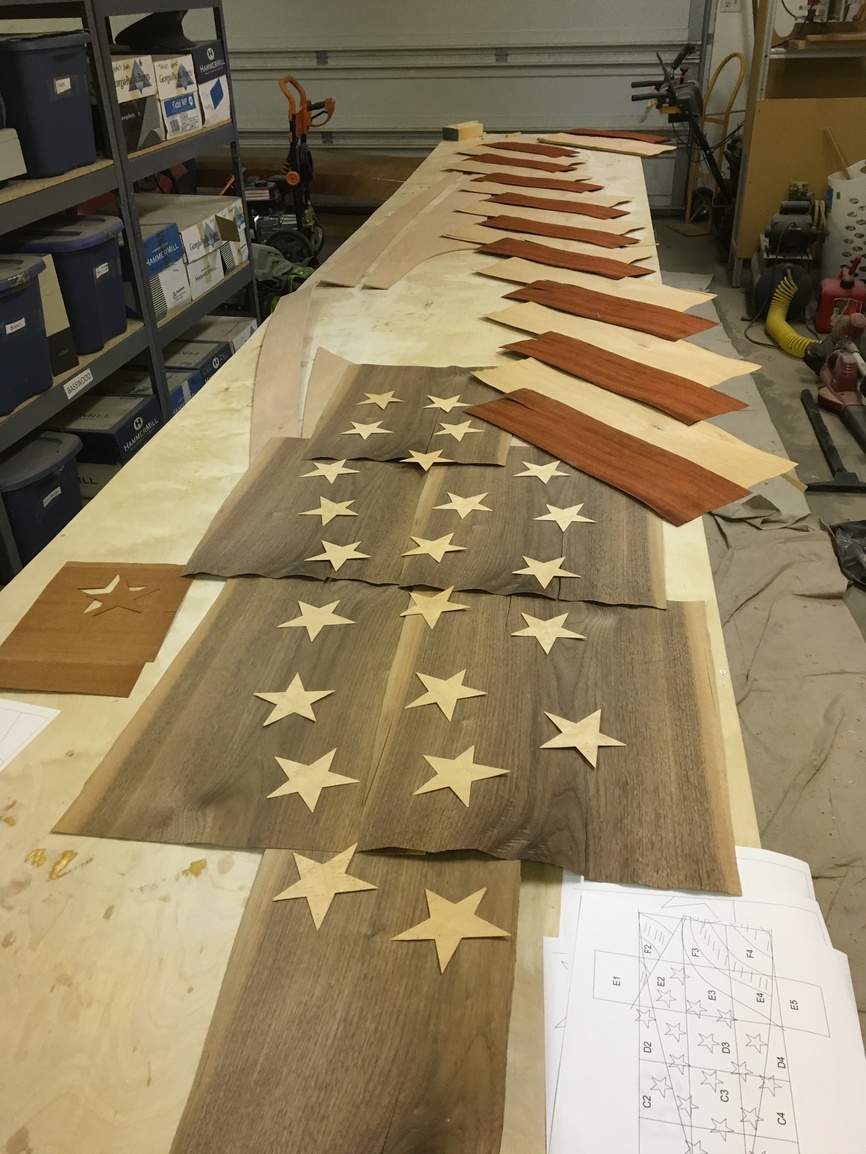
Here is where I laid out my veneer pieces to get an idea of how the final result would look.
If my walnut would have been longer I would not have had to but then ends together and would have probably gotten a better result. I chose to use what materials I had on hand
20 Likes
The veneer is cut out and taped together to hold it temporarily in place. It’s like a big piece of paper.
If you are a very good craftsman you can cut one piece, then cut the next piece to match. Most people overlay the 2 pieces and cut them both at once. That way if your line if off a bit, at least both pieces match up.

In this example, the stripes are cut individually with the ends running long. They are taped together and then each set is cut as a single unit. That way the overlaps of the folds of the flag look smoother.
23 Likes
Overlapping side by side pieces and cutting both at once is brilliant I love learning new work arounds for unsteady hands
1 Like
Once the veneer is cut out it has to be glued to a substrate. In my example, .25" marine grade plywood.
I use special veneer glue and a vacuum press to get a good tight result.
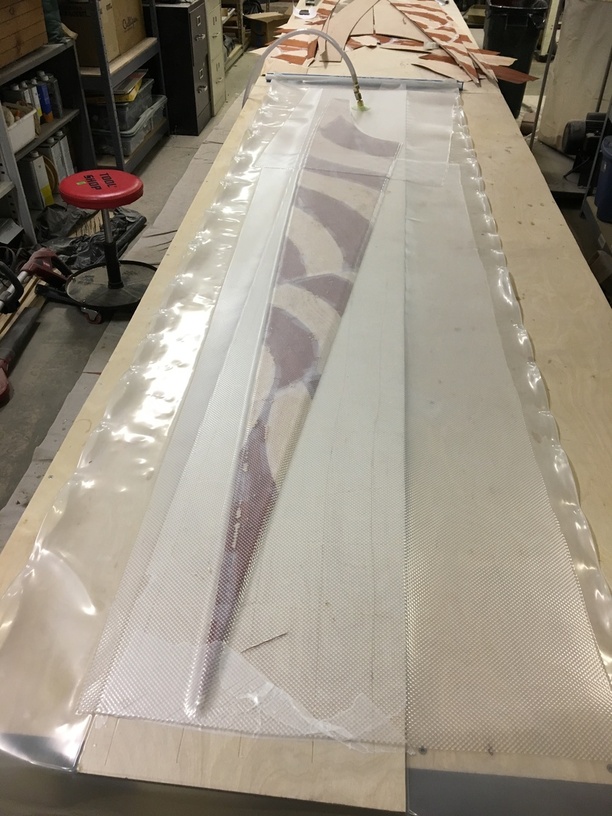
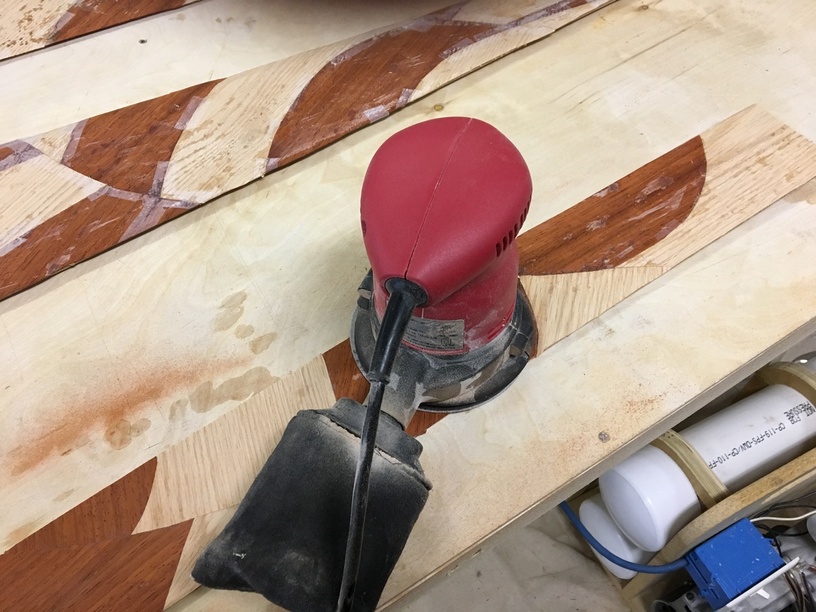
Once the glue is dry, the tape and excess glue need to be removed and the panel sanded smooth.
As of last night, here is the latest progress.
41 Likes
That is gorgeous. Thanks for sharing!
7 Likes
Thank you for the steps and dialogue. 
I have not done marquet/veneer and this helps to understand the how to steps.
5 Likes
Just amazing! I’m impressed not only by your design and workmanship, but also by the capabilities you have in your workshop.
Can’t wait to see the project after the final finish is applied.
7 Likes
Fantastic!
3 Likes
Absolutely Gorgeous!
It is really going to be eye popping when you apply the finish.
1 Like
Fine work. That should pull a crowd when you beach.
2 Likes
Very nice. I think a surface veneer might be best for me rather than an inlay in an engrave. I don’t have a router plane and the laser engraves deep enough but the grain keeps interfering with a smooth enough substrate. That’s some sweet work. Thanks for sharing.
2 Likes